Background
In our previous post we described API Coding Key Points for the second code sample. Next we will prove that the current code sample is a portable OAuth implementation by using a different authorization server. This will be Microsoft Entra ID and will run in the Microsoft Azure cloud.
Main Objective
The goal of the Entra ID code sample is to match the Second SPA and API Code Sample, ideally with exactly the same code. Only the configuration should need changing:
| Area | Description |
|---|---|
| Entra ID Integration | We will integrate our SPA and API into Entra ID, and describe the authorization server settings |
| Consistent Architecture | We will use the same open source standards based libraries and the same application code |
| Vendor Differences | If the vendor forces us to write any non-standard code, the impact will be minimized |
Components
Our components will have the same shape as previously, to match the below standard architecture:
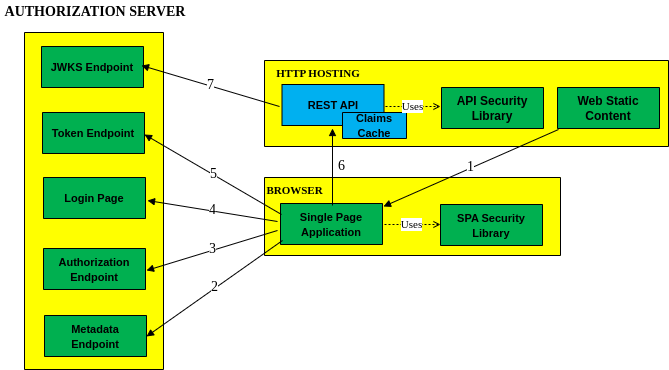
SPAs in 2021
This sample uses the traditional SPA solution, with OpenID Connect implemented solely in JavaScript. This is no longer recommended, and your production apps should instead use a Back End for Front End approach.
The traditional SPA flow remains useful for representing a pure SPA architecture, and learning about Entra ID integration. This blog’s Final SPA provides a BFF based solution, but requires a more complex flow.
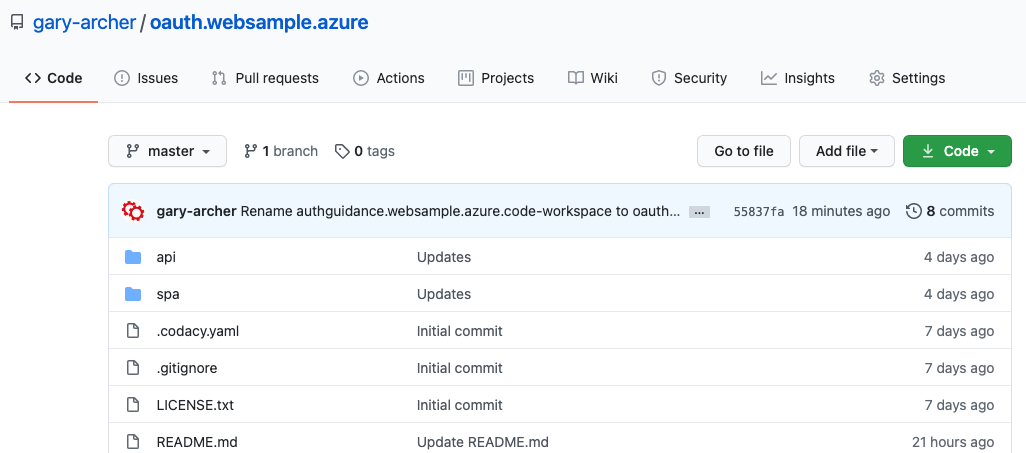
Code Download
The code for our SPA and API can be downloaded from here:
Local PC Hosting
In this post I will describe some setup details for the Entra ID authorization server I use for development. The following components will be run in an end-to-end flow:
| Component | URL |
|---|---|
| Secured API | https://api.mycompany.com/api |
| Secured SPA | https://web.mycompany.com/spa |
In order to get a working system, you would need to follow the steps in this post for your own Microsoft account, then reconfigure the apps. The configuration is a little complex though, due to my requirement to issue custom claims to access tokens.
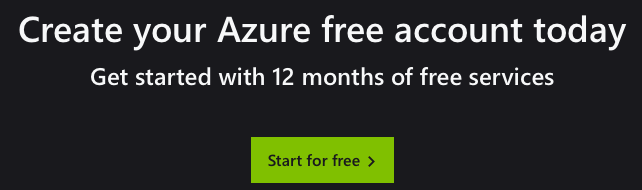
Step 1. Azure Sign Up
I used the Azure Free Trial offer and signed up for a developer account:
Step 2. Log in to the Entra ID Portal
After email confirmation I visited https://entra.microsoft.com and could manage a directory whose domain name is based on the email with which I registered:
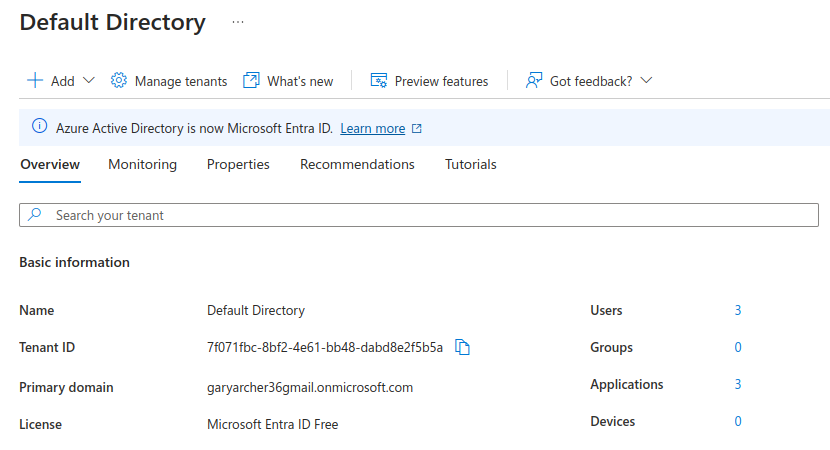
Note the Tenant ID, since the Authorization Server Base URL will be of the following form:
- https://login.microsoftonline.com/[tenantid]/v2.0
The OpenID Connect Discovery Endpoint for my developer account is therefore at the following location:
Step 3. Configure Test User Accounts
Next I navigated to Users and created the two users for testing from the previous code sample:
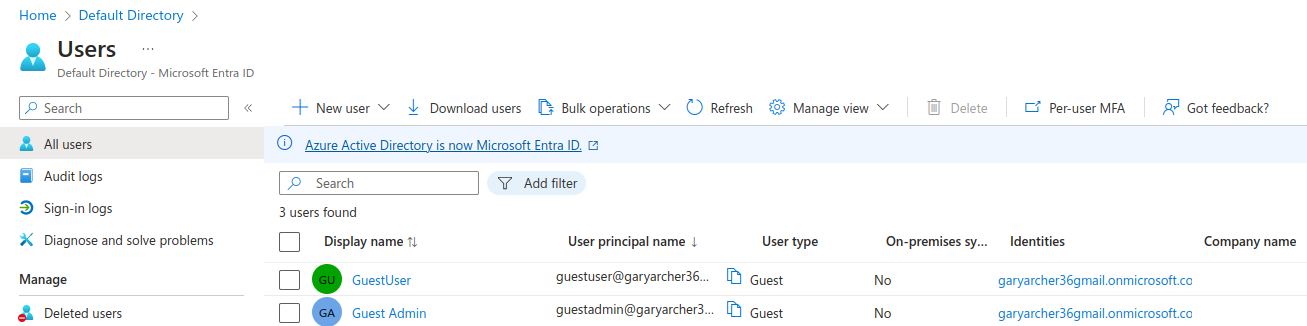
The ‘Guest User‘ and ‘Guest Admin‘ accounts I created have the following login names based on my domain:
- guestuser@garyarcher36gmail.onmicrosoft.com
- guestadmin@garyarcher36gmail.onmicrosoft.com
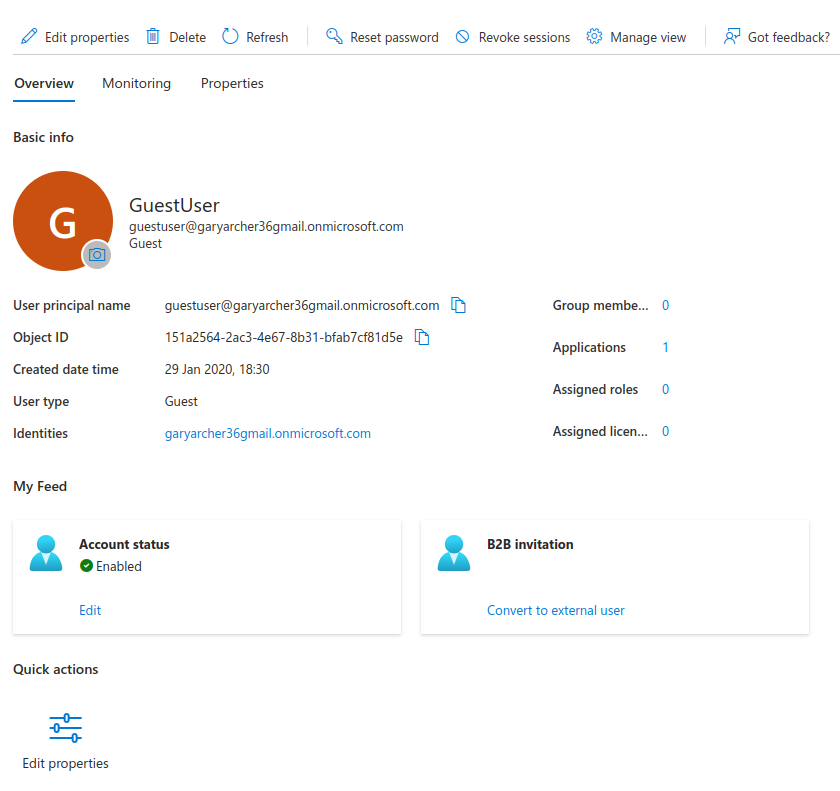
I assigned each user First name and Last name fields. The Object ID field is the unique account identifier of each user account:
I then did an initial login for each user with the following steps in a new Incognito browser window, to configure the user for MFA, as required by Entra ID. I used the Google authenticator app on my mobile device.
- In the Entra ID Portal, reset the user’s password to get a temporary one
- Login to the SPA and reset the password when prompted
- There follows a prompt to create an entry in an authenticator app
- The browser login form then presents a QR code
- On my mobile device I scanned the QR code in my authenticator app
- In the browser I then entered the authenticator app’s one-time-code
On all subsequent logins I only enter the username and password, until I am again prompted for a new one-time-code from the authenticator app.
Step 4. Register an OAuth Client for the API
By default, APIs are not OAuth clients. Microsoft have some rules around data protection that relate to the RFC8707 proposed standard, which requires an API registration.
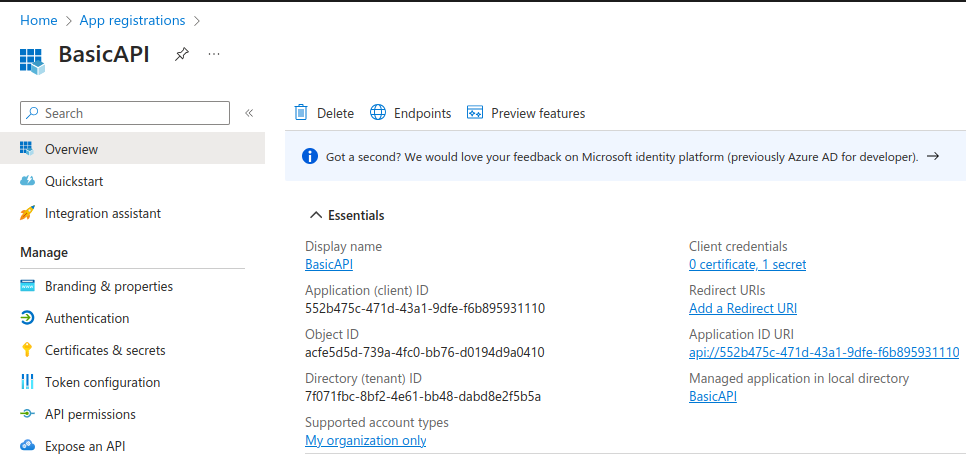
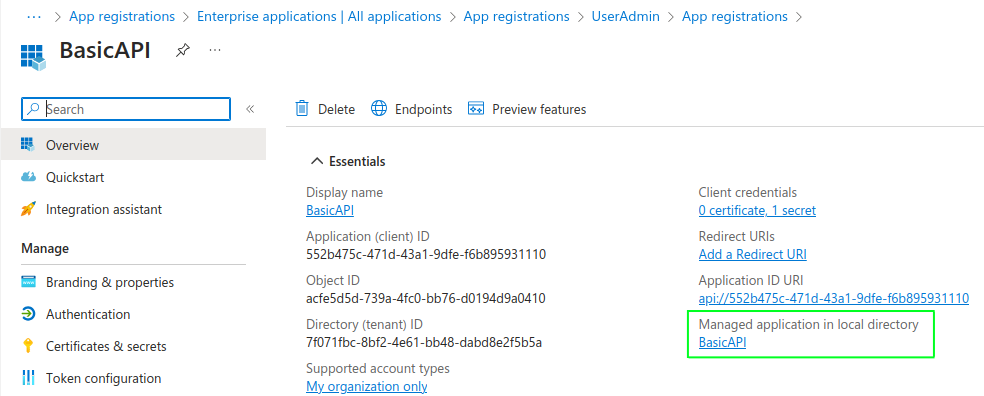
First I added a client called BasicAPI, without selecting a platform. I use this client to represent a logical collection of one or more related APIs. Access tokens issued later will use the below Client ID in their audience claim:
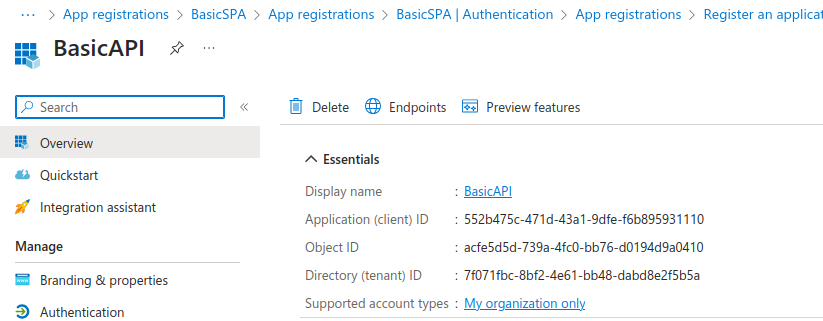
I then switched to the Owners tab and added my personal Microsoft user account as the owner of the application registration. A Client ID was then generated:
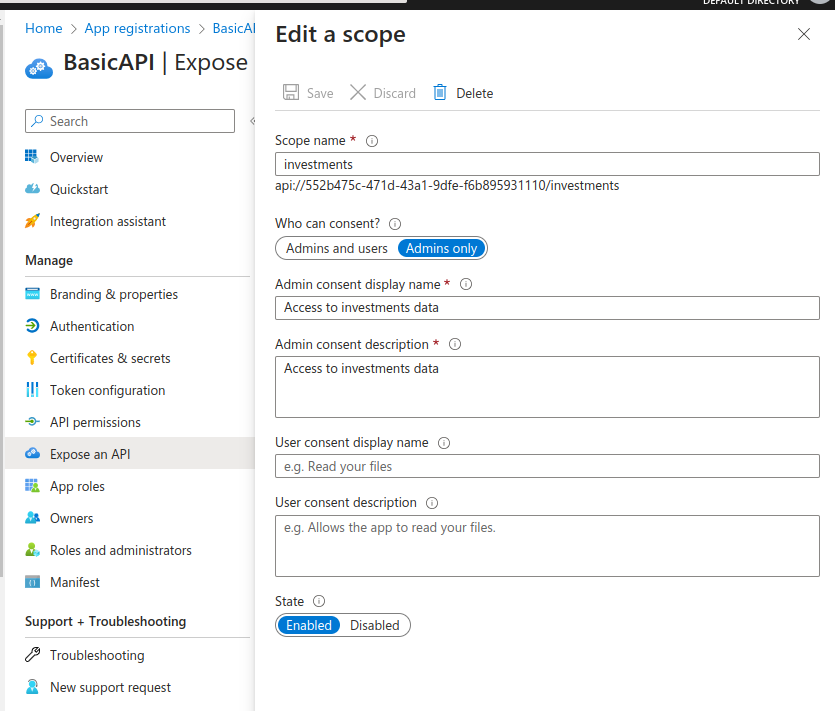
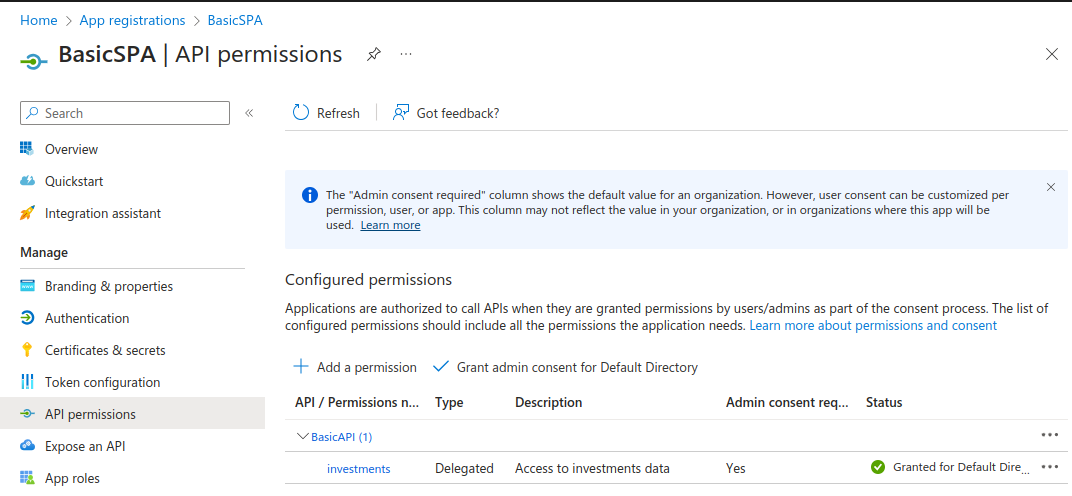
The API client registration is used to define scopes. I navigated to Expose an API and created a custom scope called investments as shown here:
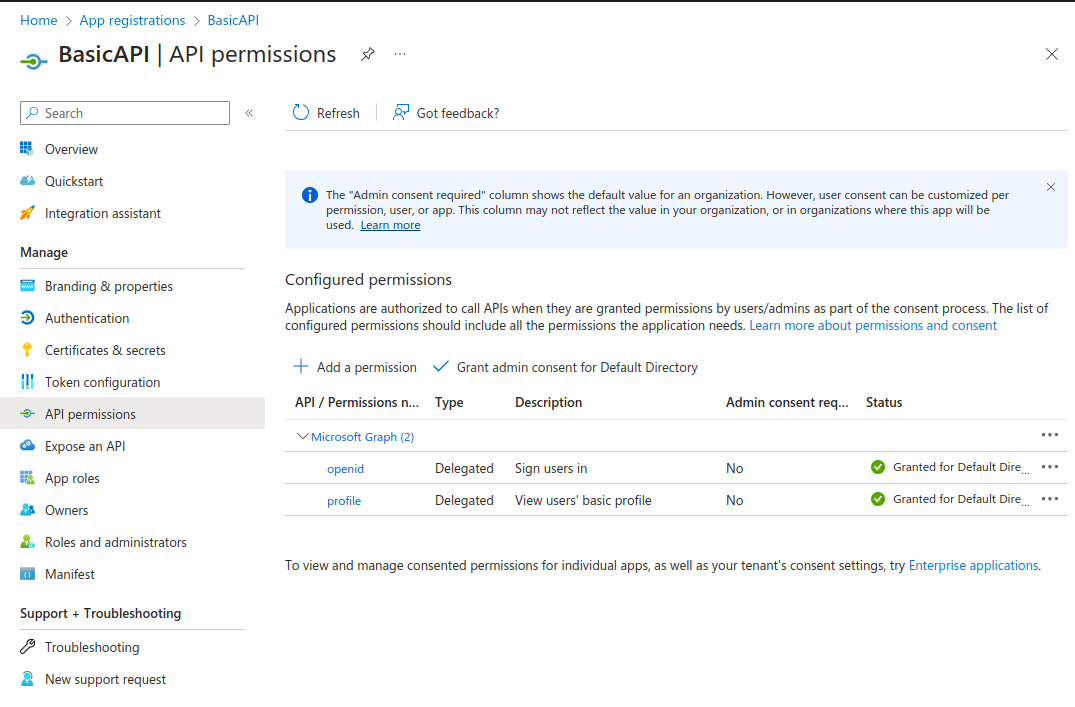
The API acts as a client to the Microsoft Graph endpoint, to get user info. Under API Permissions, I selected Add a permission / Microsoft Graph / Delegated permissions and added the openid and profile built-in OpenID Connect scopes. I also selected the Grant Admin Consent for Default Directory option:
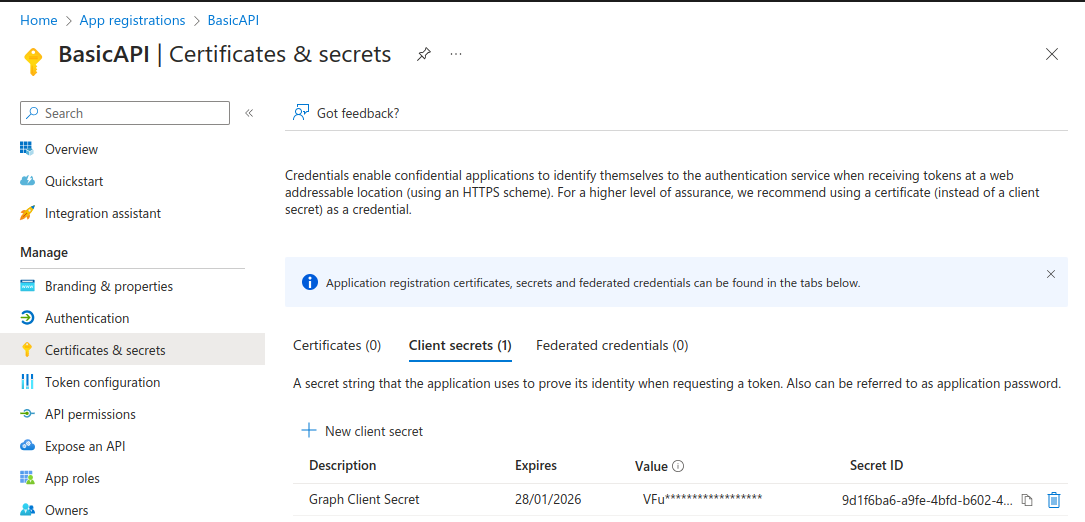
Next, I created a client secret which the API will use when it connects to Microsoft Graph:
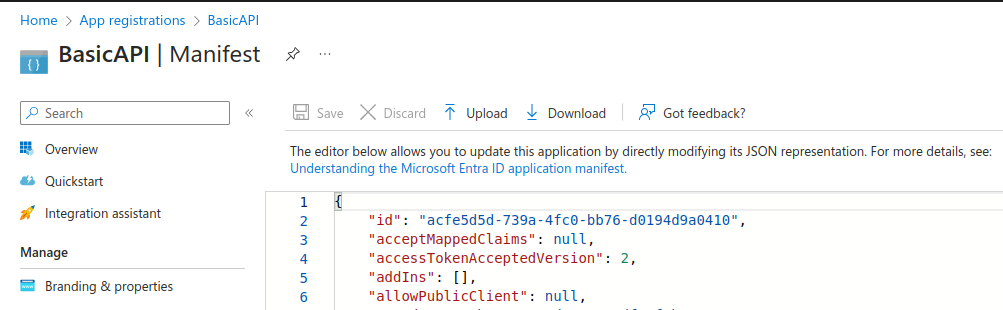
Finally, I edited the manifest data to use the latest access token version:
Step 5. Register an OAuth Client for the SPA
Under Applications / App Registrations, I selected New Registration and added a client called BasicSPA, selecting the Single Page Application platform type. This is also assigned a generated Client ID.
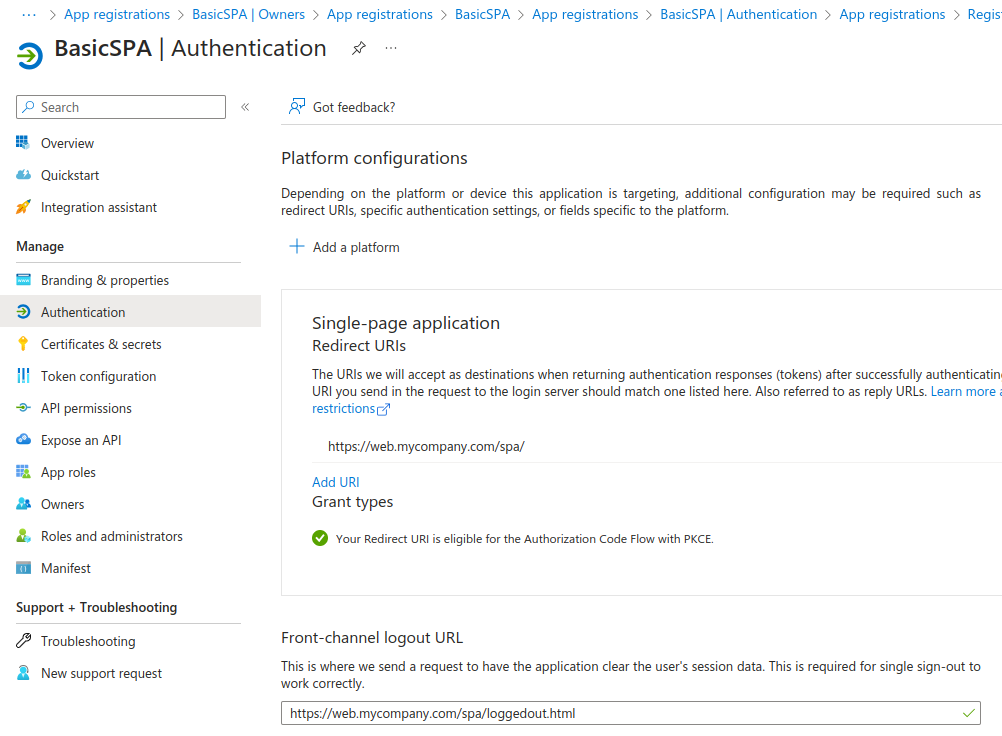
I made my personal account the owner of this application registration and again updated to the latest access token format. Next, I navigated to API Permissions, selected Add a permission / My APIs and chose the investments scope. Again I selected the Grant Admin Consent for Default Directory option:
Step 6. Populate Custom User Attributes
Next I defined two custom attributes to store against user accounts in the identity data, as described in the earlier User Data blog post. The values of these attributes, once populated against user accounts, will be included in access tokens issued to the SPA client:
| User Attribute | Description |
|---|---|
| manager_id | A business user identity that is easy for the API to work with when it receives access tokens |
| role | A user role that the API will use in its authorization logic |
To add these fields to the user accounts schema I navigated to the Cross-Tenant Synchronization screen, and added them as shown:

Populating these values for my two test user accounts was long winded. First I created a new client called UserAdmin without setting a platform. I then generated a client secret. Again I made my Microsoft account the owner and updated to the access token version 2 format. In total the following registrations were created:
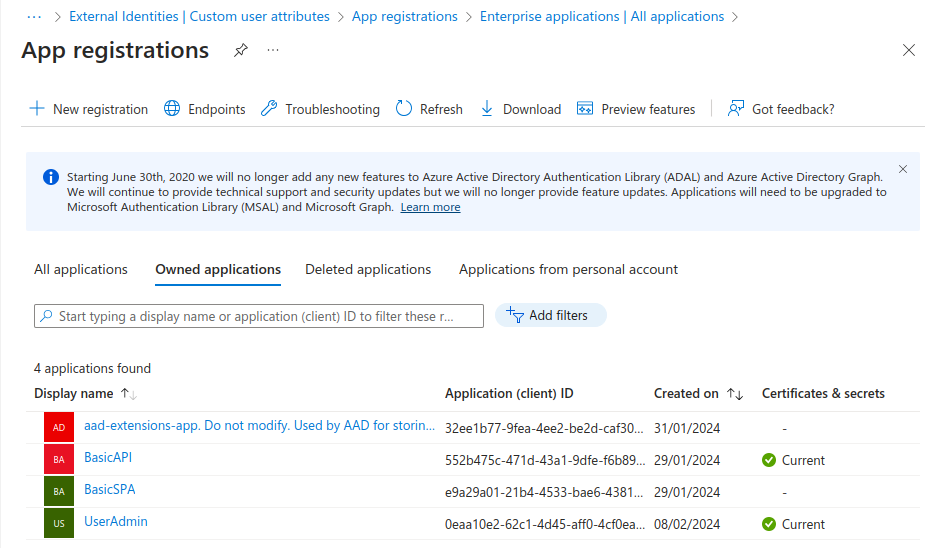
The extensions app is automatically created and used internally by Entra ID to store custom user attributes. The UserAdmin app administers all user accounts using the client credentials flow. Therefore I granted it User.ReadWriteAll Application Permissions (not delegated permissions).
To populate the values for my two test user accounts I had to write some client code to call the Graph API. I did this as a bash script that uses the jq tool. The code is available in this script in the code sample repository:
- utils/populate_custom_user_attributes.sh
My two custom user attributes are stored as extension attributes and have these full technical names. The middle part is the client ID of the extensions app registration with hyphens removed:
- extension_32ee1b779fea4ee2be2dcaf30f23d83a_manager_id
- extension_32ee1b779fea4ee2be2dcaf30f23d83a_role
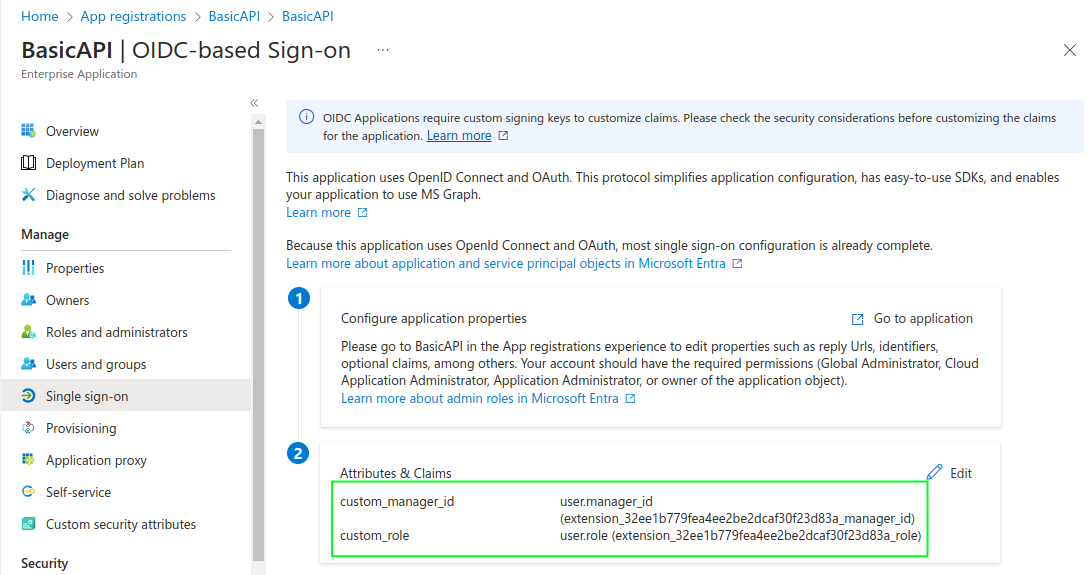
Step 7. Issue Custom Access Token Claims
To customize access tokens you edit the API client registration, starting by selecting the following link. My code sample avoids customizing ID tokens, but to do so you would follow an equivalent process for the SPA client registration:
This makes a Single Sign On tab available from which Attributes & Claims can be selected. Here the custom claims were added, using a source location of Directory Schema Extension. I used a custom_ prefix to avoid conflicts with the built-in role claim:
Next you need to return to the API manifest and make a change to set accessTokenMappedClaims=true. This avoids cryptic warnings about the API needing its own signing key.
Step 8. Download the Code Sample
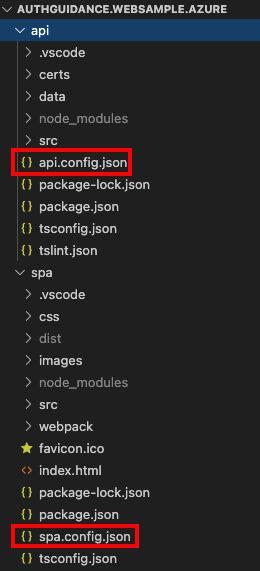
You can then download the code, then open it in Visual Studio Code:
- git clone https://github.com/gary-archer/oauth.websample.azure
- cd oauth.websample.azure
Identify the configuration files containing OAuth settings used by the UI and API:
Step 9. Update SPA Configuration
For the SPA update both the Tenant ID and the SPA’s OAuth Client ID:
{
    "app": {
        "apiBaseUrl":             "https://api.mycompany.com/api"
    },
    "oauth": {
        "authority":              "https://login.microsoftonline.com/7f071fbc-8bf2-4e61-bb48-dabd8e2f5b5a/v2.0",
        "clientId":               "e9a29a01-21b4-4533-bae6-438141ebc05c",
        "redirectUri":            "https://web.mycompany.com/spa/",
        "postLogoutRedirectUri":  "https://web.mycompany.com/spa/loggedout.html",
        "scope":                  "openid api://552b475c-471d-43a1-9dfe-f6b895931110/investments"
    }
}
Step 10. Update API Configuration
For the API configuration, replace the Tenant ID with your own value, and also update the Audience and Client ID and values with that of the API:
{
    "api": {
        "port": 443,
        "sslCertificateFileName": "./certs/mycompany.ssl.p12",
        "sslCertificatePassword": "Password1",
        "trustedOrigins": [
            "https://web.mycompany.com"
        ],
        "useProxy": false,
        "proxyUrl": "http://127.0.0.1:8888"
    },
    "oauth": {
        "jwksEndpoint":                  "https://login.microsoftonline.com/7f071fbc-8bf2-4e61-bb48-dabd8e2f5b5a/discovery/v2.0/keys",
        "tokenEndpoint":                 "https://login.microsoftonline.com/7f071fbc-8bf2-4e61-bb48-dabd8e2f5b5a/oauth2/v2.0/token",
        "userInfoEndpoint":              "https://graph.microsoft.com/oidc/userinfo",
        "issuer":                        "https://login.microsoftonline.com/7f071fbc-8bf2-4e61-bb48-dabd8e2f5b5a/v2.0",
        "audience":                      "552b475c-471d-43a1-9dfe-f6b895931110",
        "scope":                         "investments",
        "claimsCacheTimeToLiveMinutes":  15,
        "graphClient": {
            "clientId":                  "552b475c-471d-43a1-9dfe-f6b895931110",
            "clientSecret":              "VFu8Q~i~l3Ysiji~jvBgmDphm_IhDLuuOTapkaCe",
            "scope":                     "openid profile"
        }
    }
}
This configuration is equivalent to that of the earlier Updated SPA and API, which ran against AWS Cognito. The Graph details in the configuration are explained in the next post.
Step 11. Configure DNS
Update the Hosts File on your PC to include this blog’s local development domains, described in the earlier Initial OAuth Setup post:
127.0.0.1 localhost web.mycompany.com api.mycompany.comStep 12. Build the Code
Next run the following script, which will download some OpenSSL generated certificates, then build the SPA and API code:
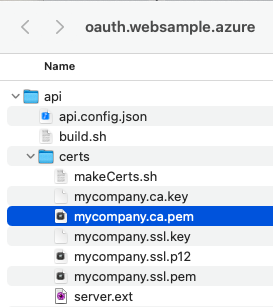
./build.shStep 13. Configure SSL Trust
Our sample runs over SSL using self signed certificates, the root certificate mycompany.ca.pem needs to be trusted by your browser, as covered in this previous post.
Step 14. Run the SPA
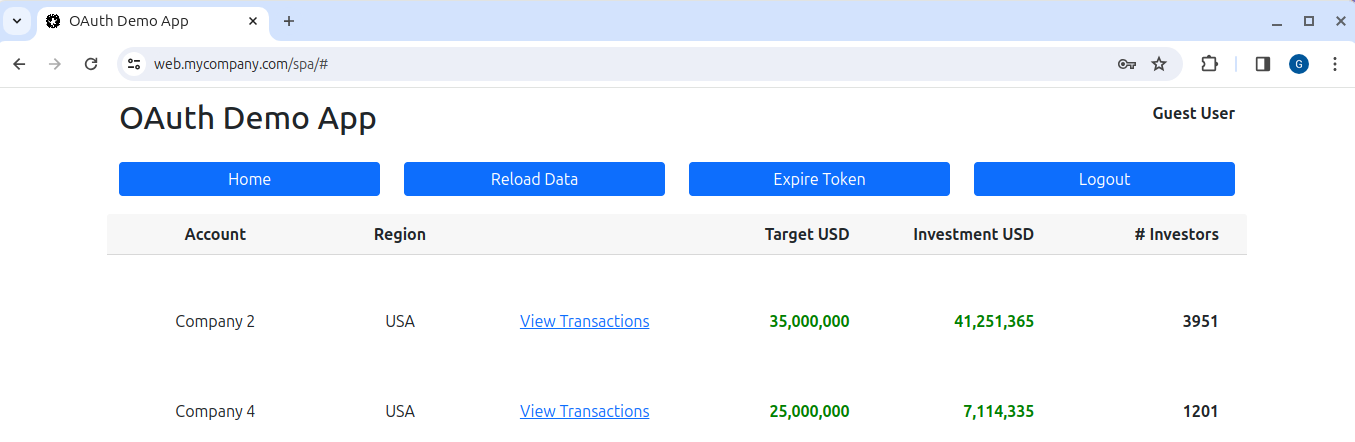
Next run the following script, to run the API over SSL on port 443, and the default browser will then be opened at https://web.mycompany.com/spa. The SPA will then redirect to Microsoft online and you can sign in with one of the test user accounts:
./run.shLogin completes successfully and we can run the same SPA and API that we originally developed for AWS Cognito. There are some minor OAuth differences but both apps use essentially the same code.
Where Are We?
I have provided a working Entra ID setup and in the next post I will explain further details about the SPA and API OAuth end-to-end flow.
Next Steps
- The next post walks through the Entra ID SPA and API OAuth Flow
- For a list of all blog posts see the Index Page