Background
Previously we discussed factors to consider when designing JWT Access Token Validation. Next we will describe how to get started with an authorization server.
Step 1: Define Base URLs
First it is worth understanding where an authorization server fits in an OAuth architecture. I like to start by designing base URLs. The following logical values are used for this blog’s code samples. For a real company the three components may be hosted in unrelated domains.
| Development Base URL | Description |
|---|---|
| https://web.mycompany.com | A base URL for static web content |
| https://api.mycompany.com | A base URL for APIs |
| https://login.mycompany.com | The OAuth Authorization Server |
On a development computer you can configure working domain names by just editing the hosts file, which exists at one of these locations:
| OS | Path |
|---|---|
| Windows | c:\system32\drivers\etc\hosts |
| macOS / Linux | /etc/hosts |
Add entries such as the following to represent development domains, which is just another way of using localhost, but with real world URLs:
127.0.0.1 localhost web.mycompany.com api.mycompany.com login.mycompany.comThis blog’s Final SPA will require a same site relationship between the web origin and API entry points called from the browser, and the development base URLs will change.
Step 2: Choose an Initial Authorization Server
By default, this blog’s code samples use my personal AWS Cognito system at https://login.authsamples.com. Much of the difficult security work for SPAs and APIs are outsourced to this component.
A key point when starting with OAuth is to point your apps to HTTPS endpoints developed by security experts rather than having to write or build the code for the authorization server. Choose one of these options initially, which are typically free for developers:
| Type | Description |
|---|---|
| Cloud Hosted | A cloud platform’s authorization server, such as those provided by AWS or Microsoft, with internet OAuth endpoints |
| Cloud Native | A Docker based authorization server, with local OAuth endpoints |
Either provides a simple and convenient option when getting started with OAuth. This blog will show how to integrate user facing apps and APIs, using portable code. A useful goal is for these components to be compliant with any standards-based authorization server.
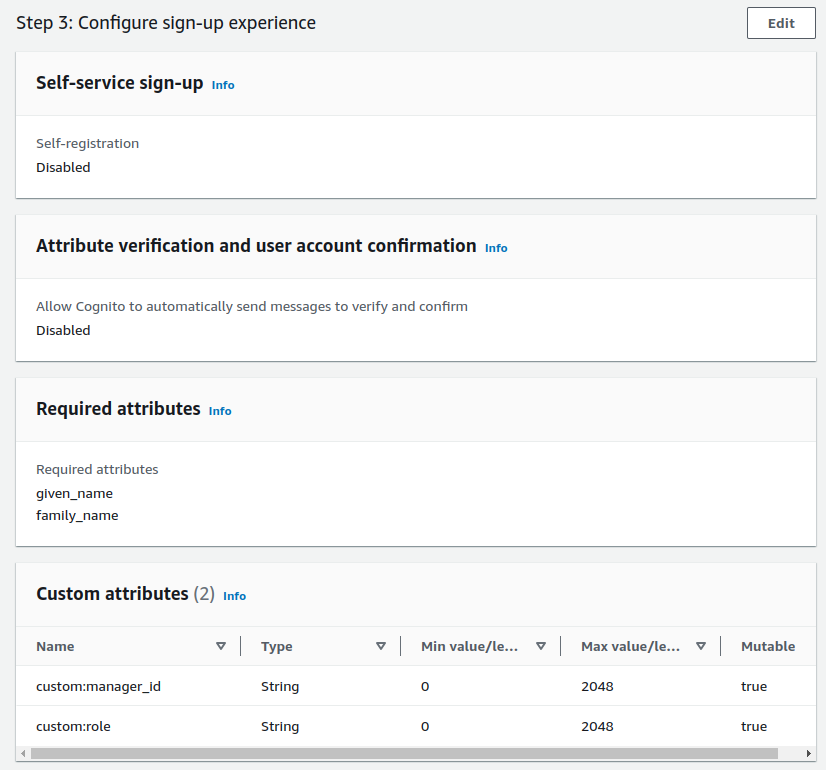
Step 3: Create the User Accounts Schema
The authorization server will store core identity fields about users. It will also issue some of these user attributes as claims to access tokens. APIs will then authorize using received claims.
For this blog I set up the authorization server to authenticate users with an email and password, and to also store name details. Custom fields called manager_id and role were added. The values assigned to users will be issued to access tokens later:
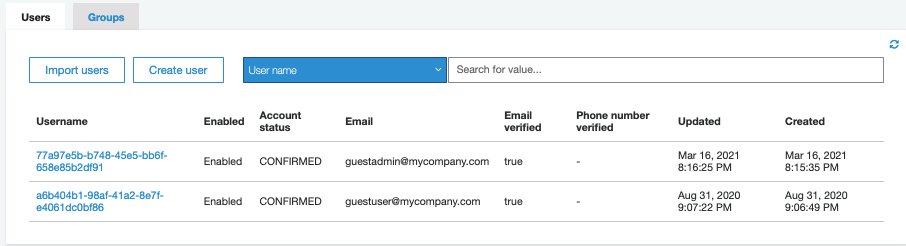
Step 4: Create Test User Accounts
In AWS Cognito I acted as an administrator to create two initial user accounts for testing and populated all of the user schema fields. Anyone reading this blog can sign into the code samples with these user accounts.
Step 5: Configure the Login User Experience
An authorization server should enable many possible ways for users to authenticate. For this blog I use only simple logins where an email and password are entered for the above test user accounts.

This blog’s frontend code samples all perform an authorization code flow and therefore support many other ways to authenticate users. To update to a different method, the authorization server would be reconfigured. No application code would need to change.
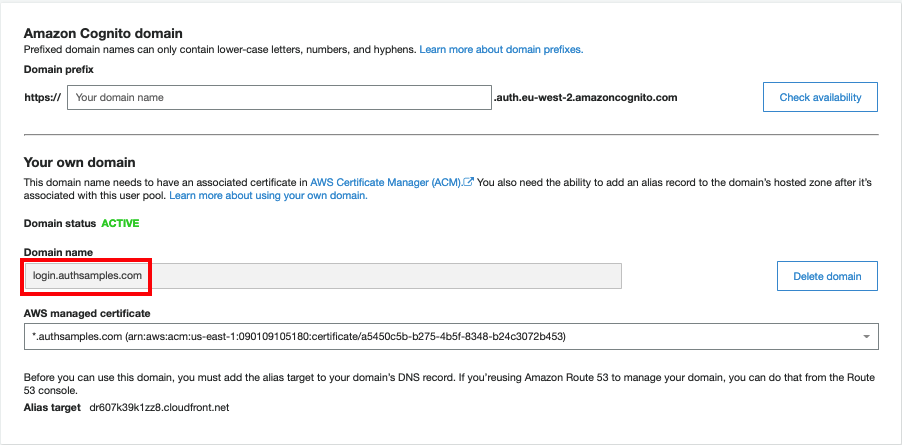
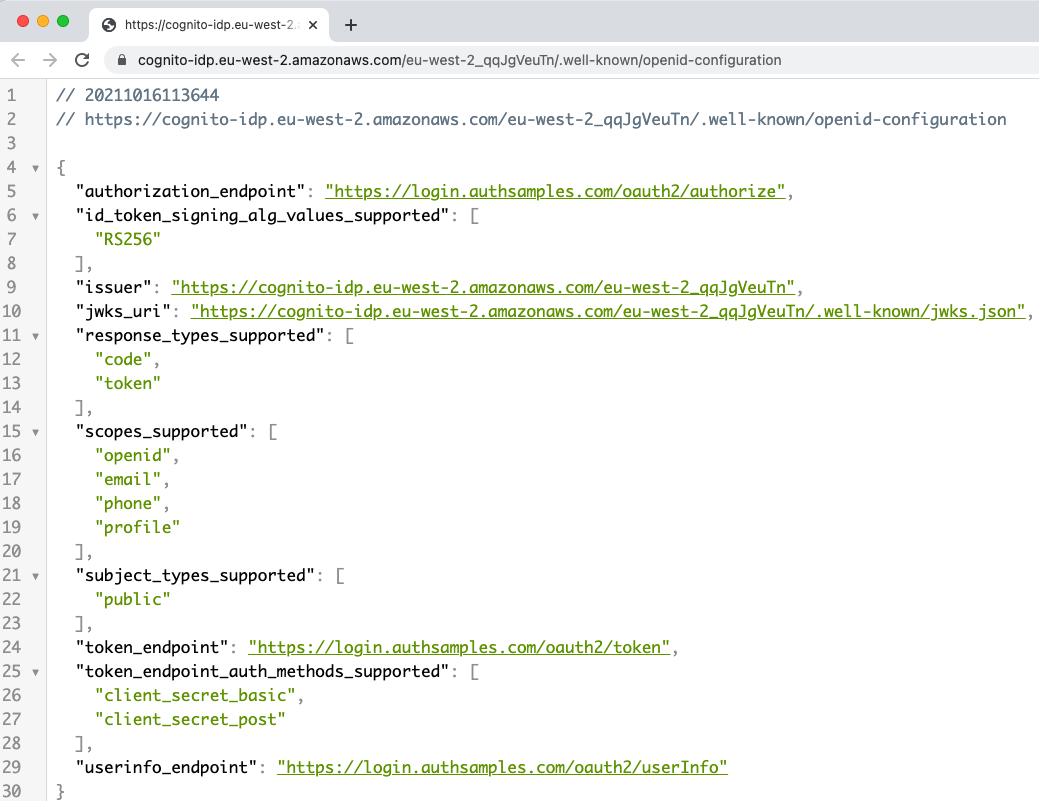
Step 6: Locate Open ID Connect Metadata
Authorization servers have a base URL and usually publish OpenID Connect metadata at a subpath of ‘.well-known/openid-configuration‘. The response provides endpoints that applications will connect to:
Step 7: Register OAuth Clients
Apps typically need to be registered as OAuth clients using an Admin UI, where fields such as Client ID, Redirect URI and Scope are configured.
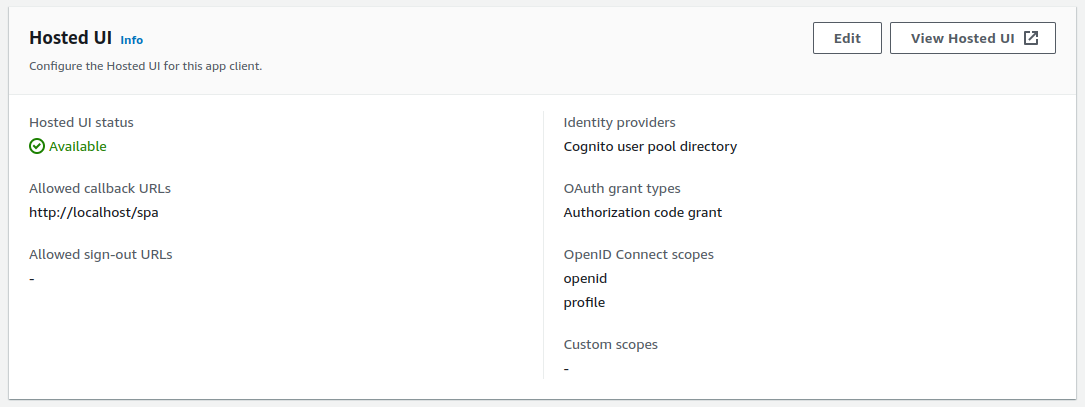
The scopes assigned to clients will determine the access token claims delivered to APIs, and used for claims based authorization later. In this manner each client gets different API permissions.
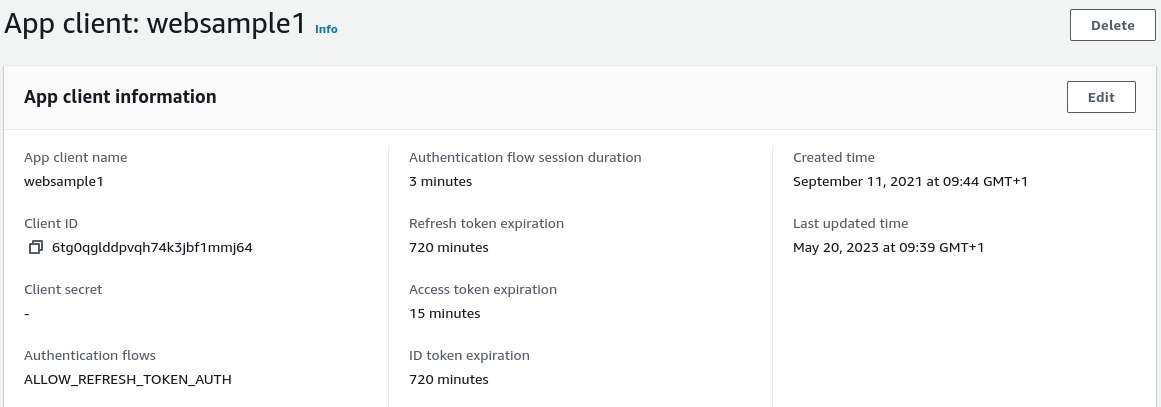
Step 8: Configure Token Lifetimes
OAuth client data will include token lifetimes. This blog’s code samples use the following values:
- The access token lifetime is 15 minutes and access tokens may expire multiple times during the user’s authenticated session
- Refresh token lifetime is 12 hours, which becomes the maximum time for the user’s authenticated session
- The ID token lifetime is also 12 hours, though this time is not used, since the ID token only conveys proof of the authentication event
Step 9: Configure Applications
Applications are configured with OAuth settings, used as input data to security libraries. In our code samples we will use JSON configuration files.
Our initial SPA points to Cognito’s issuer base URL and the SPA’s security library then looks up metadata to get the other details it needs:
{
    "app": {
        "webOrigin":        "http://web.mycompany.com",
        "apiBaseUrl":       "http://api.mycompany.com/api"
    },
    "oauth": {
        "authority":        "https://cognito-idp.eu-west-2.amazonaws.com/eu-west-2_CuhLeqiE9",
        "clientId":         "62raqvncbki418n3ckl59uf0f4",
        "redirectUri":      "http://localhost/spa",
        "scope":            "openid profile"
    }
}
The OAuth configuration for APIs is based on how OAuth access tokens are validated, and where token signing keys are downloaded from:
{
    "api": {
        "port": 80,
        "trustedOrigins": [
            "http://web.mycompany.com",
            "http://localhost"
        ],
        "useProxy": false,
        "proxyUrl": "http://127.0.0.1:8888"
    },
    "oauth": {
        "jwksEndpoint": "https://cognito-idp.eu-west-2.amazonaws.com/eu-west-2_CuhLeqiE9/.well-known/jwks.json",
        "algorithm": "RS256",
        "issuer": "https://cognito-idp.eu-west-2.amazonaws.com/eu-west-2_CuhLeqiE9",
        "audience": ""
    }
}
Step 10: Build Apps that use OAuth Standards
The initial objective should be to use security libraries to integrate OAuth in a standards based and portable manner, and to test end-to-end flows:
| Area | Description |
|---|---|
| UIs | Getting logins working in a user friendly way, along with related operations such as user creation and password recovery |
| APIs | Protecting data with OAuth, by validating access tokens, then authorizing requests based on claims |
Step 11: Clarify Requirements
During the journey of integrating OAuth into apps, you will form a better idea of what you want from the authorization server. Before committing to a vendor, ensure there are no blocking issues in your end-to-end flows, in areas such as user data storage, usability, reliability and extensibility .
If your initial choice of provider does not meet your requirements you can then spend some time reviewing alternative choices. When your clients and APIs integrate OAuth in a standards based way, switching authorization servers will require only minimal changes to application code.
Where Are We?
We have discussed the basics, to get started with OAuth development, in a way that gives you time to learn. This blog’s code samples will implement modern security while avoiding vendor lock-in. A later post provides further details on the AWS Cognito setup.
Next Steps
- Next we will explain this blog’s JavaScript Technology Setup
- For a list of all blog posts see the Index Page