Background
Previously we explained this blog’s Web Content Delivery to AWS. Next we will provide an overview of our Serverless API, and show how to run it s lambda functions locally.
API Features
The main behaviour is summarised below, and is identical to that of our earlier Node.js API, which was hosted by the Express HTTP server:
| Aspect | Description |
|---|---|
| Zero Trust | Our API will perform JWT Access Token Validation on every request, via a JOSE security library |
| Extensible Claims | Our API will be in full control of claims as described in the API Authorization Design |
| Supportable | Our API will use this blog’s designs for Logging and Error Handling to ensure good technical support qualities |
| Scalable | The same coding techniques, and any common code, can be used for many APIs in a software platform |
| Productive | Our API coding model will be modern and portable across mainstream languages |
Preferred Local Setup
Ideally we would like an equivalent setup to our earlier Node.js API, where we listen for HTTP requests on a Developer PC, and can run a UI Client against the API:
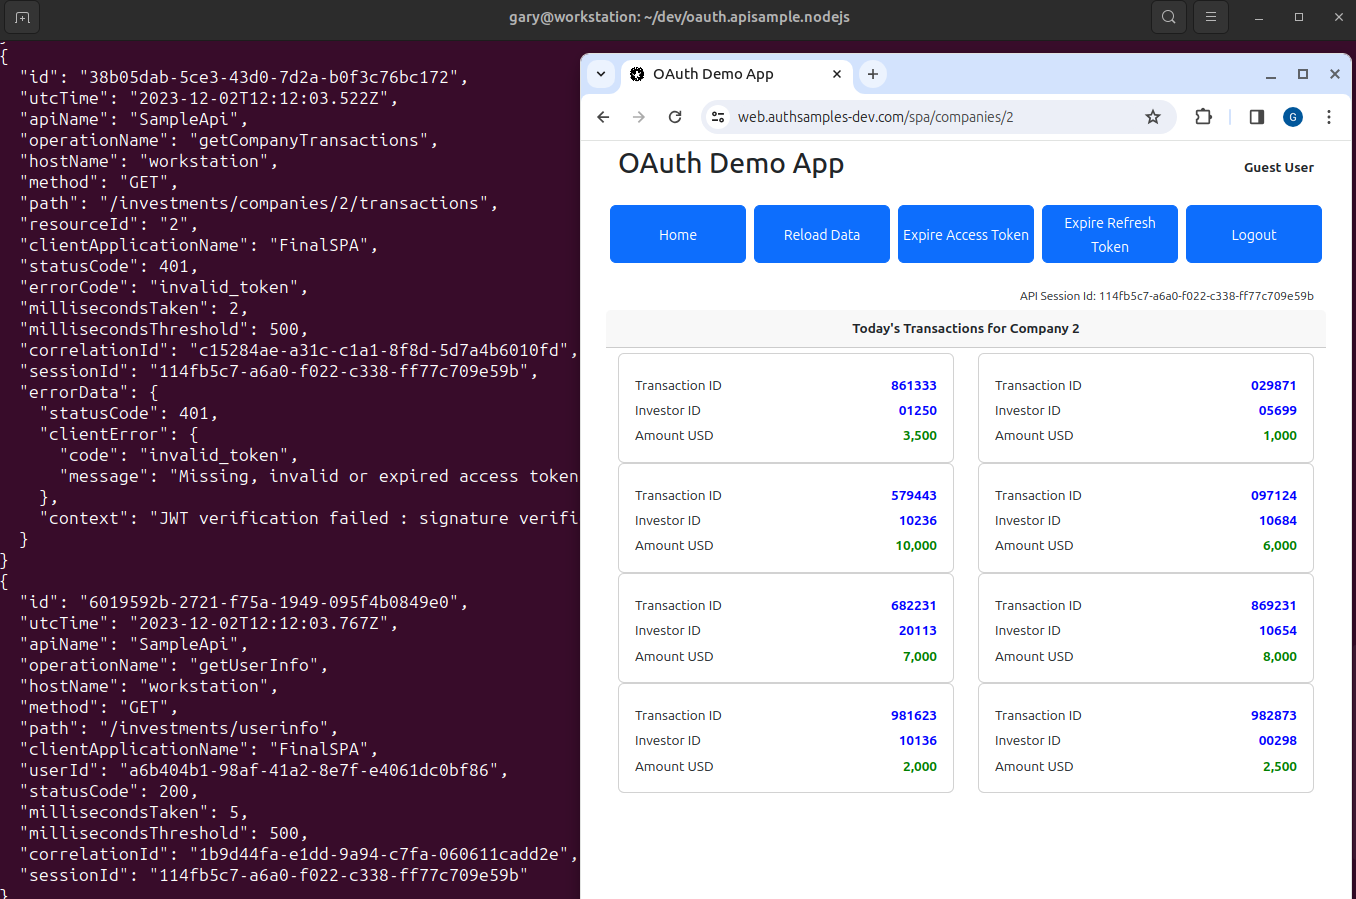
Technologies such as Serverless Offline do not yet support this reliably though, so we are limited to local execution of lambda functions and will only be able to run an integrated setup after deployment to AWS.
Get the API
The Serverless API project is available here and can be downloaded / cloned to your local PC with this command:
git clone https://github.com/gary-archer/oauth.apisample.serverless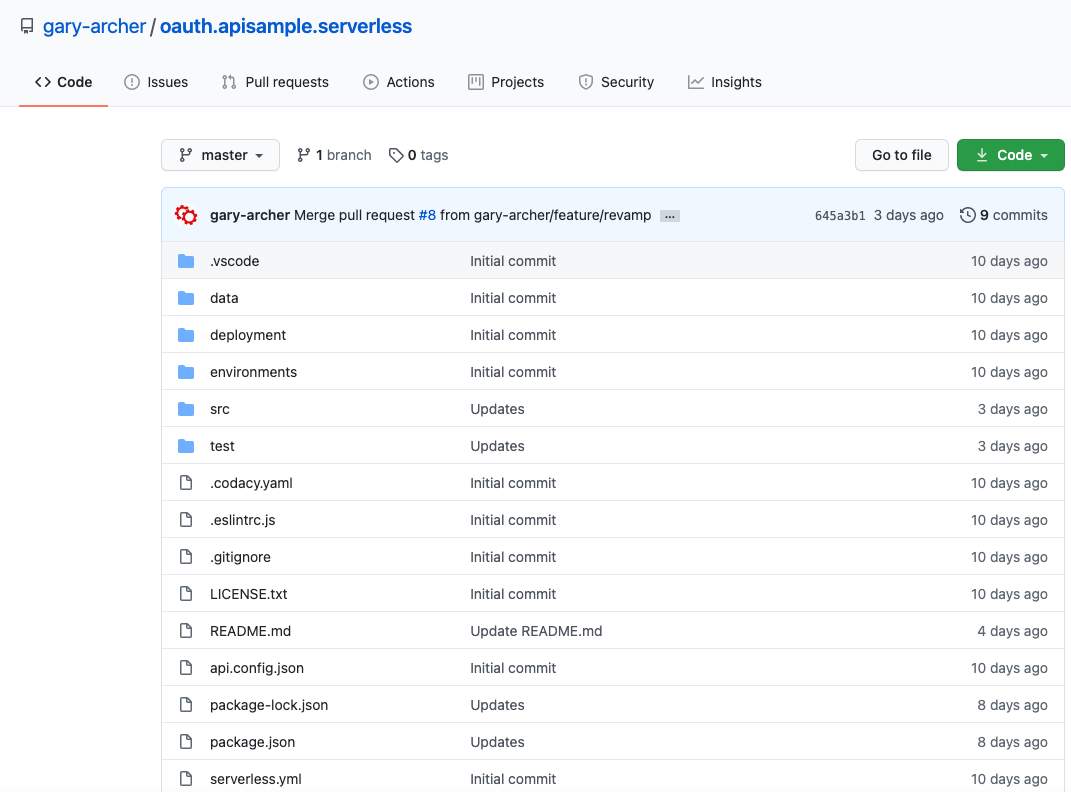
View the Code
We will take a closer look at the code in a couple of posts time, but for now, notice that the code structure matches that used in all of this blog’s earlier APIs, for Node.js, .NET and Java:
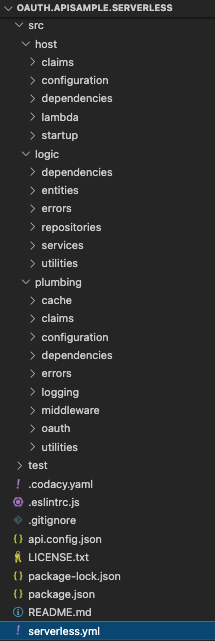
The Serverless.yml file lists the API’s operations, and the entry point are lambda functions, which have the same role as an API controller operation.
functions:

  getUserClaims:
    handler: dist/host/lambda/getUserInfo.handler
    events:
      - http:
          path: /userinfo
          method: get

  getCompanyList:
    handler: dist/host/lambda/getCompanyList.handler
    events:
      - http:
          path: /companies
          method: get

  getCompanyTransactions:
    handler: dist/host/lambda/getCompanyTransactions.handler
    events:
      - http:
          path: /companies/{id}/transactions
          method: get
          request:
            parameters:
              paths:
                id: true
In Serverless, these are run on a development computer using the ‘sls invoke‘ command. This requires input and output payloads that use a lambda specific format. Once the API is deployed, real clients will instead just use HTTP requests.
Test the API
Our earlier page on OAuth API Testing covered some techniques for testing OAuth secured APIs. Providing the input for an API request is tricky, since a user level access token is required, containing a subject claim.
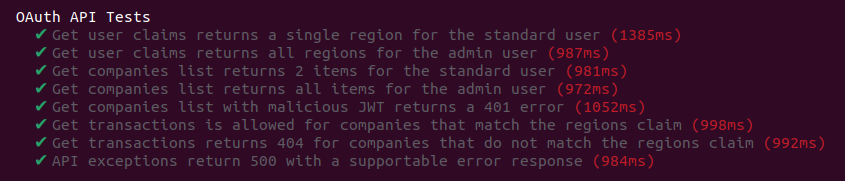
The Serverless API tests use a technique of mocking the Authorization Server. The same mocha based integration tests as the earlier Node.js API are used, with some code to wire up ‘sls invoke‘ with request and response payloads. This enables the API to be tested productively.
To run the tests, ensure that a Docker engine is installed in addition to an up to date version of Node.js, then run this command:
./start.shTests create a keypair and expose the token signing public key at a JWKS URI provided by Wiremock in Docker. The API is then pointed to this URL. Integration tests use a JWT library and the corresponding private key to issue access tokens for tests, to send to the API.
This enables the API’s OAuth security code paths to be tested productively, though local lambda execution is a little slow.
Zero Trust API Security
In AWS it is common to see online solutions that use Lambda Authorizers to validate JWT access tokens. Secure values such as claims are then simply forwarded to lambdas in header, over a trusted connection.
A more cutting edge security option in line with OAuth best practices is for each lambda to receive and validate the incoming JWT. This also helps to keep the API’s code closer to OAuth standards.
API Authorization
The overall authorization used by the Serverless API was summarised earlier in our API Authorization Design. The API collects both token claims and extra claims into a claims principal, then caches extra claims for future requests with the same access token:

The claims principal is then injected into service logic classes, which have all of the values needed, to apply authorization with simple code.
Lambdas and In Memory Caching
JWT validation requires in-memory caching of token signing public keys, and the above authorization uses in-memory caching of extra claims. Yet with lambda technology this is not possible, since a new lambda instance is spun up on every request.
To resolve this problem we need to use a distributed cache. The best-fit Serverless option is to use DynamoDB, which supports saving data with a time to live, similar to the in-process caches used by earlier APIs:
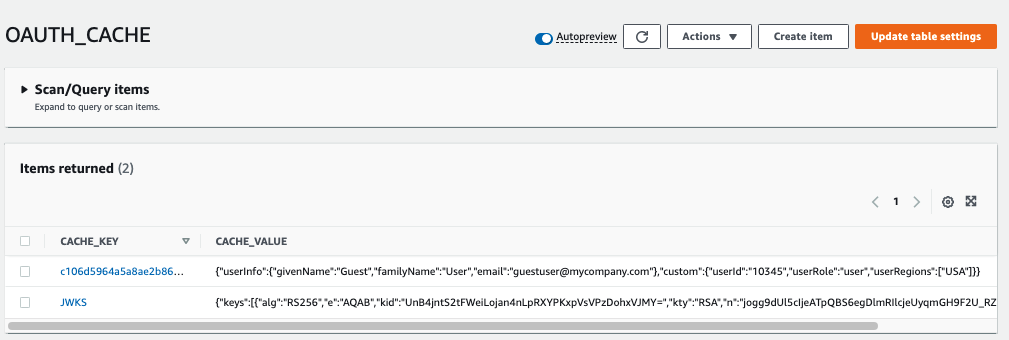
This is awkward though, since the code becomes more complex, and the Serverless API requires more out of process calls than it should, so performance is also not optimal.
Client Specific Security Differences
The API serves this blog’s final SPA, Desktop App, Android App and iOS App, all of which follow their own client side best practices. The SPA must therefore only send the latest HTTP only secure cookies when calling the Serverless API.
The Serverless API does not contain any cookie logic though, so that its usage is identical for web and native clients. Instead, cookies during API requests are dealt with by an OAuth Proxy component. Usage was summarised in the earlier post on SPA Backend for Frontend Design.
API Request Logging
The API uses our Effective API Logging design, and writes JSON logs that are shipped to Elasticsearch. When tests are run, the logging output is redirected to a lambdatest.log file:
{
  "id": "14d694e1-d7dd-fa46-7fd5-7cef812e4a6a",
  "utcTime": "2023-03-20T18:19:55.674Z",
  "apiName": "SampleApi",
  "operationName": "getCompanyTransactions",
  "hostName": "WORK",
  "method": "GET",
  "path": "/investments/companies/2/transactions",
  "resourceId": "2",
  "clientApplicationName": "ServerlessTest",
  "userId": "a6b404b1-98af-41a2-8e7f-e4061dc0bf86",
  "statusCode": 200,
  "millisecondsTaken": 21,
  "millisecondsThreshold": 500,
  "correlationId": "88686b82-f578-2e64-d716-9e1f35c6e1f0",
  "sessionId": "931f42c1-9060-786e-2c9a-d4f07335814e"
}
In AWS these log entries are first output to Cloudwatch, then could be aggregated to a cloud Log Aggregation system, to enable Technical Support Queries on the log data.
API Supportability
As for other APIs, we also implement this blog’s Error Handling and Supportability design. One interesting behaviour is the ability to perform error rehearsal, by sending in a custom header that allows testers to ‘choose an API to break‘.
The final test exercises this behaviour, and results in the following log entry. The error returned to the API client includes a ‘fairly unique error identifier‘. This enables fast lookup of API logs, to reduce problem resolution times:
{
  "id": "faa151ac-6006-8b4d-4c11-8a2e0b6a4aa8",
  "utcTime": "2023-03-20T18:19:58.376Z",
  "apiName": "SampleApi",
  "operationName": "getCompanyTransactions",
  "hostName": "WORK",
  "method": "GET",
  "path": "/investments/companies/4/transactions",
  "resourceId": "4",
  "clientApplicationName": "ServerlessTest",
  "userId": "a6b404b1-98af-41a2-8e7f-e4061dc0bf86",
  "statusCode": 500,
  "errorCode": "exception_simulation",
  "errorId": 28603,
  "millisecondsTaken": 19,
  "millisecondsThreshold": 500,
  "correlationId": "1fe8296d-37a1-943a-c33e-3464191d1a79",
  "sessionId": "931f42c1-9060-786e-2c9a-d4f07335814e",
  "performance": {
    "name": "total",
    "millisecondsTaken": 19,
    "children": [
      {
        "name": "validateToken",
        "millisecondsTaken": 14
      },
      {
        "name": "userInfoLookup",
        "millisecondsTaken": 3
      }
    ]
  },
  "errorData": {
    "statusCode": 500,
    "clientError": {
      "code": "exception_simulation",
      "message": "An exception was simulated in the API",
      "id": 28603,
      "area": "SampleApi",
      "utcTime": "2023-03-20T18:19:58.395Z"
    },
    "serviceError": {
      "details": "",
      "stack": [
        "Error: An exception was simulated in the API",
        "at ErrorFactory.createServerError (file:///home/gary/dev/oauth.apisample.serverless/dist/plumbing/errors/errorFactory.js:12:16)",
        "at CustomHeaderMiddleware.before (file:///home/gary/dev/oauth.apisample.serverless/dist/plumbing/middleware/customHeaderMiddleware.js:21:40)",
        "at runMiddlewares (file:///home/gary/dev/oauth.apisample.serverless/node_modules/@middy/core/index.js:119:27)",
        "at process.processTicksAndRejections (node:internal/process/task_queues:95:5)",
        "at async runRequest (file:///home/gary/dev/oauth.apisample.serverless/node_modules/@middy/core/index.js:79:9)"
      ]
    }
  }
}
API Architecture
Our Serverless API has reduced vendor lock-in as much as possible, by implementing non functional areas using portable code. OAuth processing is managed securely, and code is extensible in the important places.
We have also seen that the Platform as a Service model for APIs has some downsides. These include an inability to run a fully integrated setup locally, or to use in-memory caching between requests.
Where Are We?
We have explained the Serverless API’s key behaviour, which follows the same portable concepts as earlier APIs. Next we will describe how the Serverless lambdas are deployed to AWS and called via its API Gateway.
Next Steps
- Next we will explain the Serverless API Deployment
- For a list of all blog posts see the Index Page