Background
Previously we explained How to Run the Desktop Code Sample, which included some test scenarios. We will complete the posts for the initial Electron desktop app by describing some coding key points.
Desktop Technology
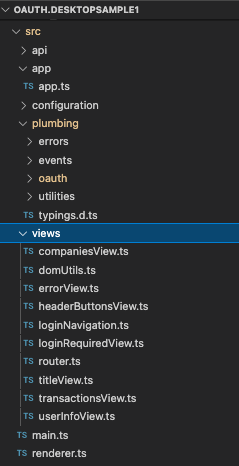
The desktop app uses the exact same views that were used in one of this blog’s earlier code samples, for the Updated SPA. In Electron, the OAuth login flow is implemented using Node.js rather than browser code.
Electron ‘Main’ Entry Point
Electron apps have two processes, Main and Renderer. The main process loads the HTML page, which creates a renderer process when it loads.
class Main {

    private _window: BrowserWindow | null;

    public constructor() {
        this._window = null;
        this._setupCallbacks();
    }

    public execute(): void {

        app.on('ready', this._createMainWindow);

        app.on('activate', this._onActivate);

        app.on('window-all-closed', this._onAllWindowsClosed);
    }

    private _createMainWindow(): void {

        this._window = new BrowserWindow({
            width: 1280,
            height: 720,
            minWidth: 800,
            minHeight: 600,
            webPreferences: {
                nodeIntegration: true,
                contextIsolation: false,
            },
        });

       ...
    }
}
Using node integration is against Electron’s Security Best Practices and is used only as a shortcut, to reduce the amount of code. In the next post we will introduce the final desktop app, which will be security hardened.
Electron ‘Renderer’ Entry Point
The renderer process runs in the Chromium browser host and renders the index.html page.For the initial code sample, JavaScript code is imported using a Node.js integration and a require statement:
<!DOCTYPE html>
<html lang='en'>
    <head>
        <meta charset='utf-8'>
        <meta http-equiv='Content-Security-Policy' content="script-src 'self' 'unsafe-inline'">
        <title>OAuth Demo App</title>

        <link rel='stylesheet' href='css/bootstrap.min.css'>
        <link rel='stylesheet' href='css/app.css'>
    </head>
    <body>
        <span class="pl-kos"><</span><span class="pl-ent">div</span> <span class="pl-c1">id</span>='<span class="pl-s">root</span>' <span class="pl-c1">class</span>='<span class="pl-s">container</span>'<span class="pl-kos">></span><span class="pl-kos"></</span><span class="pl-ent">div</span><span class="pl-kos">></span>

        <script type='text/javascript'>
            require('./built/renderer');
        </script>
    </body>
</html>
The code for the renderer process begins by creating an App class, which acts as the application shell. This creates some global objects for API calls and OAuth operations, in the same manner as earlier SPAs:
private async _initialiseApp(): Promise<void> {

    this._configuration = await ConfigurationLoader.load('desktop.config.json');

    this._authenticator = new AuthenticatorImpl(this._configuration.oauth);

    this._apiClient = new ApiClient(this._configuration.app.apiBaseUrl, this._authenticator);

    this._router = new Router(this._apiClient);
}
Desktop ‘Authenticator’ Class
For our SPA we used an ‘authenticator‘ abstraction to deal with OAuth login and token operations, and this is the main code that is different to the SPA.
export interface Authenticator {

    isLoggedIn: boolean;

    getAccessToken(): Promise<string>;

    refreshAccessToken(): Promise<string>;

    login(): Promise<void>;

    logout(): void;

    expireAccessToken(): Promise<void>;

    expireRefreshToken(): Promise<void>;
}
As we shall see, the authentication code is tricky, since it needs to manage a browser that runs as a disconnected process.
Triggering a Login Prompt
As for our SPA, our Desktop App’s ApiClient class will handle 401 responses from the API by getting a new token and retrying the API call:
private async _callApi(path: string, method: Method, dataToSend?: any): Promise<any> {

    const url = `${this._apiBaseUrl}${path}`;

    let token = await this._authenticator.getAccessToken();
    if (!token) {
        throw ErrorFactory.getFromLoginRequired();
    }

    try {

        return await this._callApiWithToken(url, method, dataToSend, token);

    } catch (e: any) {

        if (e.statusCode !== 401) {
            throw ErrorFactory.getFromHttpError(e, url, 'web API');
        }

        token = await this._authenticator.refreshAccessToken();
        if (!token) {
            throw ErrorFactory.getFromLoginRequired();
        }

        return await this._callApiWithToken(url, method, dataToSend, token);
    }
}
If a refresh isn’t possible the code throws a login_required error, which terminates the requested API calls in a controlled manner. This error code is treated specially and results in a redirect to the Login Required View, which is given a return location to use once login completes:
export class LoginNavigation {

    public static navigateToLoginRequired(): void {

        location.hash = location.hash.length > 1 ?
            `#loggedout&return=${encodeURIComponent(location.hash)}` :
            '#loggedout';
    }
}
The Authorization Redirect
The code to redirect the user to login on the system browser is laid out as follows. The browser is redirected and the app receives the result:
private async _startLogin(): Promise<void> {

    try {

        const server = new LoopbackWebServer(this._configuration, this._loginState);
        const runtimePort = await server.start();
        const redirectUri = `http://localhost:${runtimePort}`;

        await this._loadMetadata();

        const adapter = new LoginAsyncAdapter(
            this._configuration,
            this._metadata!,
            this._loginState);
        return await adapter.login(redirectUri);
    } catch (e: any) {

        throw ErrorFactory.getFromLoginOperation(e, ErrorCodes.loginRequestFailed);
    }
}
AppAuth-JS classes are useful but written in an old Node.js callback style. A LoginAsyncAdapter class is therefore used to translate to a modern async await syntax:
public async login(redirectUri: string): Promise<LoginRedirectResult> {

    const requestJson = {
        response_type: AuthorizationRequest.RESPONSE_TYPE_CODE,
        client_id: this._configuration.clientId,
        redirect_uri: redirectUri,
        scope: this._configuration.scope,
    };
    const authorizationRequest = new AuthorizationRequest(requestJson, new DefaultCrypto(), true);

    await authorizationRequest.setupCodeVerifier();

    return new Promise((resolve, reject) => {

        const notifier = new AuthorizationNotifier();
        notifier.setAuthorizationListener(async (
            request: AuthorizationRequest,
            response: AuthorizationResponse | null,
            error: AuthorizationError | null) => {

            try {
                resolve({request, response, error});

            } catch (e: any) {
                reject(e);
            }
        });

        const browserLoginRequestHandler = new BrowserLoginRequestHandler(this._state);
        browserLoginRequestHandler.setAuthorizationNotifier(notifier);
        browserLoginRequestHandler.performAuthorizationRequest(this._metadata, authorizationRequest);
    });
}
Customizing the Authorization Handler
AppAuth-JS provides the following concrete class for managing authorization redirects:
export class NodeBasedHandler extends AuthorizationRequestHandler {
  authorizationPromise: Promise<AuthorizationRequestResponse|null>|null = null;

  constructor(
      public httpServerPort = 8000,
      utils: QueryStringUtils = new BasicQueryStringUtils(),
      crypto: Crypto = new NodeCrypto()) {
    super(utils, crypto);
  }
}
It is also possible to override the base AuthorizationRequestHandler class, which I chose to do in a BrowserLoginRequestHandler class. This is used to deal with the user starting multiple logins at once, and to control the post login browser display.
Invoking the System Browser
The system browser is invoked via a library called opener, which abstracts operating system differences when launching the user’s default browser:
public performAuthorizationRequest(
    metadata: AuthorizationServiceConfiguration,
    request: AuthorizationRequest): void {

    this._authorizationPromise = new Promise<AuthorizationRequestResponse>((resolve) => {

        const callback = (queryParams: any) => {

            const response = this._handleBrowserLoginResponse(queryParams, request);
            resolve(response);

            this.completeAuthorizationRequestIfPossible();
        };

        this._state.storeLoginCallback(request.state, callback);
    });

    const loginUrl = this.buildRequestUrl(metadata, request);
    Opener(loginUrl);
}
The Authorization Code Grant
When a successful authorization response is received, the desktop app sends an authorization code grant request using the TokenRequest class. On success, the TokenResponse contains a set of OAuth tokens:
private async _endLogin(result: LoginRedirectResult): Promise<void> {

    try {

        const codeVerifier = result.request.internal!['code_verifier'];

        const extras: StringMap = {
            code_verifier: codeVerifier,
        };

        const requestJson = {
            grant_type: GRANT_TYPE_AUTHORIZATION_CODE,
            code: result.response!.code,
            redirect_uri: result.request.redirectUri,
            client_id: this._configuration.clientId,
            extras,
        };
        const tokenRequest = new TokenRequest(requestJson);

        const requestor = new CustomRequestor();
        const tokenHandler = new BaseTokenRequestHandler(requestor);

        const tokenResponse = await tokenHandler.performTokenRequest(this._metadata!, tokenRequest);

        const newTokenData = {
            accessToken: tokenResponse.accessToken,
            refreshToken: tokenResponse.refreshToken ? tokenResponse.refreshToken : null,
            idToken: tokenResponse.idToken ? tokenResponse.idToken : null,
        };

        this._tokens = newTokenData;

    } catch (e: any) {

        ErrorFactory.getFromTokenError(e, ErrorCodes.authorizationCodeGrantFailed);
    }
}
The initial desktop app simply stores the tokens in memory. Every time the app is restarted, the user is prompted to re-login. We will show how to improve this user experience in the final desktop code sample.
Loopback Web Server
If not already started, the loopback web server finds a free port in the app’s configured range, then starts listening:
private async _startServer(): Promise<void> {

    LoopbackWebServer._runtimePort = await this._getRuntimeLoopbackPort();

    LoopbackWebServer._server = Http.createServer(this._handleBrowserRequest);

    LoopbackWebServer._server.listen(LoopbackWebServer._runtimePort);
}

private async _getRuntimeLoopbackPort(): Promise<number> {

    return new Promise<number>((resolve, reject) => {

        const finderCallback = (err: any, freePort: number) => {

            if (err) {
                return reject(err);
            }

            return resolve(freePort);
        };

        FindFreePort(
            this._oauthConfig.loopbackMinPort,
            this._oauthConfig.loopbackMaxPort,
            'localhost',
            1,
            finderCallback,
        );
    });
}
Handling Re-Entrancy
For a reliable solution we need to handle multiple login attempts:
- A user starts a sign in, generating a PKCE code challenge
- The user accidentally closes the browser tab
- The user retries signing in, with different PKCE details
- We must resume the login response with the correct PKCE code verifier
The LoginState class manages this by storing a map of the OAuth state parameter to the corresponding callback:
export class LoginState {

    private _callbackMap: [string, LoginResponseCallback][];

    public constructor() {
        this._callbackMap = [];
        this._setupCallbacks();
    }

    public storeLoginCallback(state: string, responseCallback: LoginResponseCallback): void {
        this._callbackMap.push([state, responseCallback]);
    }

    public handleLoginResponse(queryParams: any): void {

        const state = queryParams.state;
        if (state) {
            const callback = this._getCallbackForState(queryParams.state);
            if (callback) {
                callback(queryParams);
                this._clearState(state);
            }
        }
    }
}
Reliability is Not Perfect
It is probably logically impossible to solve all re-entrancy cases in a perfect manner. If the user clicks Sign In twice, then completes 2 logins, on the second response the web server will be stopped and the user will see this:
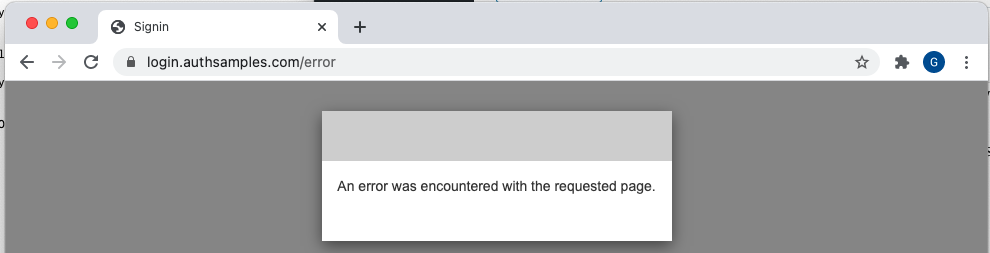
This should usually be OK, since the alternative is to keep a web server running indefinitely and leak resources. We’ve achieved the main reliability goal of preventing users from getting stuck and being unable to retry.
Refreshing Access Tokens
After 15 minutes the desktop app’s access token expires, and the AppAuth TokenRequest classes is used again, to send a token refresh token request, then update tokens stored in memory:
private async _performTokenRefresh(): Promise<void> {

    try {

        await this._loadMetadata();

        const extras: StringMap = {
            scope: this._configuration.scope,
        };

        const requestJson = {
            grant_type: GRANT_TYPE_REFRESH_TOKEN,
            client_id: this._configuration.clientId,
            refresh_token: this._tokens!.refreshToken!,
            redirect_uri: '',
            extras,
        };
        const tokenRequest = new TokenRequest(requestJson);

        const requestor = new CustomRequestor();
        const tokenHandler = new BaseTokenRequestHandler(requestor);
        const tokenResponse = await tokenHandler.performTokenRequest(this._metadata!, tokenRequest);

        const newTokenData = {
            accessToken: tokenResponse.accessToken,
            refreshToken: tokenResponse.refreshToken ? tokenResponse.refreshToken : null,
            idToken: tokenResponse.idToken ? tokenResponse.idToken : null,
        };

        if (!newTokenData.refreshToken) {
            newTokenData.refreshToken = this._tokens!.refreshToken;
        }
        if (!newTokenData.idToken) {
            newTokenData.idToken = this._tokens!.idToken;
        }

        this._tokens = newTokenData;

    } catch (e: any) {

        if (e.error === ErrorCodes.refreshTokenExpired) {

            this._tokens = null;

        } else {

            throw ErrorFactory.getFromTokenError(e, ErrorCodes.tokenRefreshFailed);
        }
    }
}
When the refresh token finally expires, the app receives an error res[pmse with an invalid_grant error code. This is handled by removing tokens from memory and redirecting the user back to the login required view.
Token Expiry Testing
The Authenticator class also has some test methods to enable us to simulate token expiry responses. As for the earlier SPA, this is done by simply adding text to corrupt the token values sent to the API:
public async expireAccessToken(): Promise<void> {

    if (this._tokens && this._tokens.accessToken) {
        this._tokens.accessToken = `${this._tokens.accessToken}x`;
    }
}

public async expireRefreshToken(): Promise<void> {

    if (this._tokens && this._tokens.refreshToken) {
        this._tokens.refreshToken = `${this._tokens.refreshToken}x`;
        this._tokens.accessToken = null;
    }
}
This helps us to visualise expiry behaviour, and to ensure that our app handles the following scenarios reliably:
- Expired access tokens result in a 401 response from the API
- Expired refresh tokens result in token refresh failing
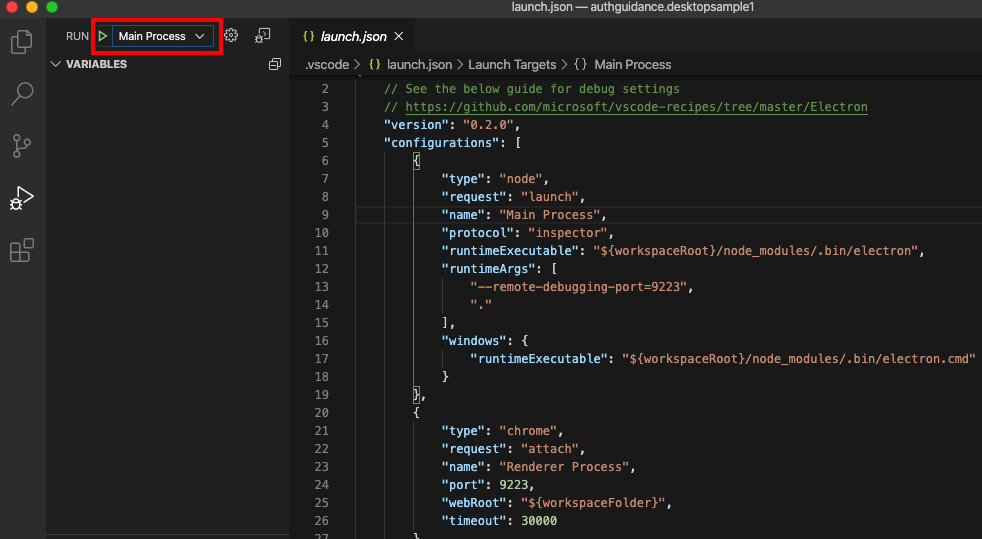
Electron Code Debugging
Our project has a launch.json file that enables us to debug code for both the main and renderer processes:
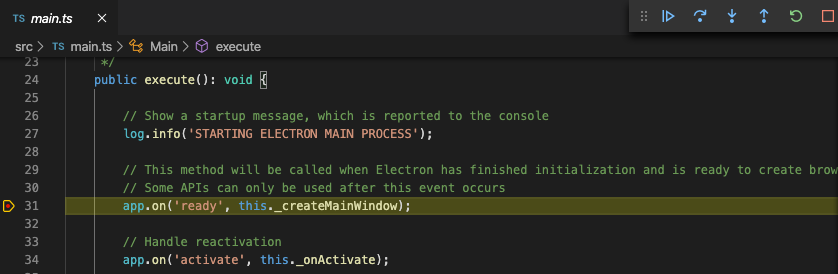
Debugging the main process allows us to step through code related to application startup:
Debugging the renderer process allows us to step through code related to other areas, including viewing properties of AppAuth-JS classes:
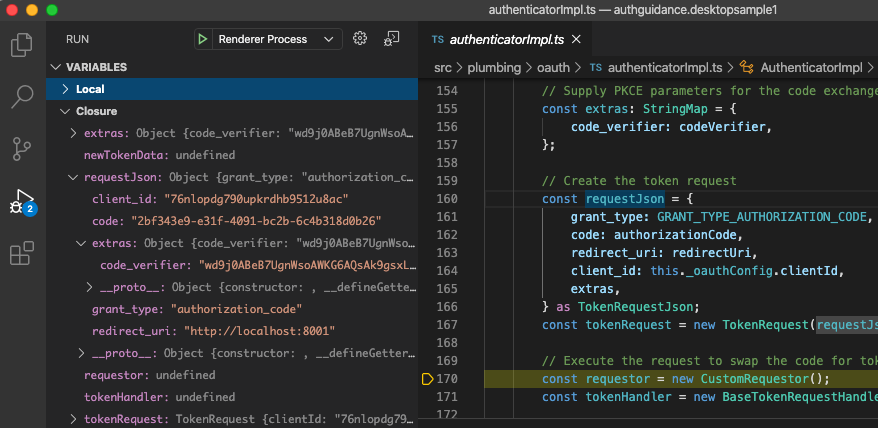
Where Are We?
We have have successfully integrated the AppAuth-JS library to implement an OpenID Connect secured cross platform desktop app. In the next code sample we will harden and complete the security implementation.
Next Steps
- We will provide a Final Desktop Code Sample with completed features
- For a list of all blog posts see the Index Page