Background
Previously the Desktop Code Sample Overview provided a summary of behaviour. Next we will explain how to get the sample running locally and run some OAuth lifecycle events.
Prerequisite: Install Node.js
If required, go to the Node.js website, then download and run the installer for your operating system.
Step 1: Download Code from GitHub
The project is available here, and can be downloaded / cloned to your local PC with this command:
git clone https://github.com/gary-archer/oauth.desktopsample1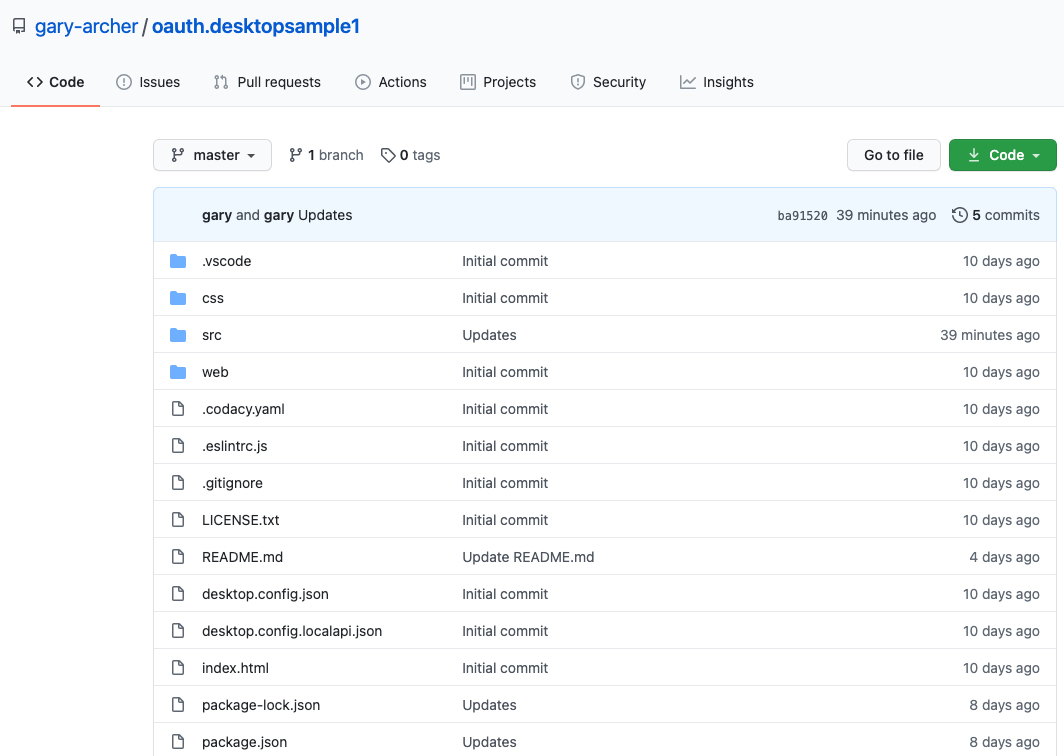
Step 2: View the Code in an IDE
The desktop app re-uses the view code from this blog’s second SPA, and has exactly the same views:
export class CompaniesView {

    private readonly _apiClient: ApiClient;

    public constructor(apiClient: ApiClient) {
        this._apiClient = apiClient;
    }

    public async load(): Promise<void> {

        try {

            const data = await this._apiClient.getCompanyList();
            this._renderData(data);

        } catch (e) {

            DomUtils.text('#main', '');
            throw e;
        }
    }

    ...
}
Step 3: Build and Run the Code
Run the following bash script to build the desktop app’s TypeScript code , then run the executable:
cd oauth.desktopsample1
./start.sh
The UI loads its home page and prepares to call the API, then detects that there is no OAuth access token, so the Login Required View is presented:

Step 4: Login via the System Browser
When Sign In is clicked, the app provides some visual progress that login is taking place externally:
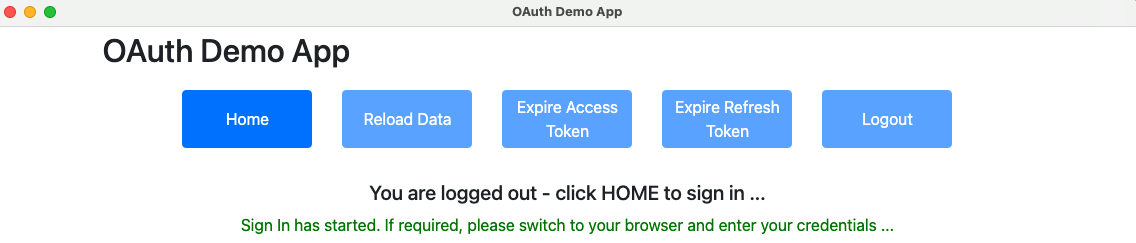
An OAuth authorization redirect is then triggered, in a separate system browser window, and this blog’s test credential can be used to sign in:
- User: guestuser@mycompany.com
- Password: GuestPassword1
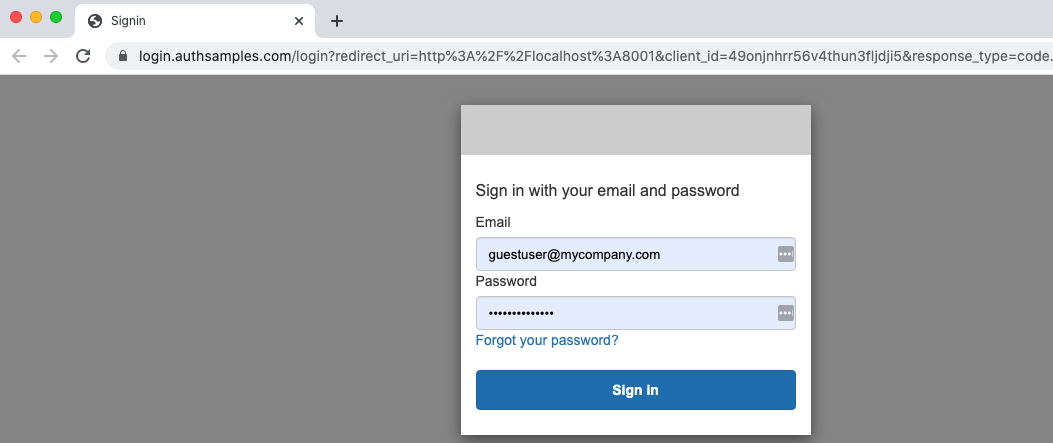
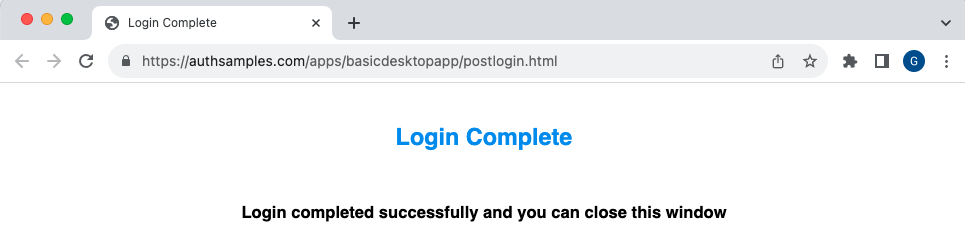
If password autofill was used for the test user, in an earlier SPA login, it is remembered for the desktop app. After login the system browser moves to a simple post login page, rather than showing a blank page. If preferred, the browser could be redirected to an external site instead.
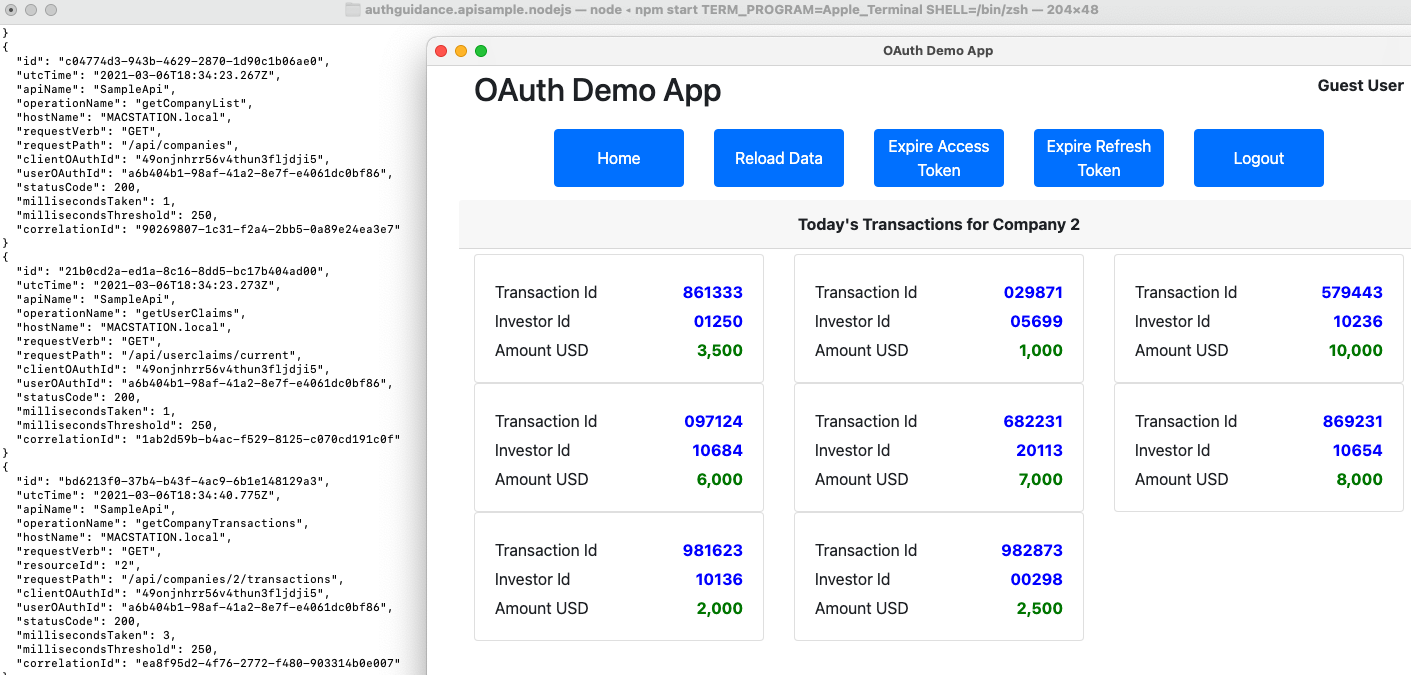
The app is then returned to the foreground and can get OAuth tokens, after which it can successfully get data from a cloud deployed API, then render it:

Step 5: View OAuth Configuration
The desktop app has a JSON configuration file which includes its OAuth settings. By default the app connects to AWS endpoints, so that you only need to run the frontend locally:
{
    "app": {
        "apiBaseUrl":       "https://api.authsamples.com/investments"
    },
    "oauth": {
        "authority":        "https://cognito-idp.eu-west-2.amazonaws.com/eu-west-2_CuhLeqiE9",
        "clientId":         "6o4rlsod8j6phsnuf3pdjo640u",
        "loopbackMinPort":  8001,
        "loopbackMaxPort":  8003,
        "scope":            "openid profile https://api.authsamples.com/investments",
        "postLoginPage":    "https://authsamples.com/apps/basicdesktopapp/postlogin.html"
    }
}
In the default setup the following URLs are used:
| Component | URL(s) |
|---|---|
| API | https://api.authsamples.com |
| Authorization Server | https://login.authsamples.com |
| Post Login Page | https://authsamples.com/apps/basicdesktopapp/postlogin.html |
Note that the JSON configuration also includes details related to running a Loopback Web Server on the local PC:
| Setting | Description |
|---|---|
| Loopback Port Range | Port numbers used in OAuth redirect URIs |
| Post Login Page | Where to send the browser after a login |
Step 6: OAuth Client Registration
Our desktop app is registered as an OAuth Client in AWS Cognito, with the following settings:
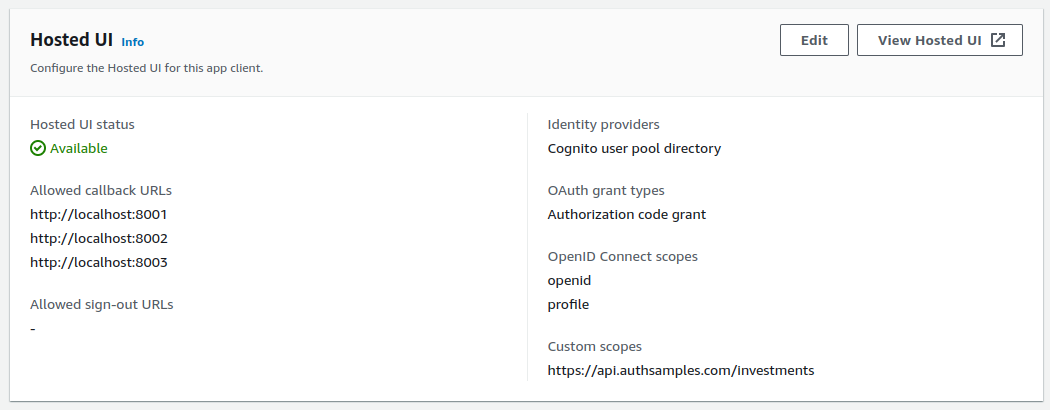
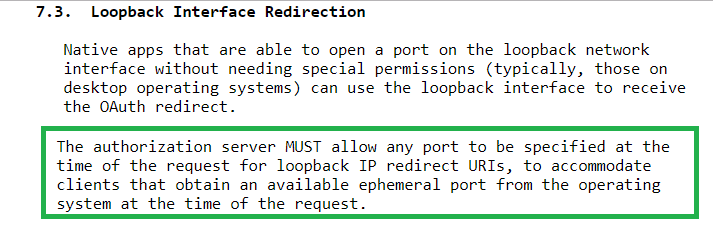
According to RFC8252, it should be possible to register a redirect URI of http://localhost and any port should then be allowed at runtime. Not all authorization servers support this, and for AWS Cognito I had to register all possible redirect URI values.
Step 7: Authorization Redirect
The desktop app uses the Authorization Code Flow (PKCE), as is standard for native apps, and redirect messages are equivalent to those for SPAs.
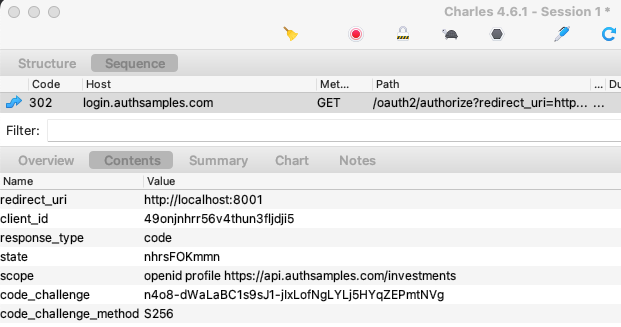
At this point the desktop app has started a local HTTP server. A low privilege port is used, with a value above 1024. The desktop app can therefore start the server without requiring local administrator rights.
Step 8: Login Completion Page
The login completion page was uploaded to an AWS S3 Bucket and then an AWS Cloudfront Distribution was used to expose it over an HTTPS URL:

Step 9: Authorization Code Grant
When the desktop app receives the login response it sends an authorization code grant message to swap the code for OAuth tokens. PKCE is used to prove that the same caller who started the login is ending it.

Step 10: Understand Reactivation of the App
When login completes, you may find that the browser remains topmost and the user may have to manually switch back to the desktop app. Private URI scheme based logins have the best support for returning the app to the foreground, as will be demonstrated in the final desktop code sample.
Step 11: Test Login Re-Entrancy
A busy user could fail to complete a login and close the browser window, leaving the UI in the following state. Our app allows the user to provide a gesture to retry the login, by clicking the Home button:
Step 12: Simulate Expiry Events
We can use the UI’s session buttons to simulate expiry related events during a user session:
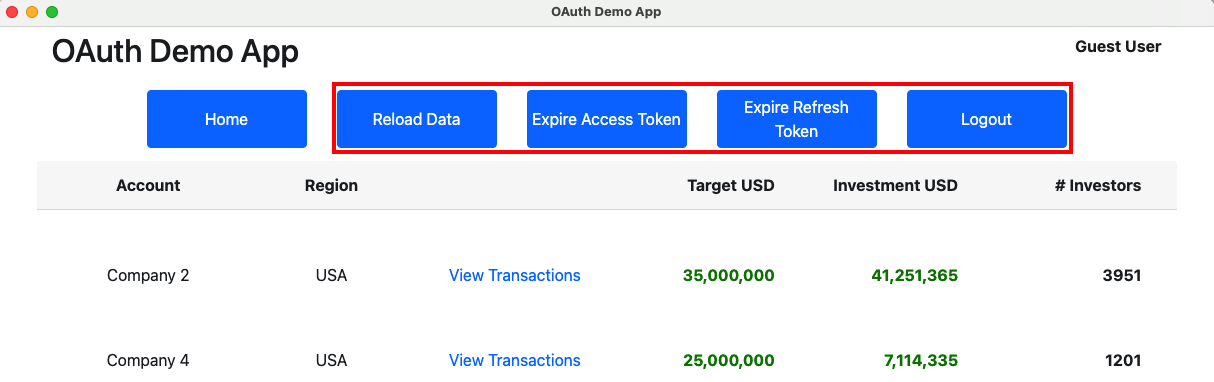
Our first sample only stores tokens in memory, so that if we use the Reload option in the Electron menu, tokens are lost and the user has to sign in again. We will improve on this for the final code sample.
Step 13: Test Access Token Expiry
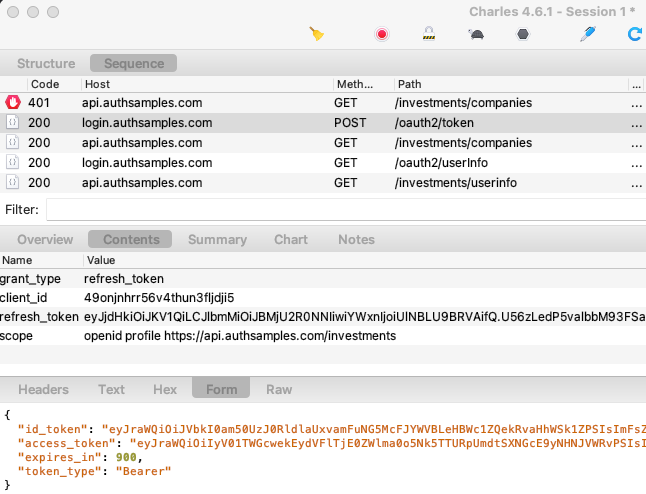
We can rehearse access token expiry by clicking Expire Access Token followed by Reload Data. This adds characters to the access token so that the API returns a 401 response. The app then sends a Refresh Token Grant message to get a new access token and retries API requests. Note that a desktop app is a public client and the refresh token is not protected with a client credential:
Step 14: Test Refresh Token Expiry
We can rehearse refresh token expiry by clicking Expire Refresh Token followed by Reload Data. This adds characters to the refresh token so that the Authorization Server returns an invalid_grant response:
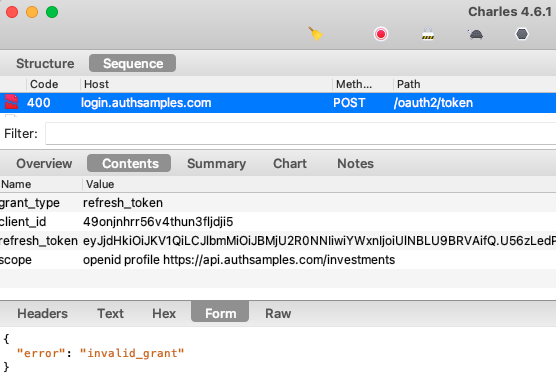
This error code means the user needs to sign in again, so we redirect the user to the Login Required view.
Step 15: Build the Desktop App Executable
To build the app for distribution you can execute the ‘./pack.sh‘ script, which builds the app into a platform specific executable file under the dist folder, then runs it.
Local API Setup
If required, you can run the desktop app against a local OAuth secured API. Do so for one of this blog’s final APIs, by following the below steps.
Step A: Run the API
Select one of the following API options and follow its instructions to run it locally:
Step B: Point the Desktop App to a Local API
To connect to local APIs, update the URL in the desktop.config.json file to the local PC value of https://api.authsamples-dev.com:446/investments:
{
    "app": {
        "apiBaseUrl":       "https://apilocal.authsamples-dev.com:446/investments"
    },
    "oauth": {
        "authority":        "https://cognito-idp.eu-west-2.amazonaws.com/eu-west-2_CuhLeqiE9",
        "clientId":         "6o4rlsod8j6phsnuf3pdjo640u",
        "loopbackMinPort":  8001,
        "loopbackMaxPort":  8003,
        "scope":            "openid profile https://api.authsamples.com/investments",
        "postLoginPage":    "https://authsamples.com/apps/basicdesktopapp/postlogin.html"
    }
}
Step C: Run the Desktop App
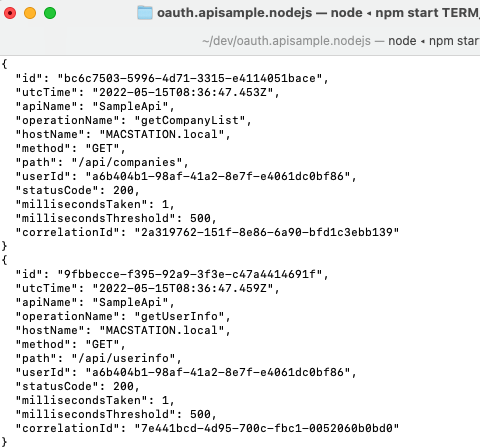
When you now run the desktop app it will call the local API, and you can also focus on API behaviour, such as OAuth and log handling:
Where Are We?
We have used our second SPA to build an OAuth Secured Desktop App, which runs on all of the main operating systems. At this stage the app has some limitations which will be resolved in the second desktop sample.
Next Steps
- Next we will cover some Coding Key Points
- For a list of all blog posts see the Index Page