Background
Previously we put in place an initial iOS Setup and ran the AppAuth iOS Code Sample. Next we will focus on viewing HTTPS mobile traffic from simulators and devices on a development computer.
Run the HTTP Proxy on the Host
First configure and run the HTTP proxy on the host computer, as described in our earlier write up on HTTPS Debugging:
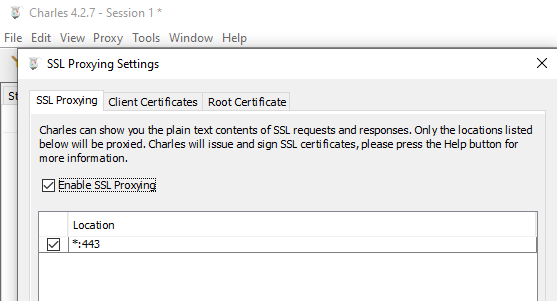
We also need to instruct the proxy to decrypt SSL traffic, as covered in our page on SSL Trust Configuration:
Determine the Computer’s IP Address
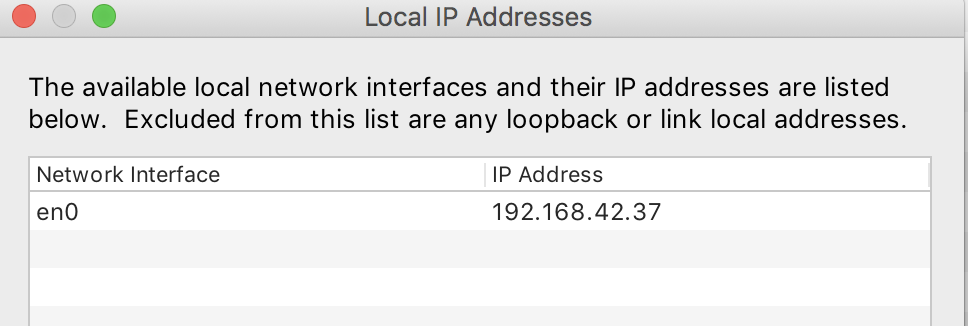
I use the Charles menu item Help / Local IP Address to find my local computer’s IP address, since I usually run on a WiFi network where the IP address is auto assigned:
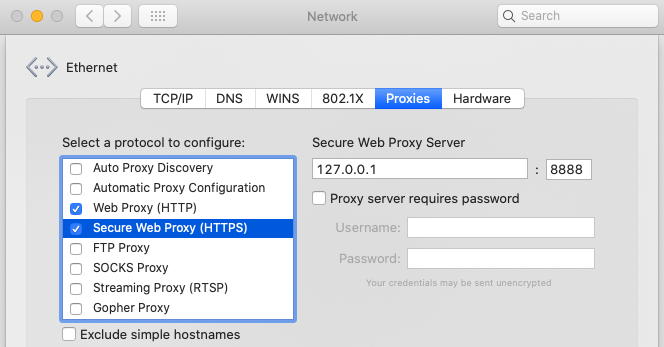
Configure iOS Simulator Proxy Settings
With iOS Simulators there are quite a few places where we cannot emulate a real device. One of these is network settings, where the simulator instead always uses the local computer’s network:
An HTTP proxy running on the local computer automatically comes into effect for the app on the simulator, which as long as the proxy is started before the simulator.
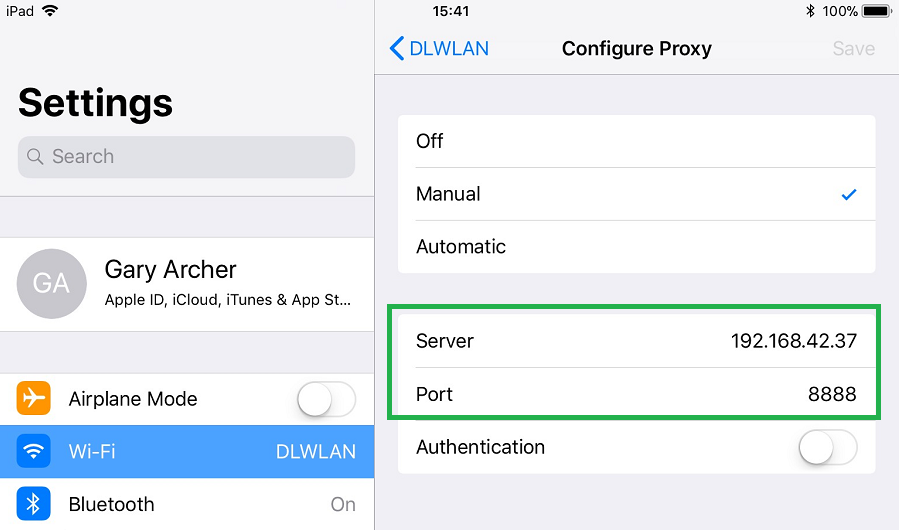
Configure iOS Device WiFi Proxy Settings
For a real iOS device we need to first click the specific network under Settings / Wi-Fi. Next select the Configure Proxy option, then select Manual and enter details similar to the below screenshot:
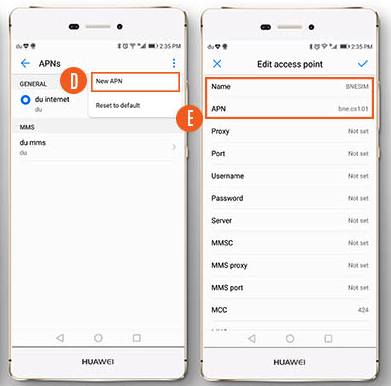
iOS Device Cellular Proxy Settings
If you ever need to proxy over a cellular network you need to first select Settings / Mobile Data / Mobile Data Options / Mobile Network. Then add an Access Point Name along with its proxy host and port details:
Understand Initial SSL Errors
If we now run the system browser or the AppAuth Sample on the iOS device, there will be an attempt to proxy the traffic over HTTPS, and this will result in SSL Trust errors:
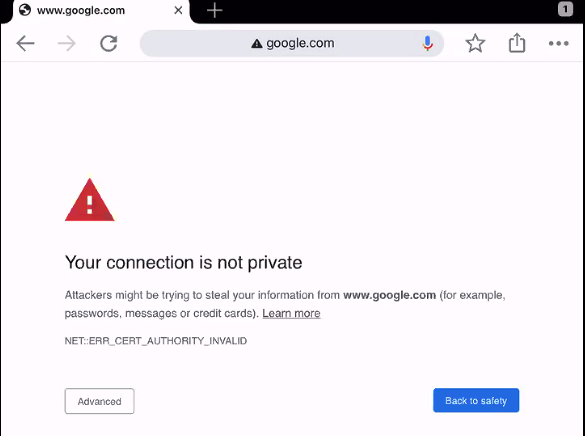
This is because the HTTP Proxy is intercepting SSL requests at runtime and replacing the Root Certification Authority. To fix this we need to configure simulators and devices to trust the HTTP Proxy’s Root Certificate.
Deploy the HTTP Proxy Root Certificate
If you are using the MITM Proxy tool, you can just browse from a mobile browser on the device or simulator to http://mitm.it/. Then download the certificate to the device’s Downloads folder.
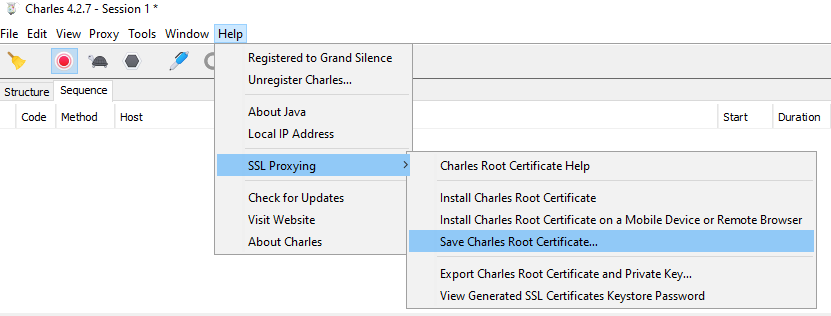
Otherwise, there will be an export option similar to that shown below, so use it to save the HTTP Proxy Root Certificate to the local computer.
Rename the file so that it has a .CRT extension. You can then email the certificate to the device. Alternatively you can run an HTTP server to download the file using a mobile browser. The following steps do this using one of this blog’s code samples:
- git clone https://github.com/gary-archer/oauth.websample1
- cd oauth.websample1/api
- cp ~/Desktop/charlesroot.pem ../spa
- npm install
- npm start
- Run the Safari browser on the simulator
- Get the local computer’s IP address, such as 192.168.42.37
- Browse to a URL such as http://192.168.42.37/spa/charlesroot.pem
However you deliver the certificate, save it to the Downloads folder. In the following example I received an email and selected Save to Files:
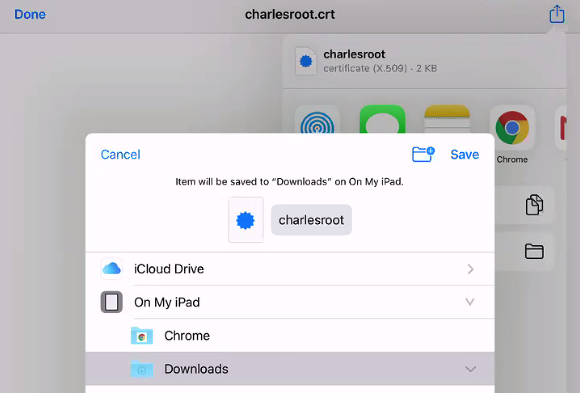
Configure iOS SSL Trust
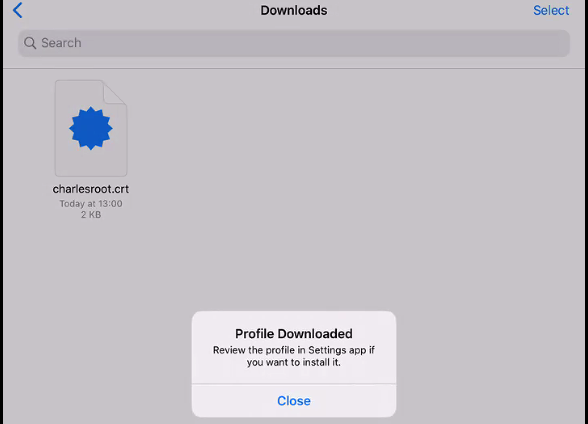
Next open the Files app and navigate to the certificate. When you tap the file you will then see a prompt that a profile has downloaded:
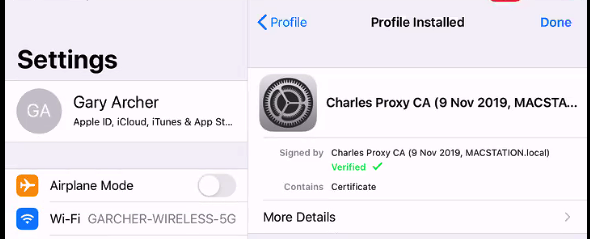
Under Settings / General / Device Management there will now be a Profile option, and when opened we will see our root certificate:

Select the Install option and follow prompts:
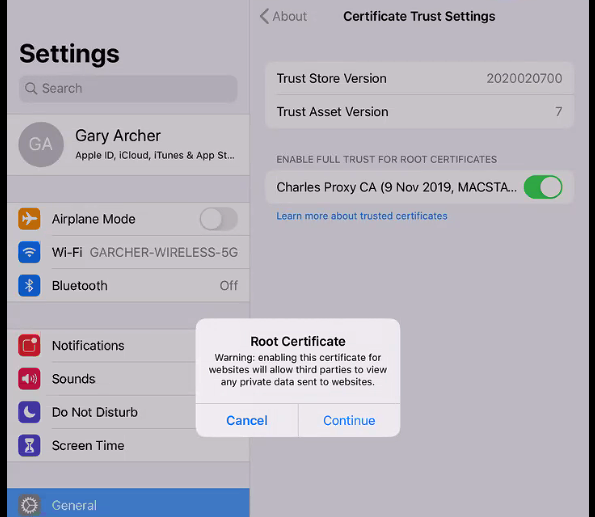
Finally switch to Settings / General / About / Certificate Trust Settings and activate the certificate:
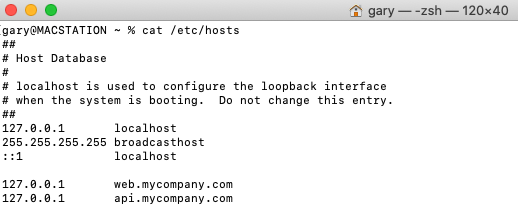
Understand Domain Name Service Lookup
During mobile development it can be useful to also run a local API, with a real world API URL such as https://api.mycompany.com/api. To support this I add a local DNS entry on my local computer:
On iOS the DNS settings from the host computer are automatically used by simulators so DNS resolution succeeds, whether or not the proxy tool is running.
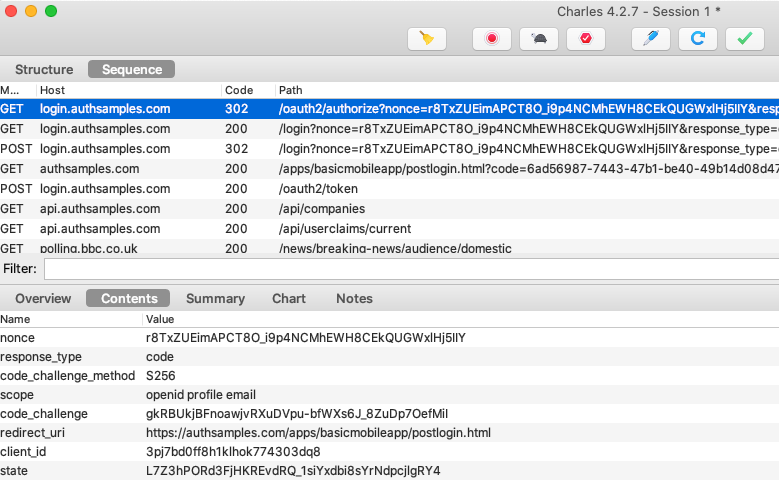
OAuth and API HTTPS Traffic is Now Viewable
On all simulators and devices we can now view OAuth and API HTTPS messages, which can be a big help when we need to troubleshoot.
Where Are We?
We have now completed our iOS HTTP debugging setup, and will now move on to describe this blog’s fully functional OAuth mobile samples.
Next Steps
- Next we will start describing our Secured Android App’s Behaviour
- For a list of all blog posts see the Index Page