Background
Previously we took a look at some backend technical behaviours in API Journey – Server Side. Next we will take a look at the API journey for frontend applications, as implemented by this blog’s final code samples:
Configuration
OAuth clients typically start by loading their configuration, which provides details such as backend base URLs. For native apps this includes OAuth client settings:
{
    "app": {
        "apiBaseUrl": "https://api.authsamples.com/investments",
    },
    "oauth": {
        "authority":             "https://cognito-idp.eu-west-2.amazonaws.com/eu-west-2_qqJgVeuTn",
        "clientId":              "1h8pildfi6a4bmfv2alj3fs6va",
        "redirectUri":           "https://authsamples.com/apps/finaldesktopapp/postlogin.html",
        "privateSchemeName":     "x-mycompany-desktopapp",
        "scope":                 "openid profile https://api.authsamples.com/investments",
        "customLogoutEndpoint":  "https://login.authsamples.com/logout",
        "postLogoutRedirectUri": "https://authsamples.com/apps/finaldesktopapp/postlogout.html",
        "logoutCallbackPath":    "/logoutcallback"
    }
}
Views
In most modern frontend technology stacks, the UI usually starts with a main view or application shell:
const root = ReactDOM.createRoot(document.getElementById('root') as HTMLElement);
root.render (
    <StrictMode>
        <ErrorBoundary>
            <BrowserRouter basename={BasePath.get()}>
                <App {...props} />
            </BrowserRouter>
        </ErrorBoundary>
    </StrictMode>
);
The shell then lays out a tree of views, and some of them will call APIs when they load. This results in multiple API requests that execute or are in-flight concurrently:
<>
    <TitleView {...getTitleProps()} />
    <HeaderButtonsView {...getHeaderButtonProps()} />
    {model.error && <ErrorSummaryView {...getErrorProps()} />}
    {model.isLoaded &&
        <>
            <SessionView {...getSessionProps()} />
            <Routes>
                <Route path='/companies/:id' element={<TransactionsContainer {...getTransactionsProps()} />} />
                <Route path='/loggedout'     element={<LoginRequiredView {...getLoginRequiredProps()} />} />
                <Route path='/*'             element={<CompaniesContainer {...getCompaniesProps()} />} />
            </Routes>
        </>
    }
</>
This Blog’s Example Views
This blog’s final UIs are all pretend apps based on a theme of protecting money based data. The business area is one of investments, that are administered by some kind of manager. There are two users, where the first has business permissions to one region:

The second user has higher privileges, for multiple regions:

The API’s authorization filters resources using claims, so that the first user only sees American data. A transactions view also exists, where access is denied if the first user tries to change the browser URL to a non American resource:

The API uses the following user attributes and the UI aims to visualise the use of claims:
| User Attribute | Represents |
|---|---|
| Scope | The main scope in the client’s access token is called ‘investments‘ to represent the app’s business area. |
| Manager ID | The API receives its business user identity in access tokens sent by the client, though the UI does not use this value. |
| Role | This is used for API authorization, and grants the admin role access to all regions shown in the UI. The role is stored in identity data and is issued to access tokens. |
| Regions | This is used for API authorization, and only allows other users access to their region(s). It is meant to represent a finer grained business permission not issued to the access token. |
| Name | The UI downloads data from the OAuth user info endpoint, then displays the given_name and family_name fields. |
| Title | In the example, the user title is also stored outside the identity data. The UI displays this and the user’s regions in a tooltip. Both are downloaded from an API user info endpoint. |
This use of claims is similar to that in any moderately complex real world system, where some user attributes will be stored in the identity data and others in the business data. The UI and API operate on both types of user attribute, in a way that is easy for a software company to extend.
Views, Models and Data Loading
For a React app, the code to load a view that calls APIs looks similar to this. The view asks its view model to fetch data from APIs. This is done in an async manner, to avoid blocking the UI thread. The view also binds to the model’s data, or renders an error when API requests fail unexpectedly:
export function CompaniesContainer(props: CompaniesContainerProps): JSX.Element {

    const model = props.viewModel;
    model.useState();

    useEffect(() => {
        startup();
        return () => cleanup();
    }, []);

    CurrentLocation.path = useLocation().pathname;

    async function startup(): Promise<void> {
        model.eventBus.on(EventNames.ReloadData, onReload);
        await loadData();
    }

    function cleanup(): void {
        model.eventBus.detach(EventNames.ReloadData, onReload);
    }

    async function loadData(options?: ViewLoadOptions): Promise<void> {
        await model.callApi(options);
    }

    return (
        <>
            ...
        </>
    );
}
The view model then calls a lower level fetch client to do the work of calling the API. It then updates its data, causing the view to re-render:
public async callApi(options?: ViewLoadOptions): Promise<void> {

    const fetchOptions = {
        cacheKey: FetchCacheKeys.Companies,
        forceReload: options?.forceReload || false,
        causeError: options?.causeError || false,
    };

    this._viewModelCoordinator.onMainViewModelLoading();
    this._updateError(null);
    this._updateCompanies([]);

    try {

        const result = await this._apiClient.getCompanyList(fetchOptions);
        if (result) {
            this._updateCompanies(result);
        }

    } catch (e: any) {

        this._updateError(ErrorFactory.fromException(e));
        this._updateCompanies([]);

    } finally {

        this._viewModelCoordinator.onMainViewModelLoaded(fetchOptions.cacheKey);
    }
}
View Recreation
In modern UI stacks such as React, Android Jetpack or Swift UI, views can be recreated many times, but view models and data should be created only once. To re-enforce this, React strict mode (in debug builds) immediately re-runs the view while the async code in the useEffect hook is executing.
This causes a duplicate API request, and the idea is to force developers to write efficient UIs, that avoid unnecessary APIs requests. This leads to a design of caching API responses in the front end, in a thread safe dictionary, with a URL based cache key:
export class FetchCache {
    private readonly _requests: Record<string, FetchCacheItem> = {};
}
This blog’s final UIs all follow this approach. The user is also given a reload option, which is broadcast to views using a publish subscribe mechanism, such as an in-memory event bus. The caching makes the views feel fast during forward or back navigation, and also lightens the load on APIs.
The Initial Login Redirect
During the initial API request, the views do not have an API message credential so cannot call APIs. This is managed by the fetch client throwing a ‘login required‘ error, which is stored in the fetch cache.
Multiple views could throw this error at the same time. Therefore a ViewModelCoordinator class is notified after each view has tried to load. Once all view models have executed, this object inspects the fetch cache and sends a single event when required, to trigger a login redirect.
Security Libraries
The OAuth work for the UI must then be performed, to trigger an OpenID Connect code flow. This is done by plugging in a third party library, or Backend for Frontend in the case of the SPA. By default, I aim to use a respected standards based library.
This blog’s final UIs wrap use of libraries in an AuthenticatorImpl class. In the event of library limitations or problems it could be swapped out, without impacting the rest of the app. If required, the logic to implement a code flow and other lifecycle operations is fairly easy to code manually.
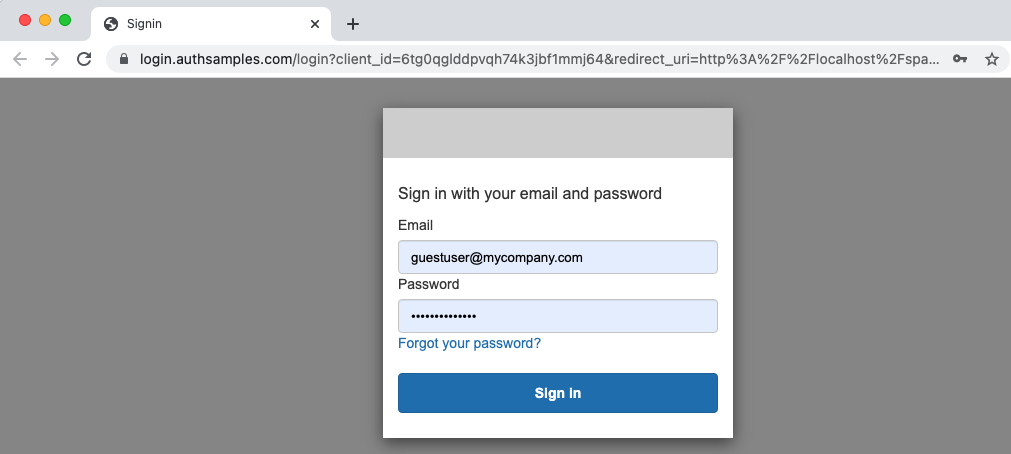
The Login Flow
The login flow looks different for web, desktop and mobile platforms. For a web client the entire browser window is redirected. This blog’s default authorization server is configured to use only basic password logins:
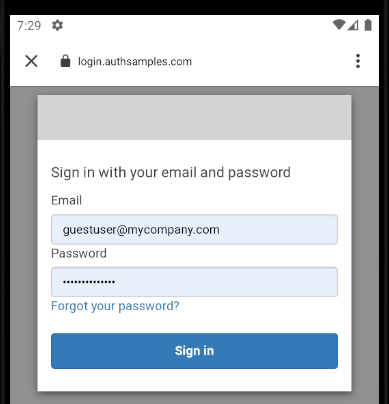
For mobile clients an integrated browser overlays the views, which wait on the response:
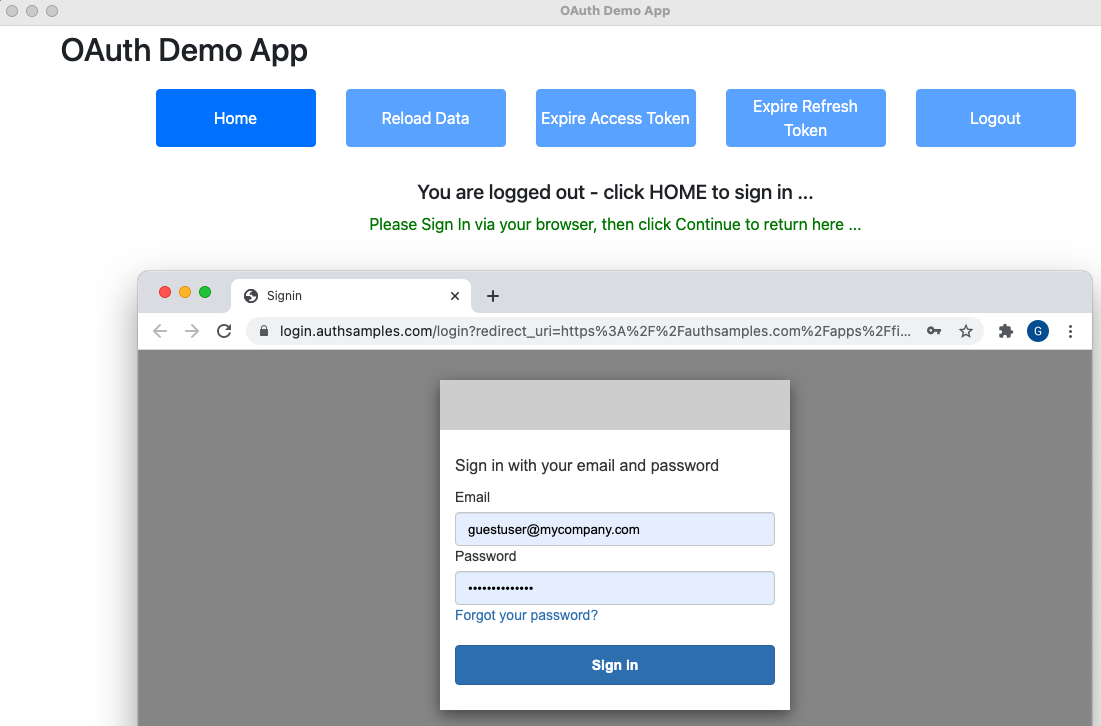
For a desktop client, the app renders a ‘login in progress‘ window, while the user signs in via a disconnected system browser:
After login, the previous frontend views retry API requests. Session cookies are written for the SPA, which are discarded when all browser windows are closed. For native apps, tokens are instead saved to operating system secure storage, to avoid a re-login on every application restart.
Applications Support any Authentication Method
Although password logins are used, use of a code flow means that all apps support any form of user authentication the authorization server supports. Changing authentication should usually require zero code changes to applications, and the API identity in access tokens should stay the same.
Concurrent API Requests
Views send an API credential to get data, representing the access token. The final UIs send an API request to get the current main view’s data, as well as two small API requests to get user info for the upper right view:

The user can then navigate around views to trigger further API calls, if that view’s data has not been loaded yet. A forced reload of data is possible by clicking the reload button, which re-runs the 3 API requests concurrently.
Expiry Events
At some point the token used to call APIs will expire. This can be rehearsed by clicking Expire Access Token followed by Reload Data. Doing so triggers 3 API requests that fail with a 401 error. This is followed by a synchronized token refresh, after which the API requests are retried and succeed:

Any resilient client should support this behaviour, since there could be multiple reasons why an access token is rejected by APIs with a 401 error. This blog manages synchronized token refresh as follows:
public async synchronizedRefresh(): Promise<void> {
    await this._concurrencyHandler.execute(this._performTokenRefresh);
}
The concurrency handler queues up promises in a thread safe array, then only makes the actual refresh call for the first caller, then returns the same result to all callers:
public async execute(action: () => Promise<void>): Promise<void> {

    const promise = new Promise<void>((resolve, reject) => {

        const onSuccess = () => {
            resolve();
        };

        const onError = (error: any) => {
            reject(error);
        };

        this._callbacks.push([onSuccess, onError]);
    });

    const performAction = this._callbacks.length === 1;
    if (performAction) {

        try {

            await action();

            this._callbacks.forEach((c) => {
                c[0]();
            });

        } catch (e: any) {

            this._callbacks.forEach((c) => {
                c[1](e);
            });
        }

        this._callbacks = [];
    }

    return promise;
}
Eventually the UI’s refresh token will also expire. This can be simulated by clicking Expire Refresh Token followed by Reload Data. The token refresh request then returns an invalid_grant error code. The UI then triggers another login redirect, in the same way as the initial login redirect.
Deep Linking
All of this blog’s UIs support deep linking, to enable users to bookmark locations within the app. Some example deep linked URLs for each platform are shown here:
| Client Type | Deep Linking URL |
|---|---|
| SPA | https://web.authsamples.com/spa/companies/2 |
| Desktop | x-mycompany-desktopapp:/companies/2 |
| Android | https://mobile.authsamples.com/basicmobileapp/deeplink/company/2 |
| iOS | https://mobile.authsamples.com/basicmobileapp/deeplink/company/2 |
These commands trigger views to run, which may then trigger API requests. These could fail if an access token needs refreshing, or the user needs to re-authenticate. In such cases this blog’s UIs return to the requested view once any OAuth work is complete.
UIs and APIs are Supportable
UIs and APIs will follow this blog’s Error Handling and Supportability Design. API requests, or OAuth operations that they trigger, could fail, in which case the view renders an error link. API 500 errors can be rehearsed by long pressing the Reload Data button for a few seconds:

Clicking a link invokes an Error Details Display that provides hints to technical support staff on the cause. For API exceptions an Error ID is shown, which references an entry in API logs, to enable details to be quickly looked up:

The API Session ID shown in the browser is nothing to do with OAuth, but could be used to enable a technical user of the SPA to query the API logs their session generates. See the Technical Support Analysis post for details.
Clients Handle Advanced Failures
OAuth clients can experience some advanced failure scenarios that are difficult to reason about, due to the three way relationship between the client, the APIs it calls and the authorization server. The best way to deal with error events reliably is to rehearse them.
| Failure Scenario | Resilient Application Behaviour |
|---|---|
| Key Renewal | Token signing keys, or cookie encryption keys used by SPAs, are sometimes renewed in an abrupt way. This blog’s clients manage this by receiving 401 response in API requests, after which token refresh fails with a session expired error. This causes a new login redirect and avoids user errors. |
| Redirect Loops | This blog’s apps don’t trigger an authorization redirect when a 401 error is returned from APIs. Instead, redirects only occur when there is no access token yet or if token refresh fails with a session expired error. Doing so prevents the possibility of redirect loops. |
| Invalid Tokens | OAuth configuration mistakes can cause clients to be issued invalid access tokens that are rejected by APIs, even though token refresh works. The client should then present an error, but clear token state. Once configuration is fixed, the user can trigger a new authorization redirect, after which the client receives corrected tokens. |
Client Responsibilities are Separated
This blog’s final UIs are coded in multiple technologies. The code is largely identical regardless of the programming language or platform, since all implementations have the same application behaviour:
- A Single Page Application developed in React
- A Desktop App developed in Electron
- Mobile Apps developed in Kotlin and Swift
In order to provide the behaviours articulated on this page, some plumbing code is needed. A folder structure is used that starts by classifying each class as either view related or plumbing related.

The goal in a real company would be to grow the views and view models. It should be possible to externalize some of the plumbing to one or more shared libraries, so that the frontend code is mostly business focused.
Developers Run a Productive Setup
All frontends can be developed in isolation, and pointed to remote API URLs. This includes deploying a remote backend for frontend to enable productive SPA development.

The development samples use SSL connections to backend components, with realistic domain names. This best enables deployment related thinking during development. I avoid URLs such as http://localhost:3000.
Where Are We?
This post has summarized a non-functional journey for API clients whose complexity is not caused by OAuth. The same intricacies would exist if any other security framework was used.
In this blog, the difficult areas are dealt with as early as possible in the software pipeline, on a development computer. Doing so should improve quality and result in more predictable business delivery.
Next Steps
- The next post moves on to this blog’s Effective API Logging design
- For a list of all blog posts see the Index Page
One thought on “API Journey – Client Side”
Comments are closed.