Background
Previously we provided an Overview of our Android App’s Behaviour and next we will describe how to run and test the code sample. Readers who are new to Android development may also want to browse these earlier pages:
Prerequisite: Install Android Studio
We can run our sample on macOS, Windows or Linux, but first install an up to date version of Android Studio, so that you have access to the latest Kotlin and Jetpack features.
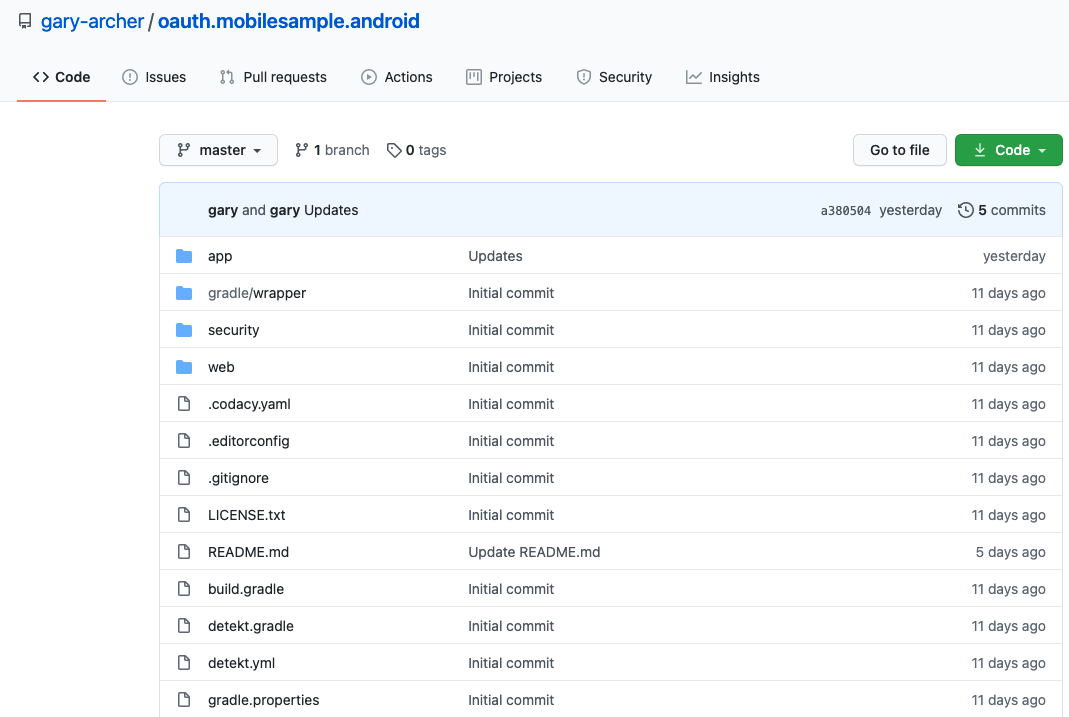
Step 1: Download the Code
The project is available here, and can be downloaded / cloned to your local PC with the following command:
- git clone https://github.com/gary-archer/oauth.mobilesample.android
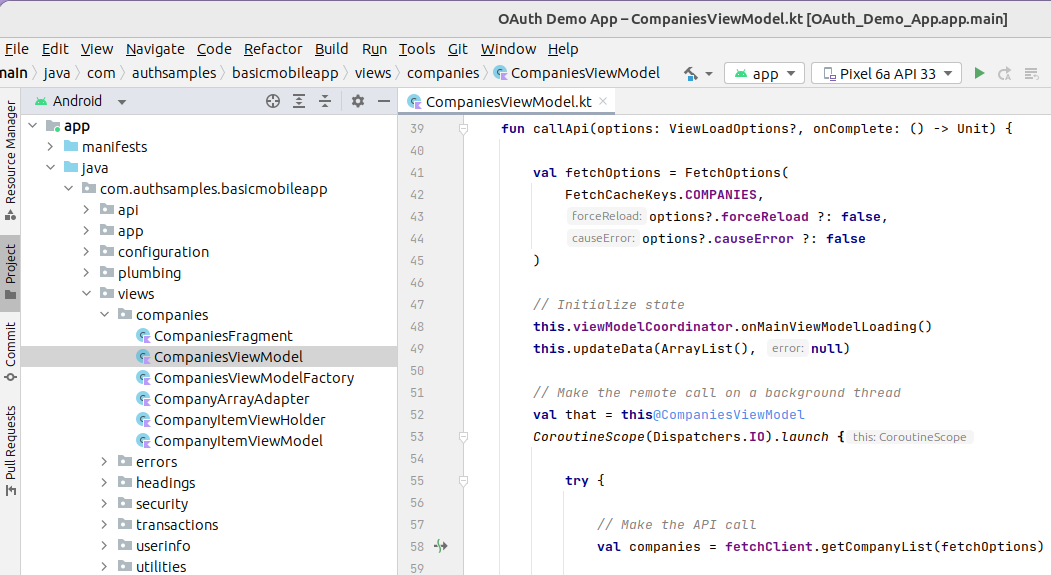
Step 2: Open the Project in Android Studio
Shortly we will describe the Coding Model, where we implement OAuth integration in an unobtrusive manner, so that Android views only need to make simple API calls and other classes deal with OAuth plumbing:
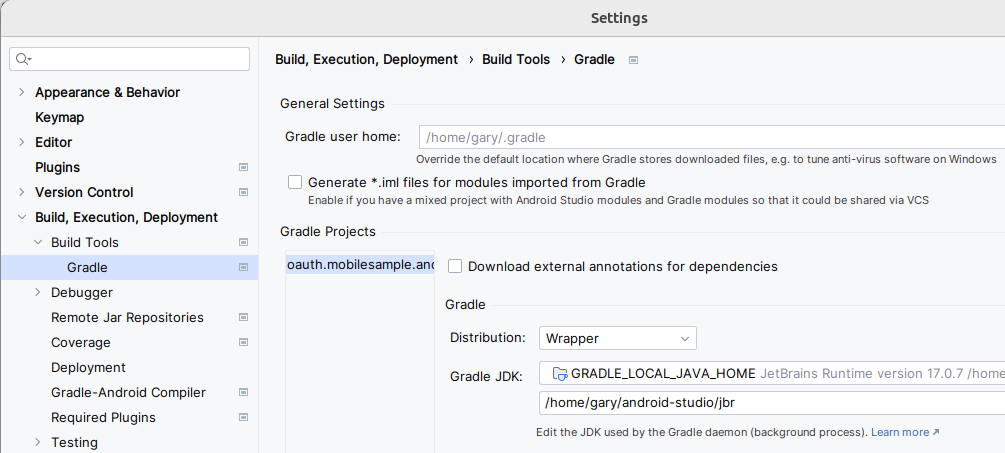
When the project is loaded there will be a Gradle Sync to download third party libraries. Ensure that this completes successfully, and also that Java 17 is configured under Preferences / Build,Execution,Deployment / Build Tools / Gradle / Gradle JDK:
Step 3: Run the App on an Emulator
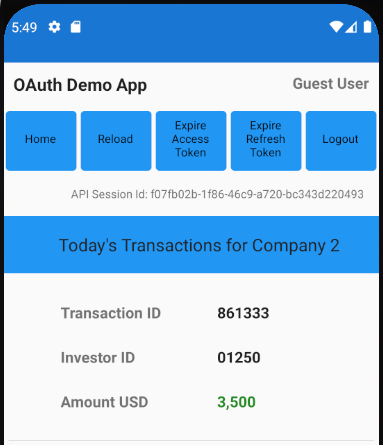
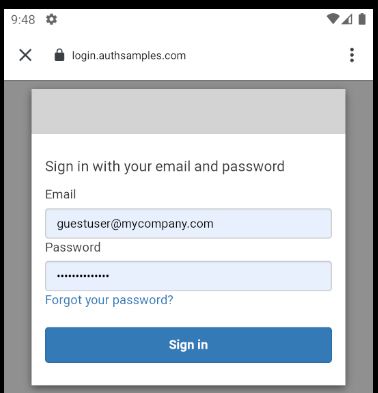
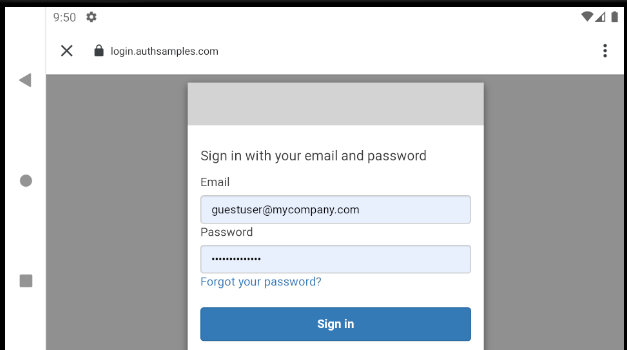
You can now run our demo app via the Run Icon in the Android Studio toolbar. You may then get an initial prompt to Secure Your Device, after which you will be able to login with the following test credential:
- User: guestuser@mycompany.com
- Password: GuestPassword1
Next save the password when prompted, then navigate between fragments by clicking an item in the Companies view or using the Home button:
Step 4: View Library Dependencies
View the app’s build.gradle.kts file to understand the our Single Activity App’s third party dependencies, which include the AppAuth Library. The app requires Android 8 (SDK 26) and above, since this simplifies some areas of the Android implementation.
object VERSION {
    const val kotlin_extensions = "1.12.0"
    const val compose = "1.8.0"
    const val compose_bom = "2023.09.02"
    const val compose_ui = "1.5.3"
    const val material3 = "1.1.2"
    const val navigation = "2.7.4"
    const val appauth = "0.11.1"
    const val browser = "1.6.0"
    const val okhttp = "4.11.0"
    const val gson = "2.10.1"
    const val okio = "3.4.0"
    const val eventbus = "3.3.1"
    const val detekt = "1.23.1"
}

dependencies {

    implementation("androidx.core:core-ktx:${VERSION.kotlin_extensions}")

    implementation("androidx.activity:activity-compose:${VERSION.compose}")
    implementation(platform("androidx.compose:compose-bom:${VERSION.compose_bom}"))

    implementation("androidx.navigation:navigation-ui-ktx:${VERSION.navigation}")
    implementation("androidx.navigation:navigation-compose:${VERSION.navigation}")

    implementation("androidx.compose.ui:ui:${VERSION.compose_ui}")
    implementation("androidx.compose.ui:ui-graphics:${VERSION.compose_ui}")
    implementation("androidx.compose.material3:material3:${VERSION.material3}")

    implementation ("net.openid:appauth:${VERSION.appauth}")

    implementation ("androidx.browser:browser:${VERSION.browser}")

    implementation ("com.squareup.okhttp3:okhttp:${VERSION.okhttp}")
    implementation ("com.google.code.gson:gson:${VERSION.gson}")

    implementation ("com.squareup.okio:okio:${VERSION.okio}")

    implementation ("org.greenrobot:eventbus:${VERSION.eventbus}")
}
Step 5: View the Single Activity Configuration
View the Android Manifest File to see the declaration of our Single Activity, which runs in Single Top mode, meaning it is by default created only once, in a similar manner to the main window in an SPA.
<activity
        android:name=".app.MainActivity"
        android:exported="true"
        android:launchMode="singleTop"
        android:configChanges="orientation|screenSize">

    <intent-filter>
        <action android:name="android.intent.action.MAIN"/>
        <category android:name="android.intent.category.LAUNCHER"/>
    </intent-filter>
</activity>
Step 6: Understand Configuration Settings
When our app runs it uses the API and OAuth settings from an embedded JSON configuration file at res/raw/mobile_config.json:
{
  "app": {
    "apiBaseUrl":             "https://api.authsamples.com/investments"
  },
  "oauth": {
    "authority":              "https://cognito-idp.eu-west-2.amazonaws.com/eu-west-2_CuhLeqiE9",
    "userInfoEndpoint":       "https://login.authsamples.com/oauth2/userInfo",
    "clientId":               "2vshs4gidsbpnjmsprhh607ege",
    "webBaseUrl":             "https://authsamples.com",
    "loginRedirectPath":      "/apps/basicmobileapp/postlogin.html",
    "postLogoutRedirectPath": "/apps/basicmobileapp/postlogout.html",
    "scope":                  "openid profile email https://api.authsamples.com/investments",
    "deepLinkBaseUrl":        "https://mobile.authsamples.com",
    "customLogoutEndpoint":   "https://login.authsamples.com/logout"
  }
}
Step 7: Configure HTTPS Debugging
We will look at some OAuth messages in the following sections. To view these messages on your own PC you will need a working HTTPS Debugging Setup, or you can just view the below screenshots if you prefer.
Step 8: Understand Login Redirects
By using AppAuth libraries the standard Authorization Code Flow (PKCE) message is sent:
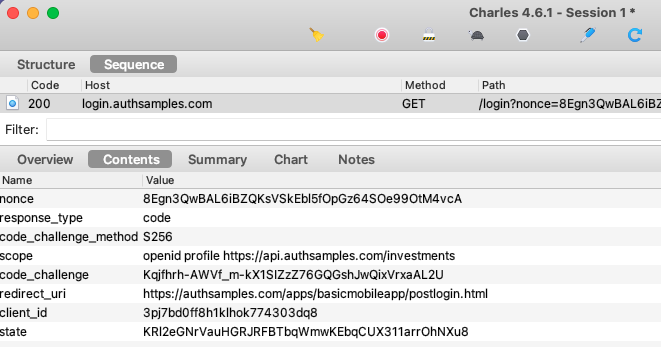
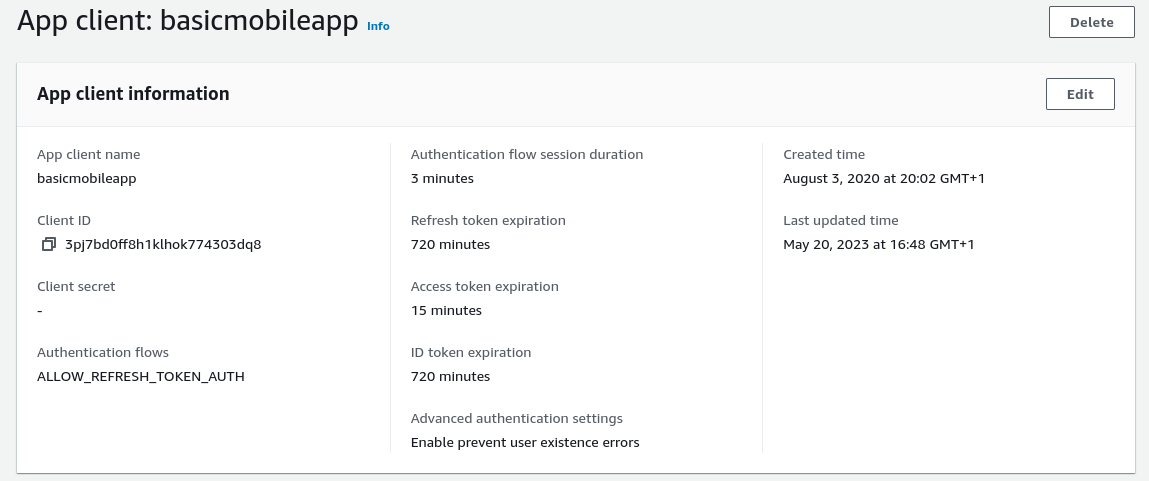
Our AWS Cognito Authorization Server accepts the request and issues an authorization code because the Client ID, Redirect URI and Scopes of the request match those configured in a Cognito OAuth Client:
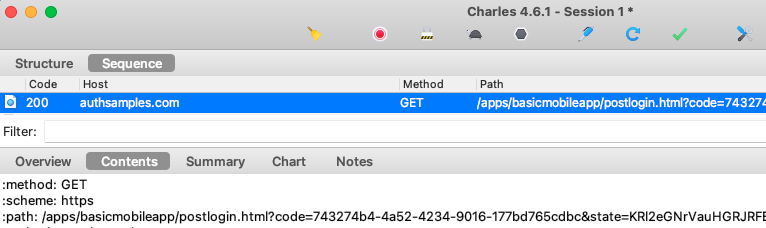
Step 9: Understand Redirect Response Handling
The result of successful authorization is the following message, and note that this is sent to an internet hosted web page rather than directly to our Android app:
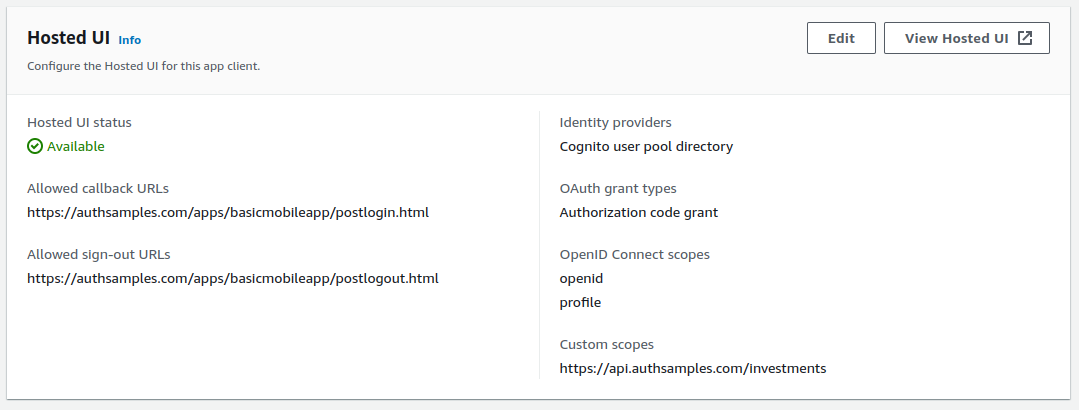
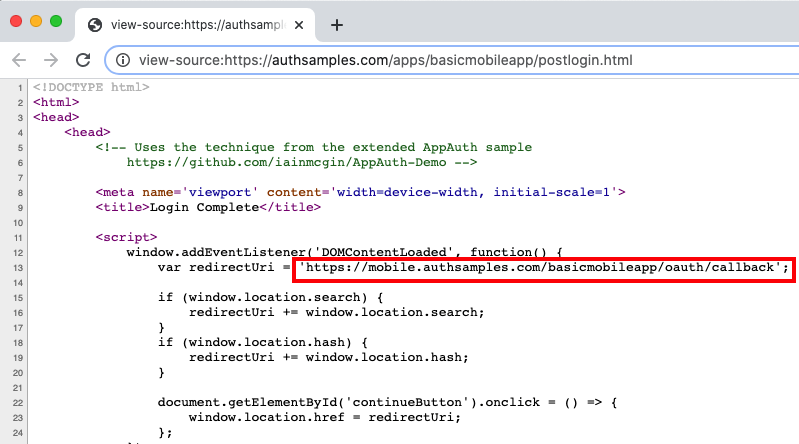
Two interstitial web pages are used with our Android sample, hosted at the following URLs. As discussed in the previous post, these web pages exist to return Claimed HTTPS scheme login responses correctly to our app.
- https://authsamples.com/apps/basicmobileapp/postlogin.html
- https://authsamples.com/apps/basicmobileapp/postlogout.html
If we do a View Source for one of the above URLs from a desktop browser, we can see that they just forward query parameters from the login response using a deep linking URL:
The Deep Linking HTTPS Scheme for login responses is associated to the app via the below Android manifest entry, which overrides the default AppAuth behaviour of using a Private URI Scheme:
<activity
    android:name="net.openid.appauth.RedirectUriReceiverActivity"
    android:exported="true">

    <intent-filter android:autoVerify="true">
        <action android:name="android.intent.action.VIEW" />
        <category android:name="android.intent.category.DEFAULT"/>
        <category android:name="android.intent.category.BROWSABLE"/>
        <data
            android:scheme="https"
            android:host="mobile.authsamples.com"
            android:path="/basicmobileapp/oauth/callback" />
    </intent-filter>
</activity>
Note that if the interstitial page is left for a couple of minutes before the user clicks Return to the App, the authorization code could time out, leading to a user error. The user can always retry and recover though.
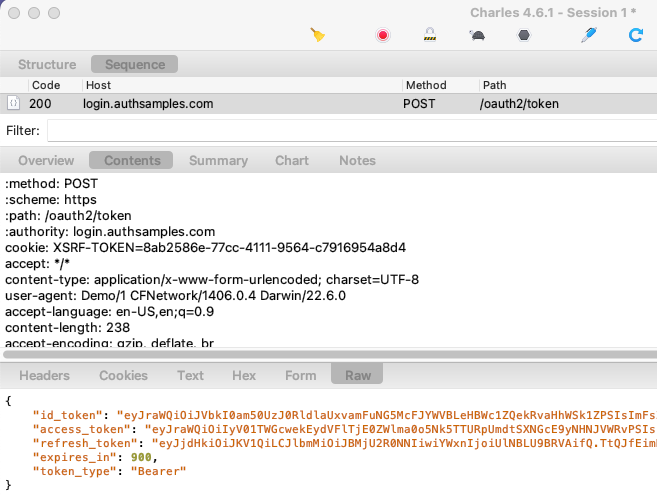
Step 10: Understand Login Completion
Once the authorization code is received by the app, a background Authorization Code Grant message is sent to Cognito’s token endpoint, which return OAuth tokens in the response:
The token data is then stored in Android Shared Preferences, and the operating system ensures that other apps cannot access the tokens.
Step 11: Test Reactivating the App During Login
It is worth performing certain tests while the Chrome Custom Tab window is active, to ensure that the app does not throw exceptions or recreate views unnecessarily:
The first of these is to switch away from the app and then reactivate it from its shortcut:
Technically, when the app is invoked via a shortcut, the launcher action is used, which is a command similar to the following, and it can potentially cause the Single Activity to be Recreated:
adb shell am start -n com.authsamples.basicmobileapp/com.authsamples.basicmobileapp.app.MainActivity -a android.intent.action.MAIN -c android.intent.category.LAUNCHERStep 12: Test Changing Orientation During Login
Similarly I would recommend changing the screen orientation half way through login and then completing the sign in.
The app’s MainActivity is configured with launchMode=’singleTop’ and configChanges=’orientation|screenSize’. It is therefore redrawn but not recreated when the orientation changes.
Step 13: Test Restarting the App after Login
Restarting the app after a login will just load OAuth tokens from secure storage. A new login will not be required, in order to improve the app’s user experience.
Step 14: Test Deep Linking
While the app is running we can test deep linking on an emulator via a command such as the following. If required our app performs a login or token renewal before moving to the deep link destination:
adb shell am start -a android.intent.action.VIEW -d https://mobile.authsamples.com/basicmobileapp/deeplink/company/2Our app uses a special activity to manage Deep Link Forwarding in a controlled manner:
<activity
    android:name=".app.DeepLinkForwardingActivity"
    android:exported="true"
    android:launchMode="singleTask"
    android:noHistory="true">

    <intent-filter android:autoVerify="true">
        <action android:name="android.intent.action.VIEW" />
        <category android:name="android.intent.category.DEFAULT" />
        <category android:name="android.intent.category.BROWSABLE" />
        <data
            android:scheme="https"
            android:host="mobile.authsamples.com"
            android:pathPrefix="/basicmobileapp/deeplink/" />
    </intent-filter>
</activity>
This enables us to ignore any deep linking requests when our activity is not top most, which most commonly means a Chrome Custom Tab is being shown.
Step 15: Test Access Token Expiry
We can use the Expire Access Token and Reload Data buttons to cause an invalid token to be sent to the API, resulting in a 401 response:
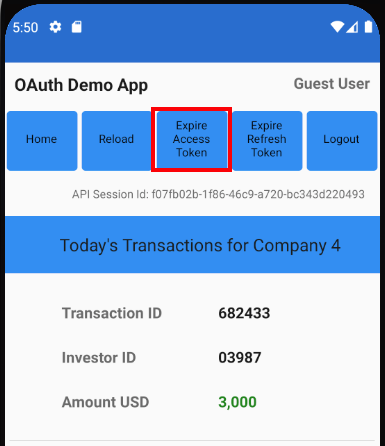
After every API call the UI checks for 401 responses, and handles them by getting a new access token. The API request is then retried once with the new token, so that the user session is silently extended. Note that a mobile app is a public client and the refresh token is not protected with a client credential:
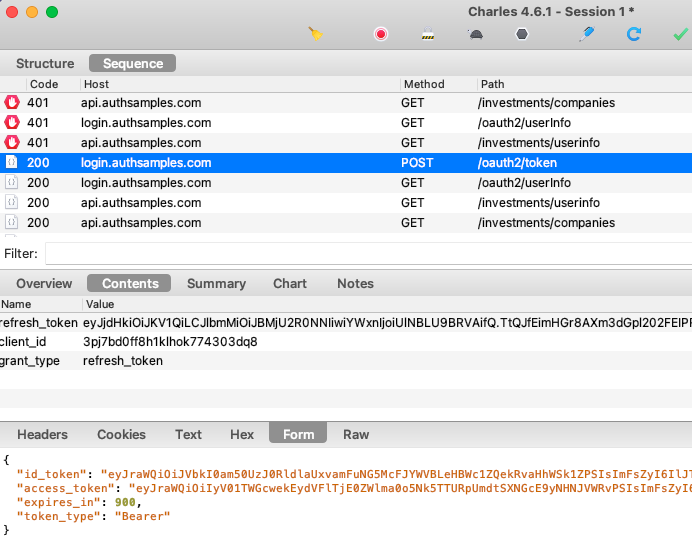
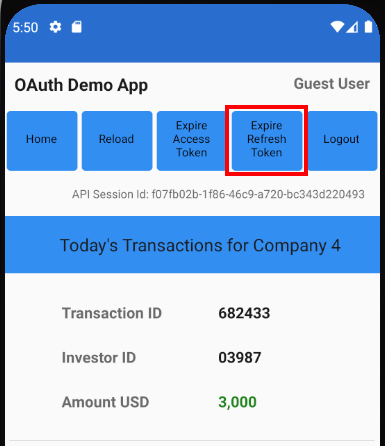
Step 16: Test Refresh Token Expiry
We can use Expire Refresh Token followed by Reload Data to simulate the end of a user session, which might occur if a user left the app running overnight:
On the next request for data the attempt to renew the access token will fail, and the result of the refresh token grant message will be an Invalid Grant response:
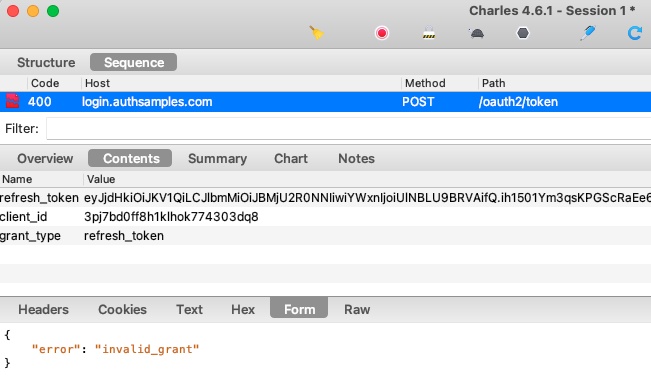
This will trigger a login redirect, and the user may be prompted to sign in again, but will experience no errors.
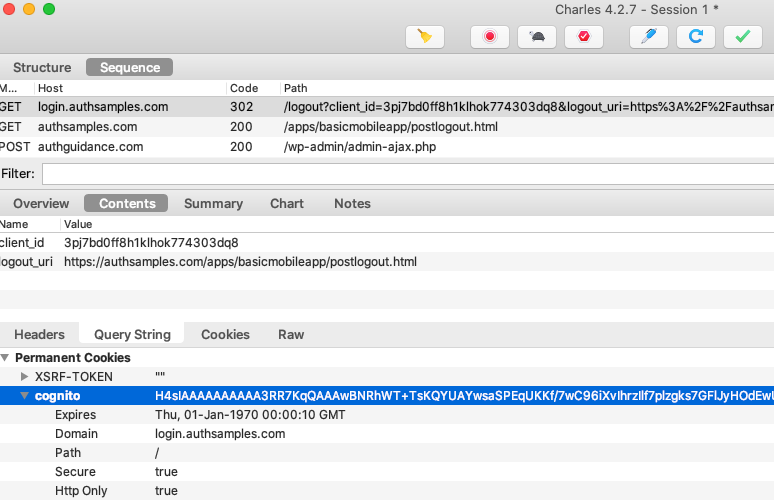
Step 17: Test Logout
To implement logout, a Logout Url Receiver Activity was added, to map the HTTPS scheme logout callback path:
<activity
    android:name=".plumbing.oauth.logout.LogoutRedirectUriReceiverActivity"
    android:exported="true">

    <intent-filter android:autoVerify="true">
        <action android:name="android.intent.action.VIEW" />
        <category android:name="android.intent.category.DEFAULT"/>
        <category android:name="android.intent.category.BROWSABLE"/>
        <data
            android:scheme="https"
            android:host="mobile.authsamples.com"
            android:path="/basicmobileapp/oauth/logoutcallback" />
    </intent-filter>
AWS Cognito also uses a vendor specific logout solution and the logout request requires client_id and logout_url parameters:
When logout completes we are returned to the below post logout view within our app. In a real world app you could then test logging in as another user with different settings or permissions.

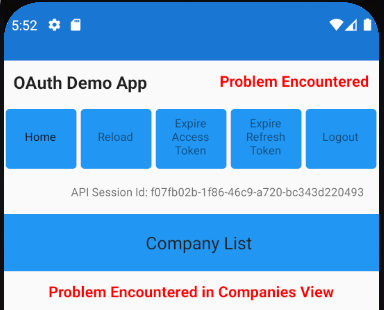
Step 18: Test Failure Scenarios
Our mobile app runs multiple fragments which could fail concurrently, so we implement the same Error HyperLink Behaviour as for our earlier React SPA. The following examples cause errors that the UI must handle:
| Scenario | Instructions |
|---|---|
| UI Error | Load data normally, then switch to airplane mode and click reload, to cause a connectivity exception |
| API Error | Long press the Reload button, which then sends a custom HTTP header to the API to rehearse an API 500 exception |
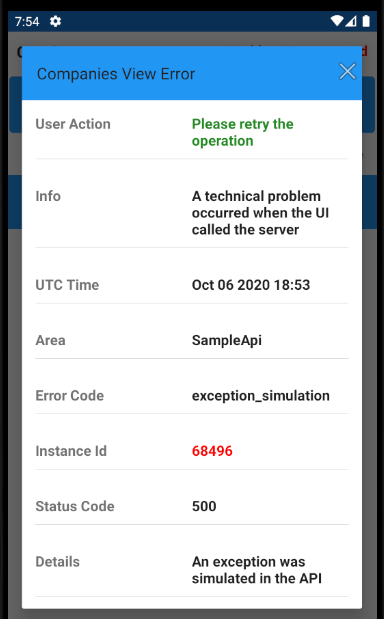
Our error display looks as follows after concurrent view failures. The user can click a hyperlink to see details, or press the Home button to retry.
The summary view uses an Android Modal Dialog to display a view with error details, which would help to enable fast problem resolution:
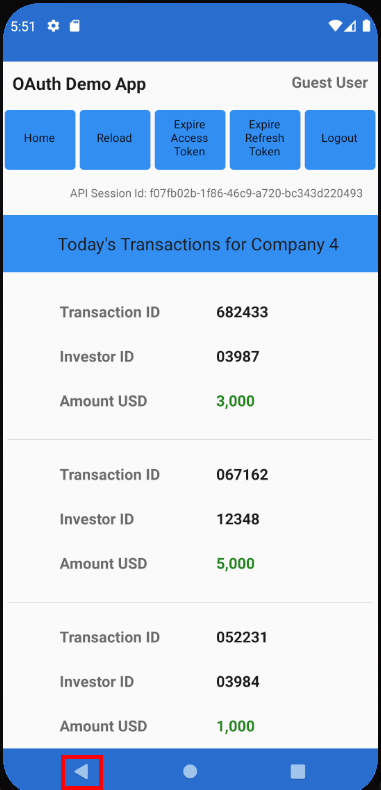
Step 19: Test Back Navigation
In a Single Activity App, the user can use the highlighted button to return to previously loaded fragments. It is worth testing that this behaves correctly for your own apps:
Where Are We?
We have shown how to run this blog’s Android code sample, and test its technical behaviour. Next we will drill into the infrastructure needed to enable the use of OAuth claimed HTTPS schemes.
Next Steps
- Next we will describe some required Android Mobile Infrastructure
- For a list of all blog posts see the Index Page