Final Desktop App – Coding Key Points

Background

Previously we introduced our Final Desktop Sample and explained its key behaviour. This post summarizes the main coding techniques. See also the Client Side API Journey to understand the background and the requirements being met.

React Update

We have updated our Electron app to use React. This mostly involved just copying in the completed views from our earlier React SPA, and the desktop app uses many of the same coding techniques.

return (
    <>
        <TitleView {...getTitleProps()} />
        <HeaderButtonsView {...getHeaderButtonProps()} />
        {model.error && <ErrorSummaryView {...getErrorProps()} />}
        <>
            <SessionView {...getSessionProps()} />
            <Routes>
                <Route path='/'              element={<CompaniesContainer {...getCompaniesProps()} />} />
                <Route path='/companies/:id' element={<TransactionsContainer {...getTransactionsProps()} />} />
                <Route path='/loggedout'     element={<LoginRequiredView {...getLoginRequiredProps()} />} />
                <Route path='*'              element={<CompaniesContainer {...getCompaniesProps()} />} />
            </Routes>
        </>
    </>
);

The only real difference in React coding is that the HashRouter must be used in Electron apps. The renderer side of the app, in the renderer.tsx source file, therefore starts a Single Page Application as follows:

const root = ReactDOM.createRoot(document.getElementById('root') as HTMLElement);
const props = {
    viewModel: new AppViewModel(),
};
root.render (
    <StrictMode>
        <ErrorBoundary>
            <HashRouter>
                <App {...props} />
            </HashRouter>
        </ErrorBoundary>
    </StrictMode>
);

Electron Security Updates

We have updated our app to follow Electron Security Recommendations so that code running in the Chromium browser use low privileges and the best practice settings:

this._window = new BrowserWindow({
    width: 1280,
    height: 720,
    minWidth: 800,
    minHeight: 600,
    webPreferences: {
        nodeIntegration: false,
        contextIsolation: true,
        sandbox: true,
        preload: path.join(app.getAppPath(), './preload.js'),
    },
});

We will cover further details of security related code changes at the end of this post. First we will describe how features for Private URI Schemes and Secure Token Storage were implemented.

Private URI Scheme Registration

In our Main process we register our Private URI Scheme at application startup, which writes to user specific areas of the operating system:

private async _registerPrivateUriScheme(): Promise<void> {

    if (process.platform === 'win32') {

        app.setAsDefaultProtocolClient(
            this._configuration!.oauth.privateSchemeName,
            process.execPath,
            [app.getAppPath()]);

    } else {
        app.setAsDefaultProtocolClient(this._configuration!.oauth.privateSchemeName);
    }
}

In order to receive private URI scheme notifications deterministically, the desktop  app restricts itself to a single running instance:

public execute(): void {

    const primaryInstance = app.requestSingleInstanceLock();
    if (!primaryInstance) {
        app.quit();
        return;
    }
}

Sending Private URI Scheme Notifications

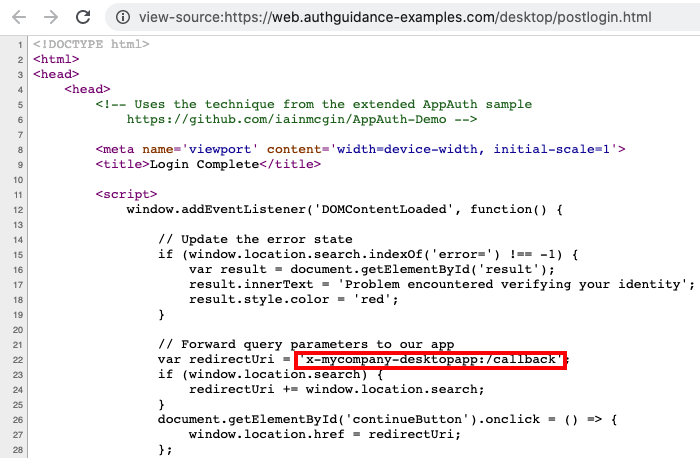
As discussed in the previous post, the response to OAuth login and logout operations originates from an Interstitial Web Page. The following code then invokes a deep link to return the authorization code to the app:
Receiving Deep Links

When the URL is invoked, the operating system raises an event that the app subscribes to, which executes the following code:

private _handleDeepLink(deepLinkUrl: string): void {

    if (this._window) {

        if (this._window.isMinimized()) {
            this._window.restore();
        }

        this._window.focus();
    }

    this._ipcEvents.handleDeepLink(deepLinkUrl);
}

The main process first asks an OAuth class to process the deep link if it is a login or logout response. Otherwise, the notification is considered to be a general deep link and is forwarded to the React app:

public handleDeepLink(deepLinkUrl: string): boolean {

    if (this._authenticatorService.handleDeepLink(deepLinkUrl)) {
        return true;
    }

    const url = UrlParser.tryParse(deepLinkUrl);
    if (url && url.pathname) {
        const path = url.pathname.replace(this._configuration.oauth.privateSchemeName + ':', '');
        this._window!.webContents.send(IpcEventNames.ON_DEEP_LINK, path);
    }

    return false;
}

Resuming OAuth Operations

As for our first desktop sample, login and logout responses are processed based on the OAuth state parameter. This enables us to find and resume the calback that was created when the system browser was opened:

public handleLoginResponse(queryParams: any): void {

    const state = queryParams.state;
    if (state) {
        const callback = this._getCallbackForState(queryParams.state);
        if (callback) {
            callback(queryParams);
            this._clearState(state);
        }
    }
}

Secure Token Storage

A TokenStorage class is used, to wrap the use of Electron safe storage. This  object manages saving, loading and deleting tokens. These are stored in encrypted text files for the logged in user account:

public load(): TokenData | null {

    try {

        const encryptedBytesBase64 = this._store.get(this._key);
        if (!encryptedBytesBase64) {
            return null;
        }

        const json = safeStorage.decryptString(Buffer.from(encryptedBytesBase64, 'base64'));
        return JSON.parse(json);

    } catch (e: any) {

        return null;
    }
}

The OAuth processing code calls the TokenStorage class after the following events:

  • When the Desktop App Starts, to load tokens
  • After the Authorization Code Grant, to save tokens
  • After the Refresh Token Grant, to update tokens
  • When the user Logs Out, to remove tokens

Concurrent Operations

React renders our desktop app’s views in a non deterministic sequence, so the following two views can call an API in parallel:
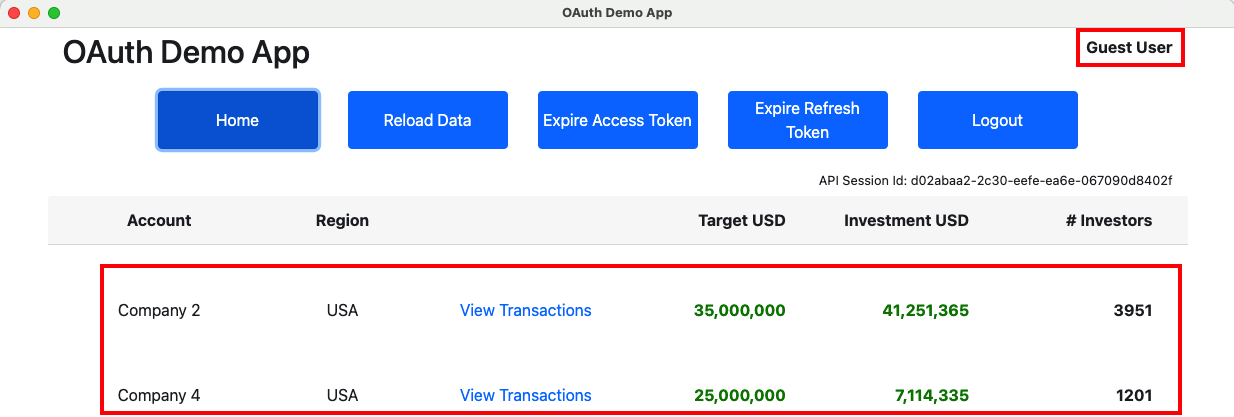
This can lead to the following scenarios and the desktop app handles concurrency correctly in all cases. This is done using the same coding techniques as the earlier React SPA:

  • One or both views could experience a technical error
  • One or both views may need to refresh an access token
  • One or both views may need to trigger a login redirect

Electron Browser Settings

In our initial code sample we included Javascript code in our index.html page via a require statement. This no longer works with Node integration disabled, so we now bundle the Javascript code for the Electron Renderer Process, then reference bundles in the index.html file, as for the final SPA:

<!DOCTYPE html>
<html lang='en'>
    <head>
        <meta charset='utf-8'>
        <title>OAuth Demo App</title>

        <link rel='stylesheet' href='bootstrap.min.css'>
        <link rel='stylesheet' href='app.css'>
    </head>
    <body>
        <div id='root' class='container'></div>

        <script type='module' src='vendor.bundle.js'></script>
        <script type='module' src='app.bundle.js'></script>
    </body>
</html>

The main side of the app also implements a Content Security Policy for the React app:

session.defaultSession.webRequest.onHeadersReceived((details, callback) => {

    let policy = '';
    if (this._useBasicContentSecurityPolicy) {

        policy += "script-src 'self' 'unsafe-eval'";

    } else {

        const trustedHosts = this._configuration!.app.trustedHosts.join(' ');
        policy += "default-src 'none';";
        policy += " script-src 'self';";
        policy += ` connect-src 'self' ${trustedHosts};`;
        policy += " child-src 'self';";
        policy += " img-src 'self';";
        policy += " style-src 'self';";
        policy += " object-src 'none';";
        policy += " frame-ancestors 'none';";
        policy += " base-uri 'self';";
        policy += " form-action 'self'";
    }

    callback({
        responseHeaders: {
            ...details.responseHeaders,
            'Content-Security-Policy': [policy],
        },
    });
});

Compiled Electron Code

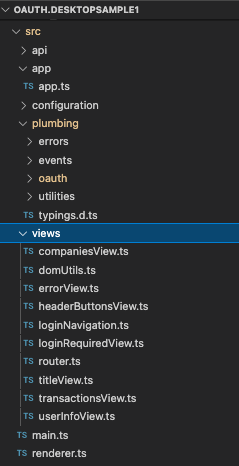
A single code base is used for main and renderer processes, which provides the simplest development setup. At deployment time I separated concerns to produce the following self-contained assets ready to deploy. Webpack is used to pull out code from the node_modules folder into bundles:
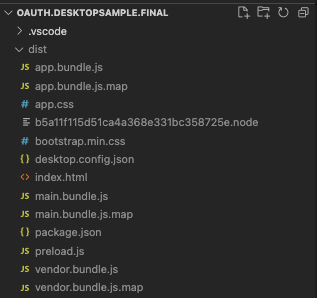
The main app is built into a main.bundle.js file using the following webpack configuration. This bundle only contains code used by the main.ts entry point and does not include any code for React views. Similarly, renderer bundles only contain code used by the renderer.tsx entry point:

import path from 'path';
import webpack from 'webpack';

const dirname = process.cwd();
const config: webpack.Configuration = {

    target: ['electron-main'],
    experiments: {
        outputModule: true,
    },

    devtool: 'source-map',
    context: path.resolve(dirname, './src'),

    entry: {
        app: ['./main.ts']
    },
    module: {
        rules: [
            {
                test: /\.ts$/,
                use: [{
                    loader: 'ts-loader',
                    options: {
                        onlyCompileBundledFiles: true,
                        configFile: '../tsconfig-main.json',
                    },
                }],
                exclude: /node_modules/,
            }
        ]
    },
    resolve: {
       extensions: ['.ts', '.js']
    },
    output: {
       path: path.resolve(dirname, './dist'),
        filename: 'main.bundle.js',
        chunkFormat: 'module',
    }
};

export default config;

The ts-loader module is instructed to use distinct tsconfig.json files for the main and renderer processes. Note also that the outputModule and chunkFormat parameters are required to build ECMAScript output for the main bundle and to avoid the use of the older CommonJS output format.

Inter Process Communication

High privilege operations such as opening the system browser or using secure token storage cannot be implemented by the React app. Instead it must use IPC events. A number of these are defined:

export class IpcEventNames {

    public static readonly ON_GET_COMPANIES = 'api_companies';
    public static readonly ON_GET_TRANSACTIONS = 'api_transactions';
    public static readonly ON_GET_OAUTH_USER_INFO = 'api_oauthuserinfo';
    public static readonly ON_GET_API_USER_INFO = 'api_userinfo';

    public static readonly ON_LOGIN = 'oauth_login';
    public static readonly ON_LOGOUT = 'oauth_logout';
    public static readonly ON_TOKEN_REFRESH = 'oauth_tokenrefresh';
    public static readonly ON_CLEAR_LOGIN_STATE = 'oauth_clearstate';
    public static readonly ON_EXPIRE_ACCESS_TOKEN = 'oauth_expireaccesstoken';
    public static readonly ON_EXPIRE_REFRESH_TOKEN = 'oauth_expirerefreshtoken';

    public static readonly ON_DEEP_LINK_STARTUP_PATH = 'get_startup_url';
    public static readonly ON_DEEP_LINK = 'private_scheme_url';
}

A Preload Script is used to define an API with which the renderer process  can request the main process to perform a higher security operation. This makes a ‘window.api‘ object available to the React apps’ JavaScript code.

const {contextBridge, ipcRenderer} = require('electron');

contextBridge.exposeInMainWorld('api', {

    sendIpcMessage: async function(name, requestData) {

        return new Promise((resolve) => {

            ipcRenderer.send(name, requestData);
            ipcRenderer.on(name, (event, responseData) => {
                resolve(responseData);
            });
        });
    },

    receiveIpcMessage: function(name, callback) {

        ipcRenderer.on(name, (event, responseData) => {
            callback(responseData);
        });
    }
});

The React app uses a RendererIpcEvents entry point for sending IPC events.  OAuth and API operations are forwarded to the main process:

export class RendererIpcEvents {

    public async getCompanyList(options: FetchOptions) : Promise<any> {
        return await this._sendRequestResponseIpcMessage(IpcEventNames.ON_GET_COMPANIES, {options});
    }

    public async getCompanyTransactions(id: string, options: FetchOptions) : Promise<any> {
        return await this._sendRequestResponseIpcMessage(IpcEventNames.ON_GET_TRANSACTIONS, {id, options});
    }

    public async login(): Promise<void> {
        await this._sendRequestResponseIpcMessage(IpcEventNames.ON_LOGIN, {});
    }

    public async logout(): Promise<void> {
        await this._sendRequestResponseIpcMessage(IpcEventNames.ON_LOGOUT, {});
    }

    public async tokenRefresh(): Promise<void> {
        await this._sendRequestResponseIpcMessage(IpcEventNames.ON_TOKEN_REFRESH, {});
    }
}

These requests are received by a MainIpcEvents entry point in the main process, which returns a result or an error response to the caller:

export class MainIpcEvents {

    public register(): void {

        ipcMain.on(IpcEventNames.ON_GET_TRANSACTIONS, this._onGetCompanyTransactions);
        ipcMain.on(IpcEventNames.ON_LOGIN, this._onLogin);
        ipcMain.on(IpcEventNames.ON_TOKEN_REFRESH, this._onTokenRefresh);
    }

    private async _onGetCompanyTransactions(event: IpcMainEvent, args: any): Promise<void> {

        await this._processAsyncRequestResponseIpcMessage(
            IpcEventNames.ON_GET_TRANSACTIONS,
            () => this._fetchService.getCompanyTransactions(args.id, args.options));
    }

    /*
     * Run a login redirect on the system browser
     */
    private async _onLogin(): Promise<void> {

        await this._processAsyncRequestResponseIpcMessage(
            IpcEventNames.ON_LOGIN,
            () => this._authenticatorService.login());
    }

    private async _onTokenRefresh(): Promise<void> {

        await this._processAsyncRequestResponseIpcMessage(
            IpcEventNames.ON_TOKEN_REFRESH,
            () => this._authenticatorService.tokenRefresh());
    }
}

OAuth and API Classes

The following main classes are used to handle OAuth and API logic. The strategy is to drive behaviour from the renderer process so that the React app is in control. The interplay is a little intricate, since the app also handles many error conditions.

Class Responsibilities
FetchClient A forwarder that also manages client side caching of API responses
FetchService Does the main work of sending API requests with access tokens to the remote API endpoints
AuthenticatorClient A forwarder to initiate login and token related operations
AuthenticatorService Does the main work of integrating with the AppAuth-JS library to trigger login and token requests, then handle responses

Debugging HTTP Requests

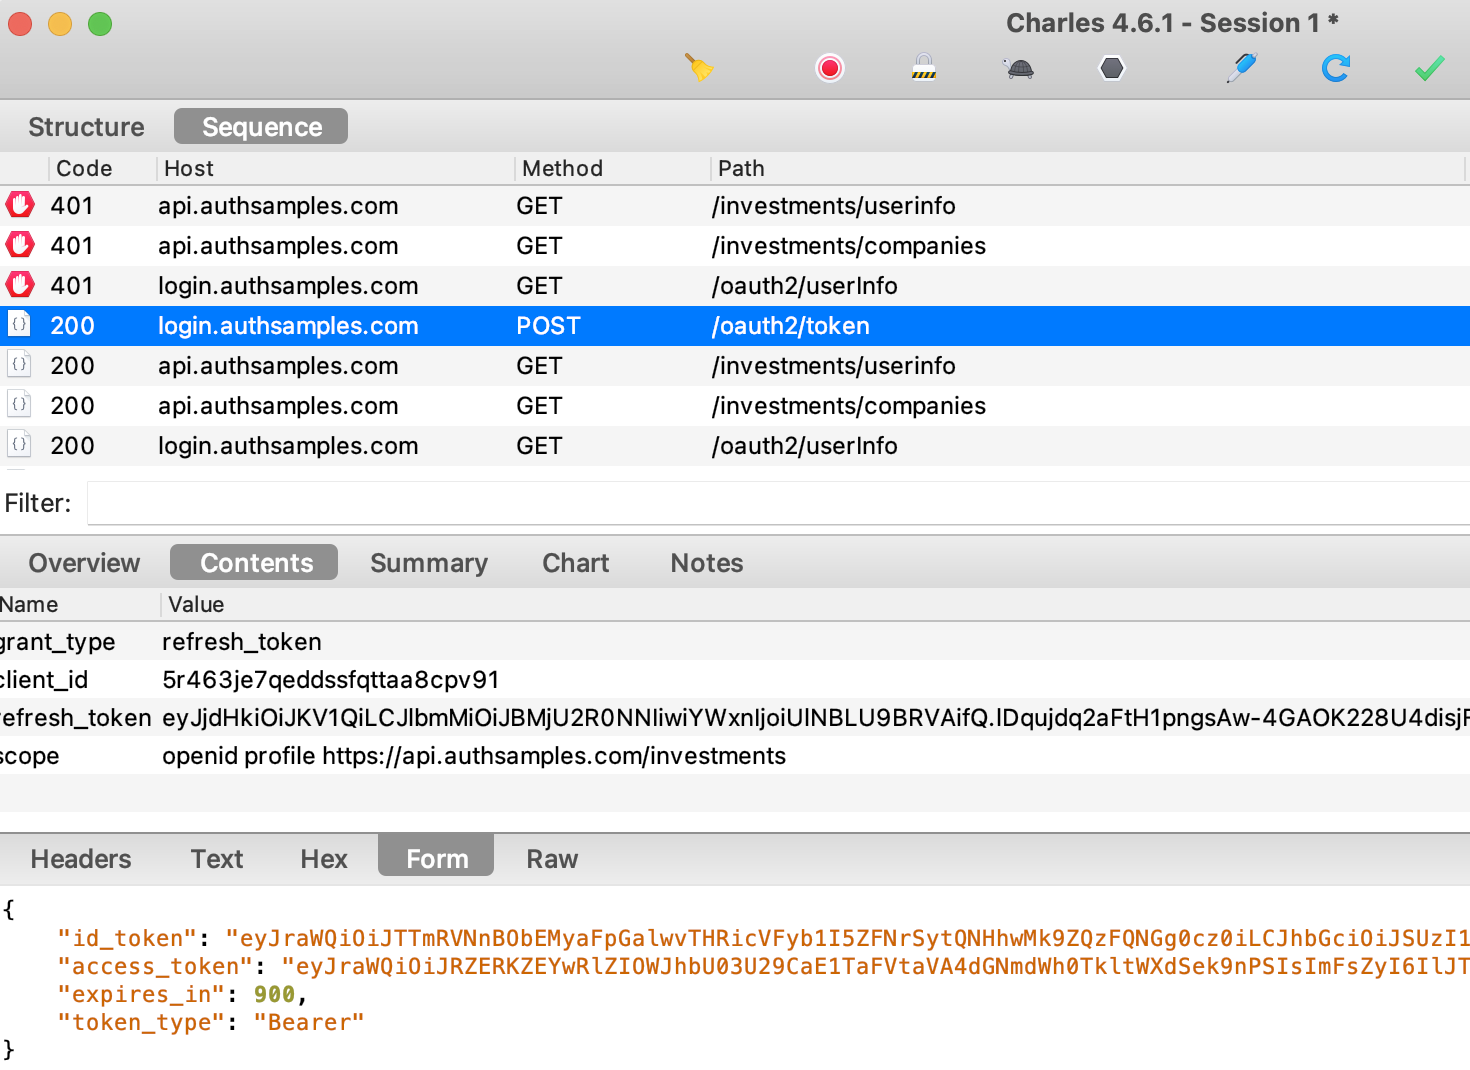
Since all OAuth and API requests are sent from the main side of the app, you won’t see any HTTP requests in the Electron Dev Tools. To view the HTTP requests you instead need to run an HTTP proxy tool.

To do so, set useProxy=true in the desktop.config.json file. To enable SSL trust for the proxy root certificate on a development computer, first set the following environment variable. This is a hack to work around problems where NODE_EXTRA_CA_CERTS is broken in ElectronJS:

export NODE_TLS_REJECT_UNAUTHORIZED=0
./build.sh
./run.sh

You will then see that the desktop app sends requests with tokens and acts as a public client, as is standard for a desktop app.
AppAuth Libraries

This blog demonstrates mobile integration using the recommendations from RFC8252. Doing so does not mandate use of the AppAuth libraries though. If you run into any library blocking issues, the code flow  could be implemented fairly easily in the AuthenticatorImpl class.

Where Are We?

We have updated the Electron Desktop App with new features that improve usability and security, and have now completed this blog’s desktop app. Next we will begin coverage of OAuth for mobile apps.

Next Steps

  • Next we will discuss Android Setup and run the AppAuth code sample
  • For a list of all blog posts see the Index Page
Final Desktop App – Overview

Background

Previously we covered Coding Key Points for our initial desktop app. Next we will add some missing features to complete session management, harden security, and improve usability.

New Features

The completed desktop code sample will demonstrate these main features:

Feature Description
React Update We will update from plain TypeScript to a more complete frontend technology stack
Deep Linking Login responses will be returned as deep links, on private URI scheme based redirect URIs
Secure Token Storage We will persist OAuth tokens using operating system encryption private to the app and user
Security Improvements We will follow Electron security best practice by removing Node integration

Components

Components are the same as for our Initial Desktop Sample, and readers only need to run the Desktop Code to get a complete solution. By default our desktop app uses AWS Cognito as an Authorization Server.

Code Download

The code for our final desktop app can be downloaded from here:

  • git clone https://github.com/gary-archer/oauth.desktopsample.final

How to Run the Sample

The instructions are almost identical to those for the initial desktop sample. After cloning the sample code, run the following command from its folder:

./build.sh

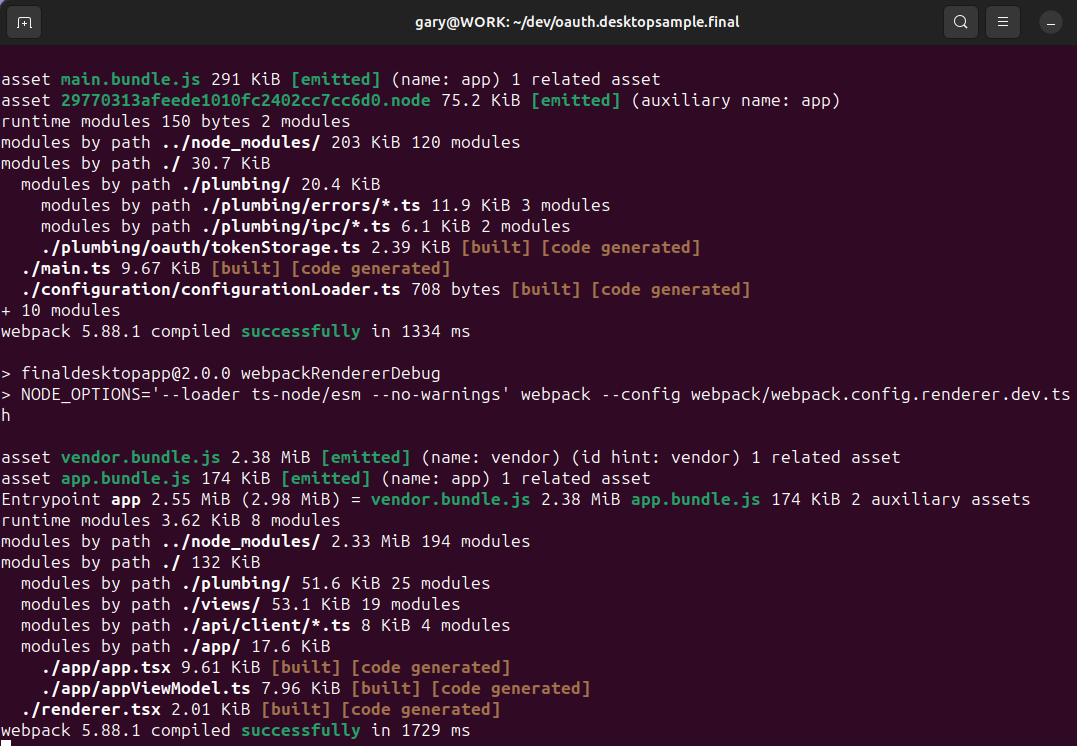
The script builds webpack bundles for the main and renderer parts of the desktop app. The renderer build runs in watch mode so that a pure frontend development model can be followed, to update React code and quickly see changes:

To launch the app, open another terminal window and execute the following script:

./run.sh

Updated Login User Experience

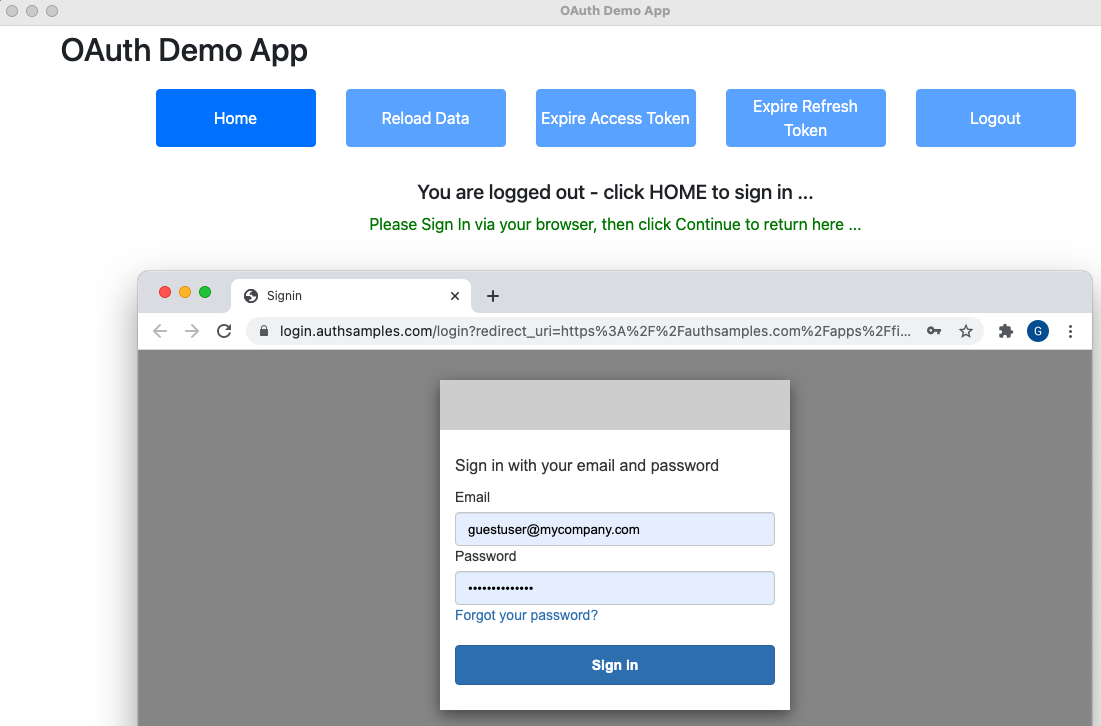
The app executes logins in the same manner as our initial code sample:

This blog’s test credential can then be used to sign in:

  • User: guestuser@mycompany.com
  • Password: GuestPassword1

Once login completes, a completion web page is rendered in the browser. A similar page is also shown when receiving the logout response:

When the user clicks Continue, a Private URI Scheme prompt is presented by the browser, that can deep link back to the desktop app:

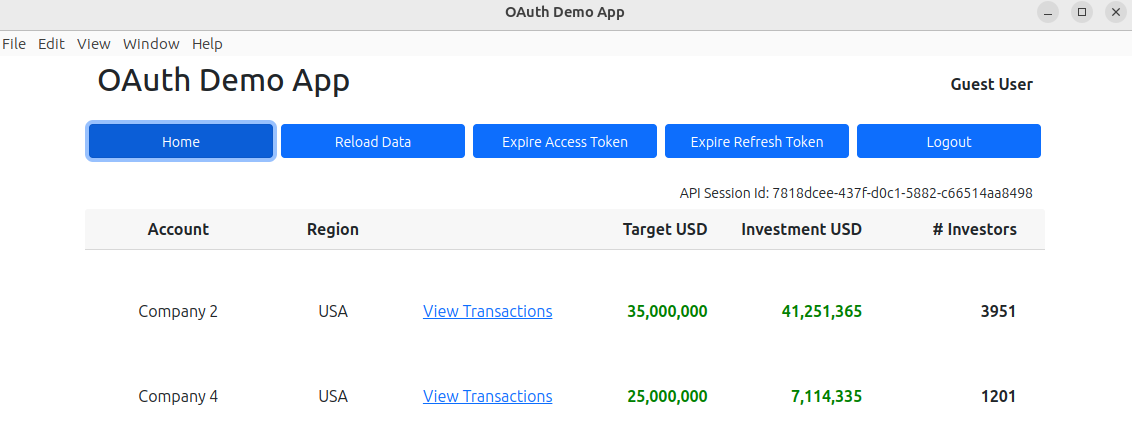
The desktop app is then brought to the foreground and can get data from the API using an OAuth access token:

After login our tokens are securely stored for the lifetime of the refresh token. The user can restart the app without requiring a new user login. OpenID Connect logout has also been implemented.

OAuth Configuration Changes

The final desktop app’s configuration no longer uses HTTP ports, and now uses login and logout completion pages as redirect URIs:

{
    "app": {
        "apiBaseUrl":               "https://api.authsamples.com/api",
        "trustedHosts": [
                                    "https://api.authsamples.com",
                                    "https://login.authsamples.com",
                                    "https://cognito-idp.eu-west-2.amazonaws.com"
        ],
        "useProxy": false,
        "proxyUrl": "http://127.0.0.1:8888"
    },
    "oauth": {
        "authority":                "https://cognito-idp.eu-west-2.amazonaws.com/eu-west-2_CuhLeqiE9",
        "clientId":                 "5r463je7qeddssfqttaa8cpv91",
        "redirectUri":              "https://authsamples.com/apps/finaldesktopapp/postlogin.html",
        "privateSchemeName":        "x-mycompany-desktopapp",
        "scope":                    "openid profile email https://api.authsamples.com/api/transactions_read",
        "customLogoutEndpoint":     "https://login.authsamples.com/logout",
        "postLogoutRedirectUri":    "https://authsamples.com/apps/finaldesktopapp/postlogout.html",
        "logoutCallbackPath":       "/logoutcallback"
    }
}

Deep Links and Login Reliability

When a deep link is triggered after a redirect, it is possible that the browser will refuse to invoke it unless there is a user gesture. This is especially true if a redirect is entirely automatic, as for a single-sign-on or a logout.

Instead there needs to be a screen before invoking the deep link. You may find using the OpenID Connect prompt=login parameter on every login redirect is reliable. In this blog I instead use a custom interstitial page, partly because AWS Cognito does not support the prompt parameter.

Interstitial Pages

This blog uses interstitial pages that ensure a user gesture. This also improves a little on the default blank browser page that is otherwise displayed to the user after login. The configured redirect URIs point to AWS hosted web pages:

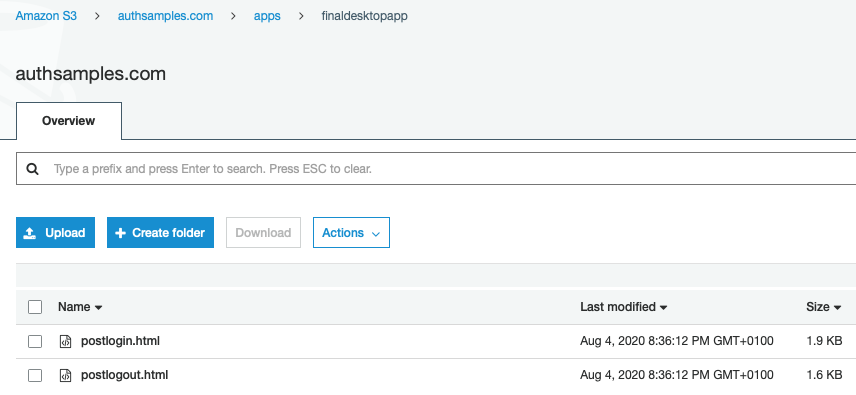
I deployed the HTML pages to an AWS S3 Bucket and then made them available over SSL via an AWS Cloudfront Distribution:

Private URI Scheme Forwarding

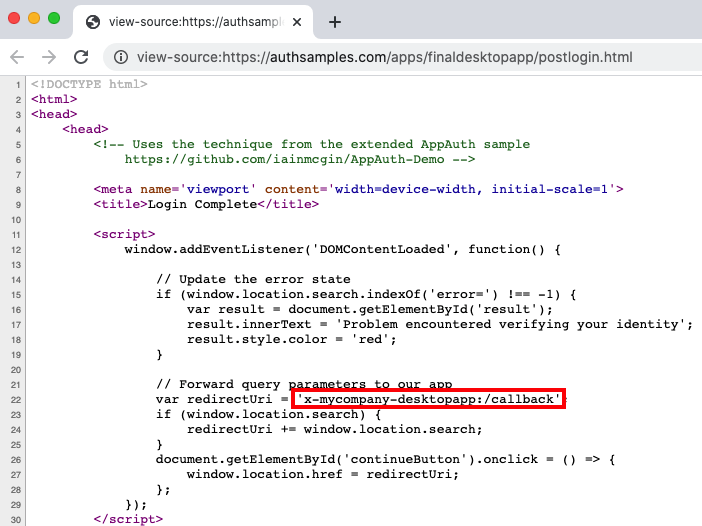
If you do a View Source for the above interstitial pages we see that they simply forward the login response to the app via a private URI scheme URL:

One downside of this design is that if the user doesn’t click the Return to the App button for a couple of minutes, the authorization code could time out, leading to a user error. The user can always retry and recover though.

Private URI Scheme Browser Prompts

All browsers recognize private URI schemes registered with the operating syastem and present a special prompt. For the final appearance, first build a packaged version of the desktop app:

./pack.sh

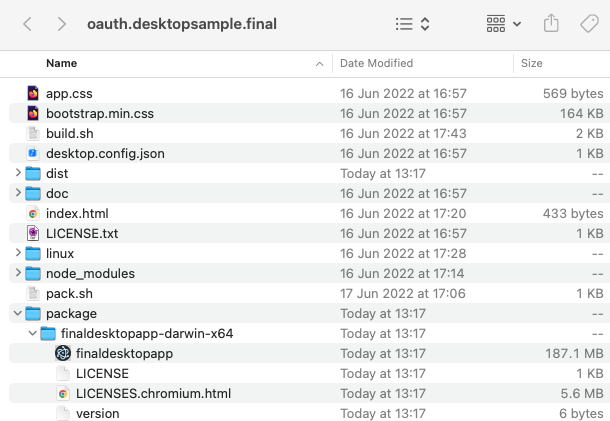
This results in a built binary that can be run locally using the Electron Packager, in order to test the built app as well as the version under development:

The prompt messages then look as follows in the main browsers:

Google Chrome

Safari

Firefox

Edge

Final Cognito Desktop OAuth Client

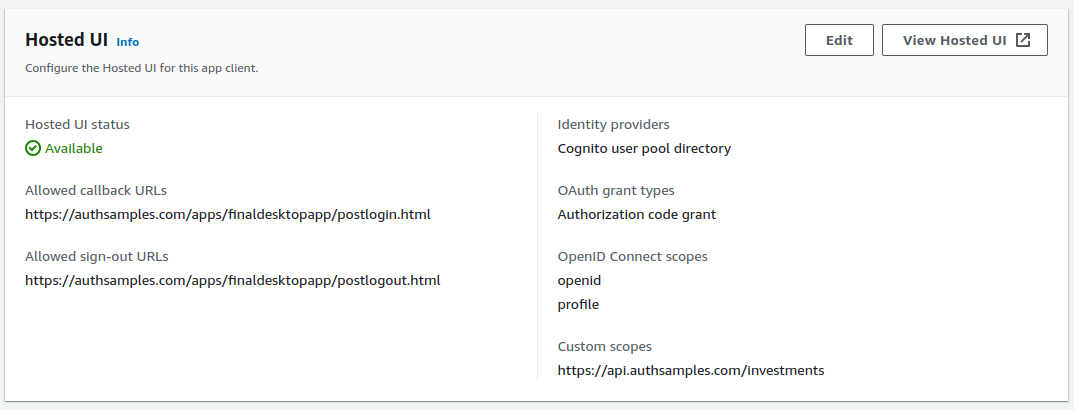
A new OAuth client has been created, which registers the interstitial pages for the redirect URI and the post logout redirect URI:

Private URI Scheme Registration

Our Desktop App registers the Private URI Scheme as a Per User Setting that does not require administrator privileges. On Windows this updates a per user registry location under HKEY_CURRENT_USER:

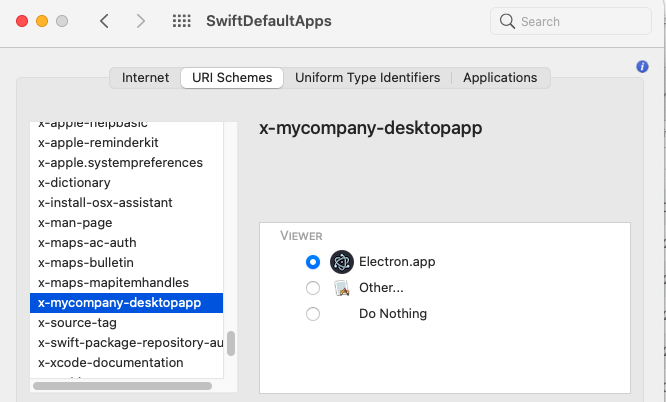
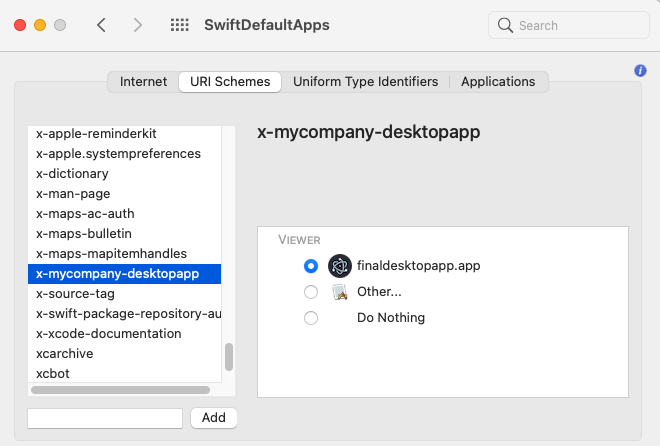
On macOS you can use the SwiftDefaultApps tool to view the scheme and the app it is registered to, which is also a per user setting:

In my Linux distribution, the Gnome Desktop System controls custom schemes. Our sample includes a .desktop file with registration instructions:

[Desktop Entry]
Type=Application
Name=Final Desktop App
Exec=$APP_COMMAND %U
StartupNotify=false
MimeType=x-scheme-handler/x-mycompany-desktopapp

To use private URI schemes you need to be able to restrict the desktop app to a single instance. In some desktop cases, such as for an Excel Plugin, this may not be possible, and you will need to use a loopback based solution.

Secure Token Storage

The desktop app stores OAuth tokens in an encrypted text file. Electron safeStorage is used to create an operating system encryption key private to the user and app, for protecting the text. The result is that users do not need to login every time they restart the app.

On macOS the encryption key is saved to the Keychain. On Windows and Linux the key is less visible. Windows uses the DPAPI subsystem, and my Ubuntu Linux system uses the GNOME libsecret subsystem. Further details on the underlying security are discussed in this online thread.

The actual tokens are stored as base64 encrypted bytes in a JSON file at one of the following locations:

 OS  Stored Tokens Location
 Windows
~/AppData/Roaming/finaldesktopapp/tokens.json
 macOS
~/Library/Application Support/finaldesktopapp/tokens.json
 Linux (Gnome)
~/.config/finaldesktopapp/tokens.json

Deep Linking to Views

The login and logout response messages received by the app are a type of deep link notification:

  • x-mycompany-desktopapp:/callback?code=…&state=…
  • x-mycompany-desktopapp:/logoutcallback

We can also use deep linking to bookmark screens, by sending a user an email with a URL link such as this:

  • x-mycompany-desktopapp:/companies/2

The easiest way to test deep linking is from a command shell, and this varies slightly for the different operating systems:

 OS  Example Command
 Windows start x-mycompany-desktopapp:/companies/2
 macOS open x-mycompany-desktopapp:/companies/2
 Linux (Gnome) xdg-open  x-mycompany-desktopapp:/companies/2

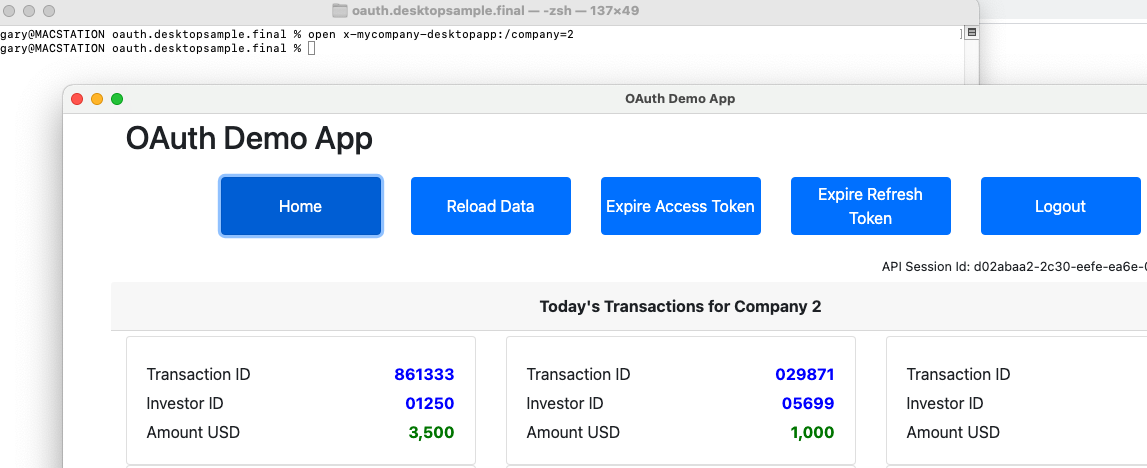
If the desktop app is running, this command will cause it to update its location to the Transactions Page for our second company. If not then it will start up at that location:

If the user is logged in and has a valid access token, the app will move directly to the deep linking destination screen. Otherwise a token renewal or login will be triggered, followed by deep link navigation afterwards.

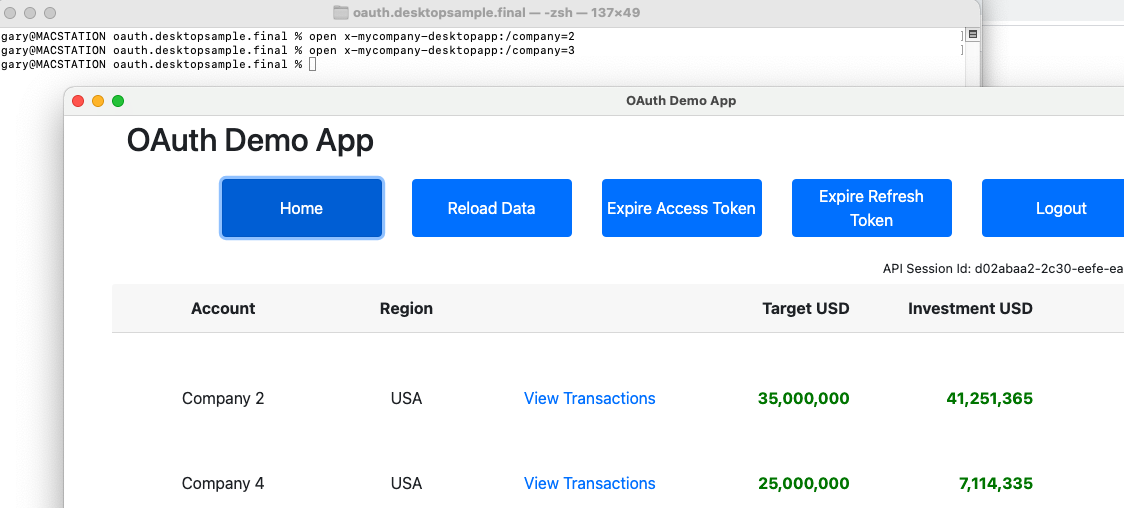
This blog’s APIs deny the default test user access to companies other than 2 and 4. Attempts to Deep Link to Company 3 will fail API authorization and return a known error code. The desktop app handles this error specially, by returning the user to the list view:

Finally, note that on macOS, startup deep links will only work if we first package the app with ‘npm run pack‘, so that the scheme registration points to the packaged executable:

Desktop deep linking may not be as usable as web and mobile deep linking in practice. Email clients may consider the private URI scheme’s prefix suspect, and block this type of deep link.

Security Updates

Node integration has been disabled, meaning that the Renderer side of the app can only perform low-privilege operations. Opening the system browser, processing deep links and dealing with secure storage are now all done of the Main side of the app.

This adds a fair amount of complexity, and I ended up moving all logic that involves HTTP requests with tokens outside of the Chromium browser. This means all outgoing OAuth and API requests are proxied from renderer to main before being sent to the remote endpoint.

Where Are We?

We have updated our desktop code sample with some essential features. Private URI Scheme Based Logins are a more integrated solution, though login usability remains unnatural, due to use of the disconnected browser.

Next Steps

Desktop App – Coding Key Points

Background

Previously we explained How to Run the Desktop Code Sample, which included some test scenarios. We will complete the posts for the initial Electron desktop app by describing some coding key points.

Desktop Technology

The desktop app uses the exact same views that were used in one of this blog’s earlier code samples, for the Updated SPA. In Electron, the OAuth login flow is implemented using Node.js rather than browser code.

Electron ‘Main’ Entry Point

Electron apps have two processes, Main and Renderer. The main process loads the HTML page, which creates a renderer process when it loads.

class Main {

    private _window: BrowserWindow | null;

    public constructor() {
        this._window = null;
        this._setupCallbacks();
    }

    public execute(): void {

        app.on('ready', this._createMainWindow);

        app.on('activate', this._onActivate);

        app.on('window-all-closed', this._onAllWindowsClosed);
    }

    private _createMainWindow(): void {

        this._window = new BrowserWindow({
            width: 1280,
            height: 720,
            minWidth: 800,
            minHeight: 600,
            webPreferences: {
                nodeIntegration: true,
                contextIsolation: false,
            },
        });

       ...
    }
}

Using node integration is against Electron’s Security Best Practices and is used only as a shortcut, to reduce the amount of code. In the next post we will introduce the final desktop app, which will be security hardened.

Electron ‘Renderer’ Entry Point

The renderer process runs in the Chromium browser host and renders the index.html page.For the initial code sample, JavaScript code is imported using a Node.js integration and a require statement:

<!DOCTYPE html>
<html lang='en'>
    <head>
        <meta charset='utf-8'>
        <meta http-equiv='Content-Security-Policy' content="script-src 'self' 'unsafe-inline'">
        <title>OAuth Demo App</title>

        <link rel='stylesheet' href='css/bootstrap.min.css'>
        <link rel='stylesheet' href='css/app.css'>
    </head>
    <body>
        <span class="pl-kos"><</span><span class="pl-ent">div</span> <span class="pl-c1">id</span>='<span class="pl-s">root</span>' <span class="pl-c1">class</span>='<span class="pl-s">container</span>'<span class="pl-kos">></span><span class="pl-kos"></</span><span class="pl-ent">div</span><span class="pl-kos">></span>
        
        <script type='text/javascript'>
            require('./built/renderer');
        </script>
    </body>
</html>

The code for the renderer process begins by creating an App class, which acts as the application shell. This creates some global objects for API calls and OAuth operations, in the same manner as earlier SPAs:

private async _initialiseApp(): Promise<void> {

    this._configuration = await ConfigurationLoader.load('desktop.config.json');

    this._authenticator = new AuthenticatorImpl(this._configuration.oauth);

    this._apiClient = new ApiClient(this._configuration.app.apiBaseUrl, this._authenticator);

    this._router = new Router(this._apiClient);
}

Desktop ‘Authenticator’ Class

For our SPA we used an ‘authenticator‘ abstraction to deal with OAuth login and token operations, and this is the main code that is different to the SPA.

export interface Authenticator {

    isLoggedIn: boolean;

    getAccessToken(): Promise<string>;

    refreshAccessToken(): Promise<string>;

    login(): Promise<void>;

    logout(): void;

    expireAccessToken(): Promise<void>;

    expireRefreshToken(): Promise<void>;
}

As we shall see, the authentication code is tricky, since it needs to manage a  browser that runs as a disconnected process.

Triggering a Login Prompt

As for our SPA, our Desktop App’s ApiClient class will handle 401 responses from the API by getting a new token and retrying the API call:

private async _callApi(path: string, method: Method, dataToSend?: any): Promise<any> {

    const url = `${this._apiBaseUrl}${path}`;

    let token = await this._authenticator.getAccessToken();
    if (!token) {
        throw ErrorFactory.getFromLoginRequired();
    }

    try {

        return await this._callApiWithToken(url, method, dataToSend, token);

    } catch (e: any) {

        if (e.statusCode !== 401) {
            throw ErrorFactory.getFromHttpError(e, url, 'web API');
        }

        token = await this._authenticator.refreshAccessToken();
        if (!token) {
            throw ErrorFactory.getFromLoginRequired();
        }

        return await this._callApiWithToken(url, method, dataToSend, token);
    }
}

If a refresh isn’t possible the code throws a login_required error, which terminates  the requested API calls in a controlled manner. This error code is treated specially and results in a redirect to the Login Required View, which is given a return location to use once login completes:

export class LoginNavigation {

    public static navigateToLoginRequired(): void {

        location.hash = location.hash.length > 1 ?
            `#loggedout&return=${encodeURIComponent(location.hash)}` :
            '#loggedout';
    }
}

The Authorization Redirect

The code to redirect the user to login on the system browser is laid out as follows. The browser is redirected and the app receives the result:

private async _startLogin(): Promise<void> {

    try {

        const server = new LoopbackWebServer(this._configuration, this._loginState);
        const runtimePort = await server.start();
        const redirectUri = `http://localhost:${runtimePort}`;

        await this._loadMetadata();

        const adapter = new LoginAsyncAdapter(
            this._configuration,
            this._metadata!,
            this._loginState);
        return await adapter.login(redirectUri);
    } catch (e: any) {

        throw ErrorFactory.getFromLoginOperation(e, ErrorCodes.loginRequestFailed);
    }
}

AppAuth-JS classes are useful but written in an old Node.js callback style. A LoginAsyncAdapter class is therefore used to translate to a modern async await syntax:

public async login(redirectUri: string): Promise<LoginRedirectResult> {

    const requestJson = {
        response_type: AuthorizationRequest.RESPONSE_TYPE_CODE,
        client_id: this._configuration.clientId,
        redirect_uri: redirectUri,
        scope: this._configuration.scope,
    };
    const authorizationRequest = new AuthorizationRequest(requestJson, new DefaultCrypto(), true);

    await authorizationRequest.setupCodeVerifier();

    return new Promise((resolve, reject) => {

        const notifier = new AuthorizationNotifier();
        notifier.setAuthorizationListener(async (
            request: AuthorizationRequest,
            response: AuthorizationResponse | null,
            error: AuthorizationError | null) => {

            try {
                resolve({request, response, error});

            } catch (e: any) {
                reject(e);
            }
        });

        const browserLoginRequestHandler = new BrowserLoginRequestHandler(this._state);
        browserLoginRequestHandler.setAuthorizationNotifier(notifier);
        browserLoginRequestHandler.performAuthorizationRequest(this._metadata, authorizationRequest);
    });
}

Customizing the Authorization Handler

AppAuth-JS provides the following concrete class for managing authorization redirects:

export class NodeBasedHandler extends AuthorizationRequestHandler {
  authorizationPromise: Promise<AuthorizationRequestResponse|null>|null = null;

  constructor(
      public httpServerPort = 8000,
      utils: QueryStringUtils = new BasicQueryStringUtils(),
      crypto: Crypto = new NodeCrypto()) {
    super(utils, crypto);
  }
}

It is also possible to override the base AuthorizationRequestHandler class, which I chose to do in a BrowserLoginRequestHandler class. This is used to deal with the user starting multiple logins at once, and to control the post login browser display.

Invoking the System Browser

The system browser is invoked via a library called opener, which abstracts operating system differences when launching the user’s default browser:

public performAuthorizationRequest(
    metadata: AuthorizationServiceConfiguration,
    request: AuthorizationRequest): void {

    this._authorizationPromise = new Promise<AuthorizationRequestResponse>((resolve) => {

        const callback = (queryParams: any) => {

            const response = this._handleBrowserLoginResponse(queryParams, request);
            resolve(response);

            this.completeAuthorizationRequestIfPossible();
        };

        this._state.storeLoginCallback(request.state, callback);
    });

    const loginUrl = this.buildRequestUrl(metadata, request);
    Opener(loginUrl);
}

The Authorization Code Grant

When a successful authorization response is received, the desktop app sends an authorization code grant request using the TokenRequest class. On success, the TokenResponse contains a set of OAuth tokens:

private async _endLogin(result: LoginRedirectResult): Promise<void> {

    try {

        const codeVerifier = result.request.internal!['code_verifier'];

        const extras: StringMap = {
            code_verifier: codeVerifier,
        };

        const requestJson = {
            grant_type: GRANT_TYPE_AUTHORIZATION_CODE,
            code: result.response!.code,
            redirect_uri: result.request.redirectUri,
            client_id: this._configuration.clientId,
            extras,
        };
        const tokenRequest = new TokenRequest(requestJson);

        const requestor = new CustomRequestor();
        const tokenHandler = new BaseTokenRequestHandler(requestor);

        const tokenResponse = await tokenHandler.performTokenRequest(this._metadata!, tokenRequest);

        const newTokenData = {
            accessToken: tokenResponse.accessToken,
            refreshToken: tokenResponse.refreshToken ? tokenResponse.refreshToken : null,
            idToken: tokenResponse.idToken ? tokenResponse.idToken : null,
        };

        this._tokens = newTokenData;

    } catch (e: any) {

        ErrorFactory.getFromTokenError(e, ErrorCodes.authorizationCodeGrantFailed);
    }
}

The initial desktop app simply stores the tokens in memory. Every time the app is restarted, the user is prompted to re-login. We will show how to improve this user experience in the final desktop code sample.

Loopback Web Server

If not already started, the loopback web server finds a free port in the app’s configured range, then starts listening:

private async _startServer(): Promise<void> {

    LoopbackWebServer._runtimePort = await this._getRuntimeLoopbackPort();

    LoopbackWebServer._server = Http.createServer(this._handleBrowserRequest);

    LoopbackWebServer._server.listen(LoopbackWebServer._runtimePort);
}

private async _getRuntimeLoopbackPort(): Promise<number> {

    return new Promise<number>((resolve, reject) => {

        const finderCallback = (err: any, freePort: number) => {

            if (err) {
                return reject(err);
            }

            return resolve(freePort);
        };

        FindFreePort(
            this._oauthConfig.loopbackMinPort,
            this._oauthConfig.loopbackMaxPort,
            'localhost',
            1,
            finderCallback,
        );
    });
}

Handling Re-Entrancy

For a reliable solution we need to handle multiple login attempts:

  • A user starts a sign in, generating a PKCE code challenge
  • The user accidentally closes the browser tab
  • The user retries signing in, with different PKCE details
  • We must resume the login response with the correct PKCE code verifier

The LoginState class manages this by storing a map of the OAuth state parameter to the corresponding callback:

export class LoginState {

    private _callbackMap: [string, LoginResponseCallback][];

    public constructor() {
        this._callbackMap = [];
        this._setupCallbacks();
    }

    public storeLoginCallback(state: string, responseCallback: LoginResponseCallback): void {
        this._callbackMap.push([state, responseCallback]);
    }

    public handleLoginResponse(queryParams: any): void {

        const state = queryParams.state;
        if (state) {
            const callback = this._getCallbackForState(queryParams.state);
            if (callback) {
                callback(queryParams);
                this._clearState(state);
            }
        }
    }
}

Reliability is Not Perfect

It is probably logically impossible to solve all re-entrancy cases in a perfect manner. If the user clicks Sign In twice, then completes 2 logins, on the second response the web server will be stopped and the user will see this:

This should usually be OK, since the alternative is to keep a web server running indefinitely and leak resources. We’ve achieved the main reliability goal of preventing users from getting stuck and being unable to retry.

Refreshing Access Tokens

After 15 minutes the desktop app’s access token expires, and the AppAuth TokenRequest classes is used again, to send a token refresh token request, then update tokens stored in memory:

private async _performTokenRefresh(): Promise<void> {

    try {

        await this._loadMetadata();

        const extras: StringMap = {
            scope: this._configuration.scope,
        };

        const requestJson = {
            grant_type: GRANT_TYPE_REFRESH_TOKEN,
            client_id: this._configuration.clientId,
            refresh_token: this._tokens!.refreshToken!,
            redirect_uri: '',
            extras,
        };
        const tokenRequest = new TokenRequest(requestJson);

        const requestor = new CustomRequestor();
        const tokenHandler = new BaseTokenRequestHandler(requestor);
        const tokenResponse = await tokenHandler.performTokenRequest(this._metadata!, tokenRequest);

        const newTokenData = {
            accessToken: tokenResponse.accessToken,
            refreshToken: tokenResponse.refreshToken ? tokenResponse.refreshToken : null,
            idToken: tokenResponse.idToken ? tokenResponse.idToken : null,
        };

        if (!newTokenData.refreshToken) {
            newTokenData.refreshToken = this._tokens!.refreshToken;
        }
        if (!newTokenData.idToken) {
            newTokenData.idToken = this._tokens!.idToken;
        }

        this._tokens = newTokenData;

    } catch (e: any) {

        if (e.error === ErrorCodes.refreshTokenExpired) {

            this._tokens = null;

        } else {

            throw ErrorFactory.getFromTokenError(e, ErrorCodes.tokenRefreshFailed);
        }
    }
}

When the refresh token finally expires, the app receives an error  res[pmse with an invalid_grant error code. This is handled by removing tokens from memory and redirecting the user back to the login required view.

Token Expiry Testing

The Authenticator class also has some test methods to enable us to simulate token expiry responses. As for the earlier SPA, this is done  by simply adding text to corrupt the token values sent to the API:

public async expireAccessToken(): Promise<void> {

    if (this._tokens && this._tokens.accessToken) {
        this._tokens.accessToken = `${this._tokens.accessToken}x`;
    }
}

public async expireRefreshToken(): Promise<void> {

    if (this._tokens && this._tokens.refreshToken) {
        this._tokens.refreshToken = `${this._tokens.refreshToken}x`;
        this._tokens.accessToken = null;
    }
}

This helps us to visualise expiry behaviour, and to ensure that our app handles the following scenarios reliably:

  • Expired access tokens result in a 401 response from the API
  • Expired refresh tokens result in token refresh failing

Electron Code Debugging

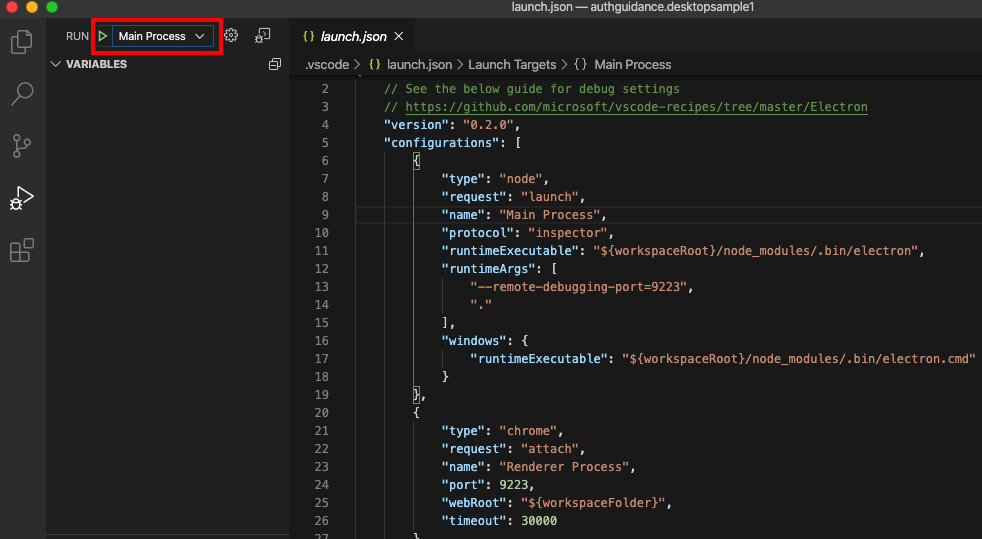
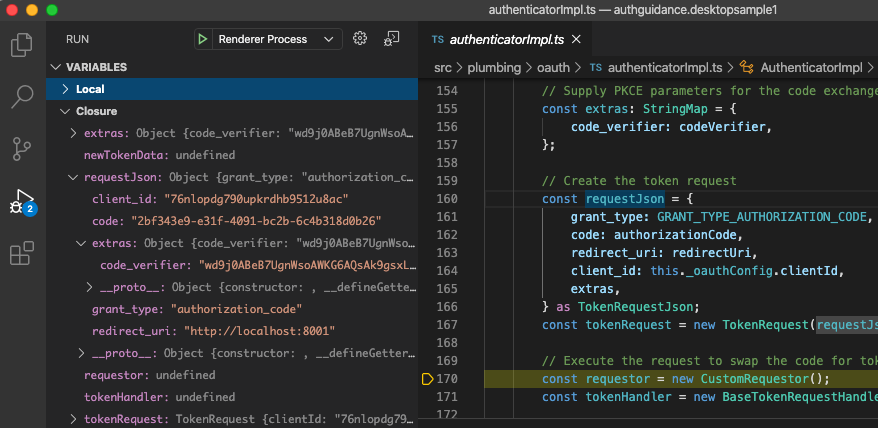
Our project has a launch.json file that enables us to debug code for both the main and renderer processes:

Debugging the main process allows us to step through code related to application startup:

Debugging the renderer process allows us to step through code related to other areas, including viewing properties of AppAuth-JS classes:

Where Are We?

We have have successfully integrated the AppAuth-JS library to implement an OpenID Connect secured cross platform desktop app. In the next code sample we will harden and complete the security implementation.

Next Steps

Desktop App – How to Run the Code Sample

Background

Previously the Desktop Code Sample Overview provided a summary of behaviour. Next we will explain how to get the sample running locally and run some OAuth lifecycle events.

Prerequisite: Install Node.js

If required, go to the Node.js website, then download and run the installer for your operating system.

Step 1: Download Code from GitHub

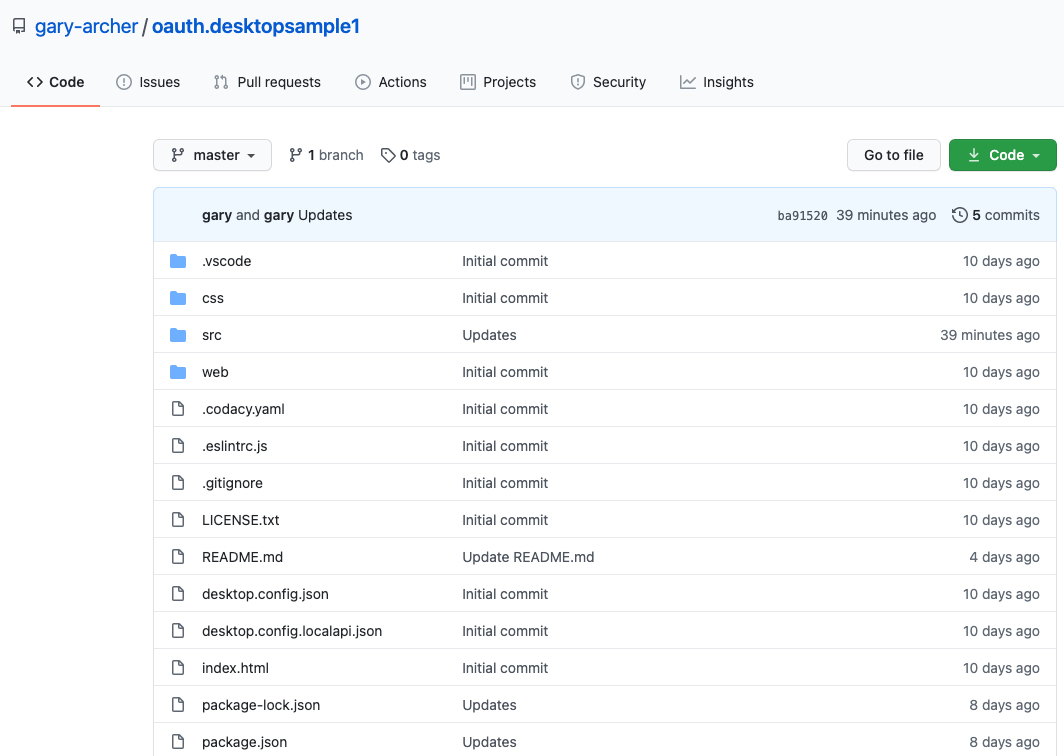
The project is available here, and can be downloaded / cloned to your local PC with this command:

git clone https://github.com/gary-archer/oauth.desktopsample1

Step 2: View the Code in an IDE

The desktop app re-uses the view code from this blog’s second SPA, and has exactly the same views:

export class CompaniesView {

    private readonly _apiClient: ApiClient;

    public constructor(apiClient: ApiClient) {
        this._apiClient = apiClient;
    }

    public async load(): Promise<void> {

        try {

            const data = await this._apiClient.getCompanyList();
            this._renderData(data);

        } catch (e) {

            DomUtils.text('#main', '');
            throw e;
        }
    }

    ...
}

Step 3: Build and Run the Code

Run the following bash script to build the desktop app’s TypeScript code , then run the executable:

cd oauth.desktopsample1
./start.sh

The UI loads its home page and prepares to call the API, then detects that there is no OAuth access token, so the Login Required View is presented:

Step 4: Login via the System Browser

When Sign In is clicked, the app provides some visual progress that login is taking place externally:

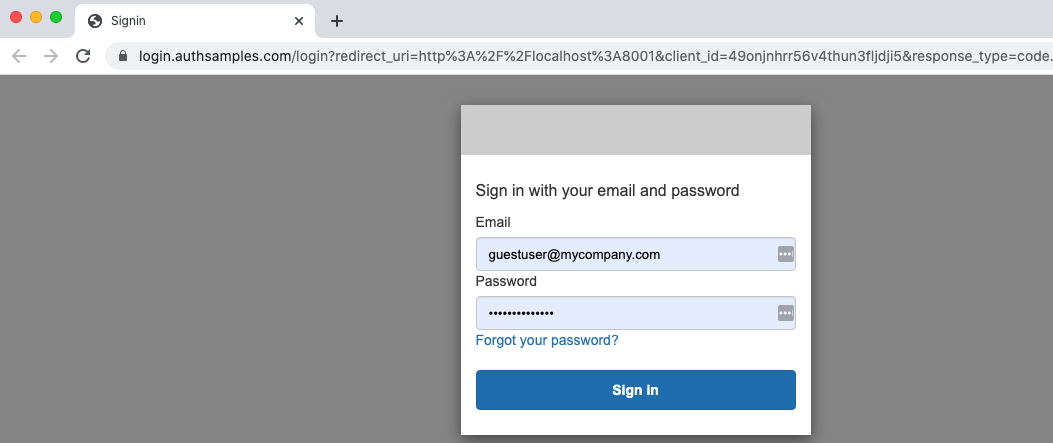
An OAuth authorization redirect is then triggered, in a separate system browser window, and this blog’s test credential can be used to sign in:

  • User: guestuser@mycompany.com
  • Password: GuestPassword1

If password autofill was used for the test user, in an earlier SPA login, it is remembered for the desktop app.  After login the system browser moves to  a simple post login page, rather than showing a blank page. If preferred, the browser could be redirected to an external site instead.

The app is then returned to the foreground and can get OAuth tokens, after which it can successfully get data from a cloud deployed API, then render it:

Step 5: View OAuth Configuration

The desktop app has a JSON configuration file which includes its OAuth settings. By default the app connects to AWS endpoints, so that you only need to run the frontend locally:

{
    "app": {
        "apiBaseUrl":       "https://api.authsamples.com/investments"
    },
    "oauth": {
        "authority":        "https://cognito-idp.eu-west-2.amazonaws.com/eu-west-2_CuhLeqiE9",
        "clientId":         "6o4rlsod8j6phsnuf3pdjo640u",
        "loopbackMinPort":  8001,
        "loopbackMaxPort":  8003,
        "scope":            "openid profile https://api.authsamples.com/investments",
        "postLoginPage":    "https://authsamples.com/apps/basicdesktopapp/postlogin.html"
    }
}

In the default setup the following URLs are used:

Component URL(s)
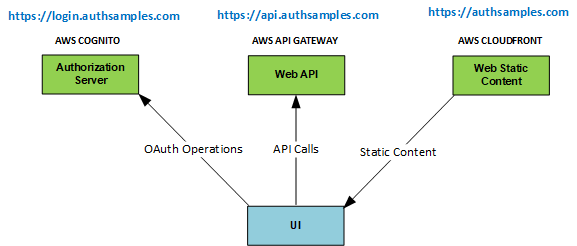
API https://api.authsamples.com
Authorization Server https://login.authsamples.com
Post Login Page https://authsamples.com/apps/basicdesktopapp/postlogin.html

Note that the JSON configuration also includes details related to running a Loopback Web Server on the local PC:

Setting Description
Loopback Port Range Port numbers used in OAuth redirect URIs
Post Login Page Where to send the browser after a login

Step 6: OAuth Client Registration

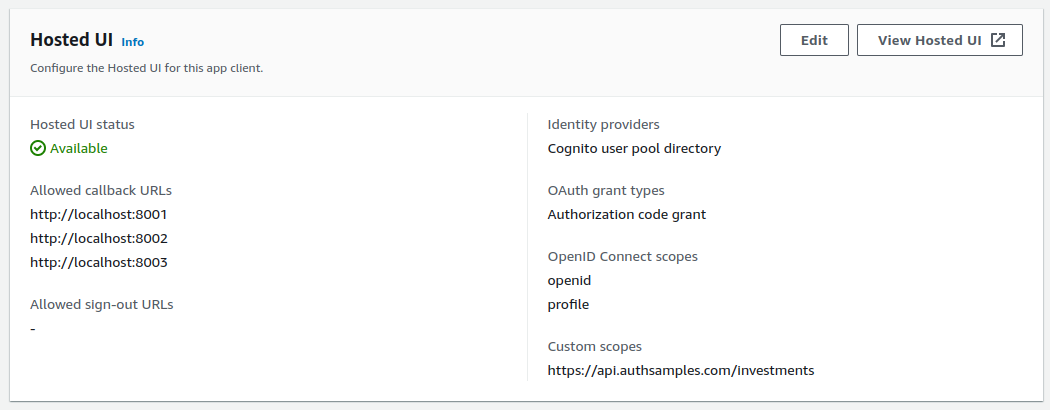
Our desktop app is registered as an OAuth Client in AWS Cognito, with the following settings:

According to RFC8252, it should be possible to register a redirect URI of http://localhost and any port should then be allowed at runtime. Not all authorization servers support this, and for AWS Cognito I had to register all possible redirect URI values.

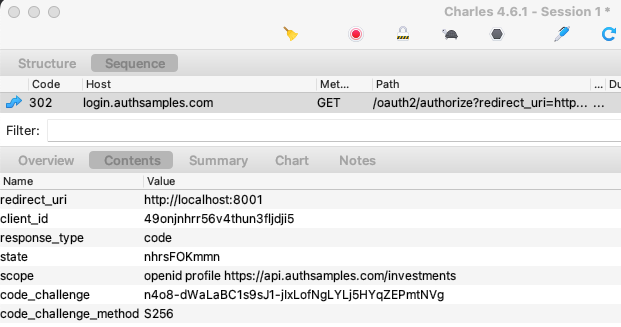
Step 7: Authorization Redirect

The desktop app uses the Authorization Code Flow (PKCE), as is standard for native apps, and redirect messages are equivalent to those for SPAs.

At this point the desktop app has started a local HTTP server. A low privilege port is used, with a value above 1024. The desktop app can therefore start the server without requiring local administrator rights.

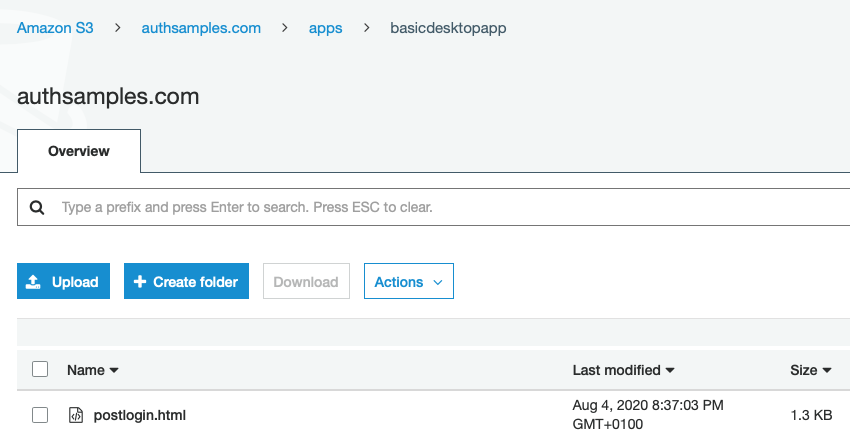
Step 8: Login Completion Page

The login completion page was uploaded to an AWS S3 Bucket and then an AWS Cloudfront Distribution was used to expose it over an HTTPS URL:

Step 9: Authorization Code Grant

When the desktop app receives the login response it sends an authorization code grant message to swap the code for  OAuth tokens. PKCE is used to prove that the same caller who started the login is ending it.

Step 10: Understand Reactivation of the App

When login completes, you may find that the browser  remains topmost and the user may have to manually switch back to the desktop app. Private URI scheme based logins have the best support for returning the app to the foreground, as will be demonstrated in the final desktop code sample.

Step 11: Test Login Re-Entrancy

A busy user could fail to complete a login and close the browser window, leaving the UI in the following state. Our app allows the user to provide a gesture to retry the login, by clicking the Home button:

Step 12: Simulate Expiry Events

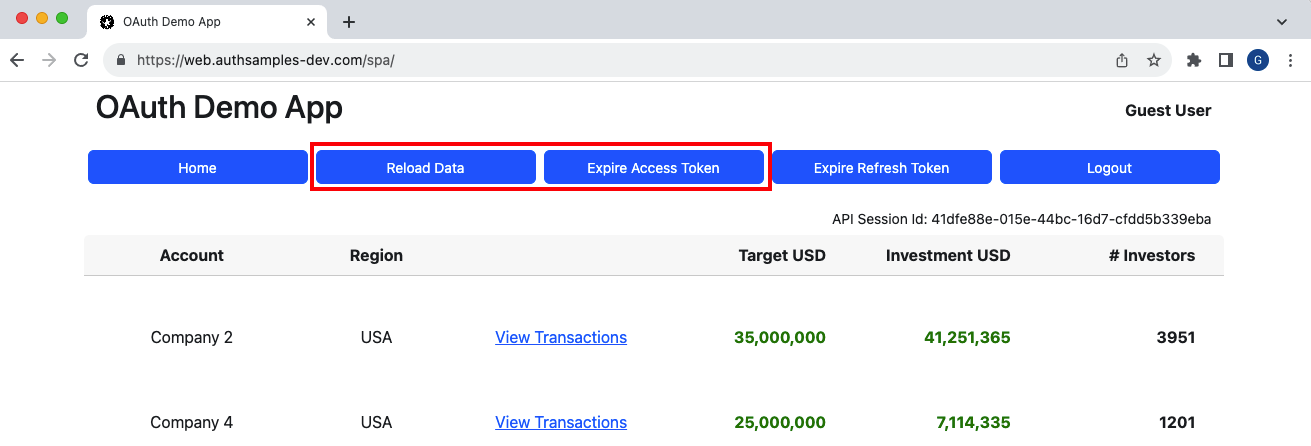
We can use the UI’s session buttons to simulate expiry related events during a user session:

Our first sample only stores tokens in memory, so that if we use the Reload option in the Electron menu, tokens are lost and the user has to sign in again. We will improve on this for the final code sample.

Step 13: Test Access Token Expiry

We can rehearse access token expiry by clicking Expire Access Token followed by Reload Data. This adds characters to the access token so that the API returns a 401 response. The app then sends a Refresh Token Grant message to get a new access token and retries API requests. Note that a desktop app is a public client and the refresh token is not protected with a client credential:

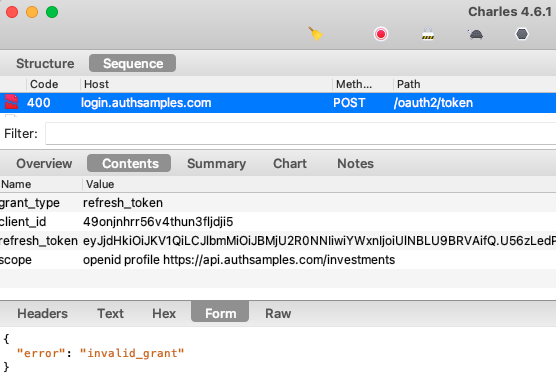
Step 14: Test Refresh Token Expiry

We can rehearse refresh token expiry by clicking Expire Refresh Token followed by Reload Data. This adds characters to the refresh token so that the Authorization Server returns an invalid_grant response:

This error code means the user needs to sign in again, so we redirect the user to the Login Required view.

Step 15: Build the Desktop App Executable

To build the app for distribution you can execute the ‘./pack.sh‘ script, which builds the app into a platform specific executable file under the dist folder, then runs it.

Local API Setup

If required, you can run the desktop app against a local OAuth secured API.  Do so for one of this blog’s final APIs, by following the below steps.

Step A: Run the API

Select one of the following API options and follow its instructions to run it locally:

Step B: Point the Desktop App to a Local API

To connect to local APIs, update the URL in the desktop.config.json file to the local PC value of https://api.authsamples-dev.com:446/investments:

{
    "app": {
        "apiBaseUrl":       "https://apilocal.authsamples-dev.com:446/investments"
    },
    "oauth": {
        "authority":        "https://cognito-idp.eu-west-2.amazonaws.com/eu-west-2_CuhLeqiE9",
        "clientId":         "6o4rlsod8j6phsnuf3pdjo640u",
        "loopbackMinPort":  8001,
        "loopbackMaxPort":  8003,
        "scope":            "openid profile https://api.authsamples.com/investments",
        "postLoginPage":    "https://authsamples.com/apps/basicdesktopapp/postlogin.html"
    }
}

Step C: Run the Desktop App

When you now run the desktop app it will call the local API, and you can also focus on API behaviour, such as OAuth and log handling:

Where Are We?

We have used our second SPA to build an OAuth Secured Desktop App, which runs on all of the main operating systems. At this stage the app has some limitations which will be resolved in the second desktop sample.

Next Steps

Desktop Code Sample Overview

Background

Previously we summarised this blog’s Native Architecture Goals. Secured mobile apps will be covered in later posts. First though, we will implement an initial OpenID Connect secured desktop code sample.

Features

The behaviour provided in our initial sample is summarised below:

Feature Description
Cross Platform The desktop app will run on Windows, macOS and Linux and will be coded in TypeScript
Library Integration A third party library will implement OpenID Connect logins and token handling
System Browser Logins The desktop app will invoke the system browser to sign the user in, then listen for the login response
Reliability We will handle some re-entrancy scenarios when our app interacts with the system browser

Components

The sample connects to components hosted in AWS, so that readers only need to run the Desktop Code to get a complete solution. This will include the use of web content that renders a post login page in the system browser.

Code Download

The code for our Initial Desktop App can be downloaded from here, and we will cover full details of how to run it in the next post:

 Code Sample Behaviour

Our overall Desktop UI will have the same simple theme and views as the earlier SPAs, though the login user experience will feel different:

Desktop App Technology

We will implement our app using Electron, which uses web technologies for desktop screen development. We will therefore be able to re-use most code from the Plain TypeScript SPA we built earlier.

Platform Specific Appearance

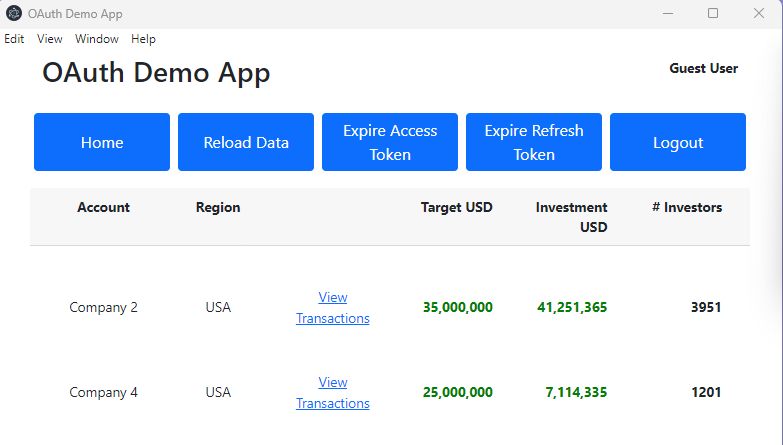
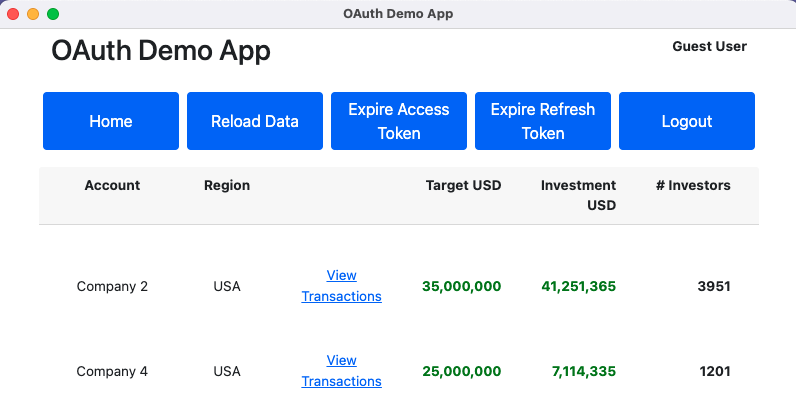
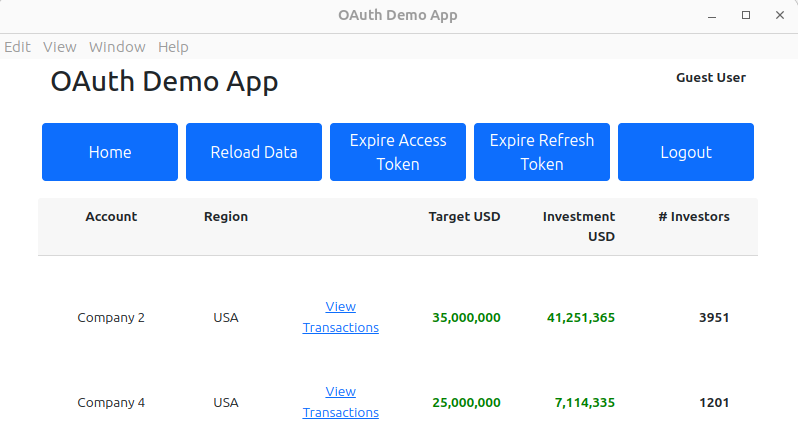
Our desktop app will run on Windows, macOS and Linux, and the following screenshots show the minor differences in appearance:

AppAuth Security Library

We will use the AppAuth-JS Library to implement the OpenID Connect  flow. Once the behaviour is understood you should be able to adapt it to any other desktop technology, using a different library. For example, a C# desktop app might use the Identity Model OIDC Client.

Deprecated Web View Logins

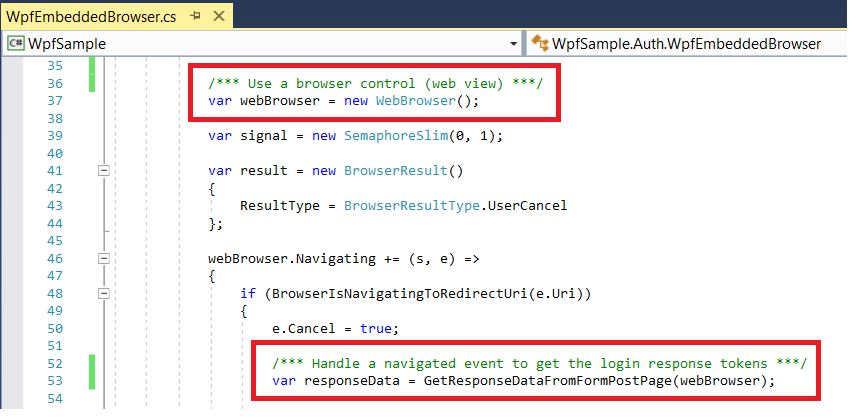
A few years ago it was standard for OAuth secured desktop apps to use a web view for logins. In a C# application you might write code like this:

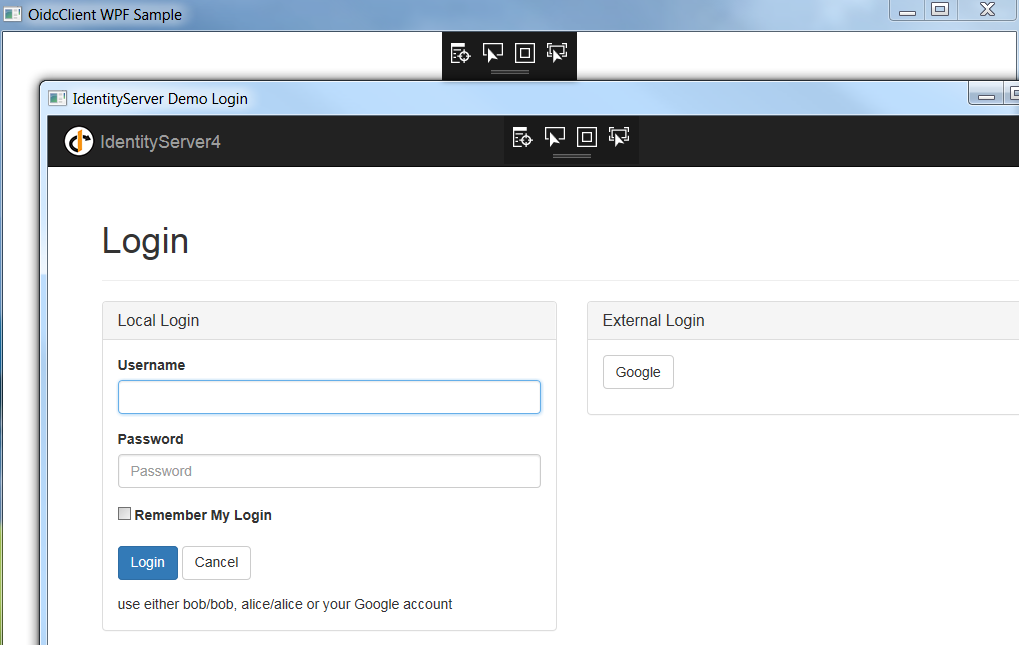
Typically logins would use a popup window hosting a web view browser control. The popup would capture the login response from the web view via an ‘Out of Browser Redirect URI‘ such as urn:ietf:wg:oauth:2.0:oob.

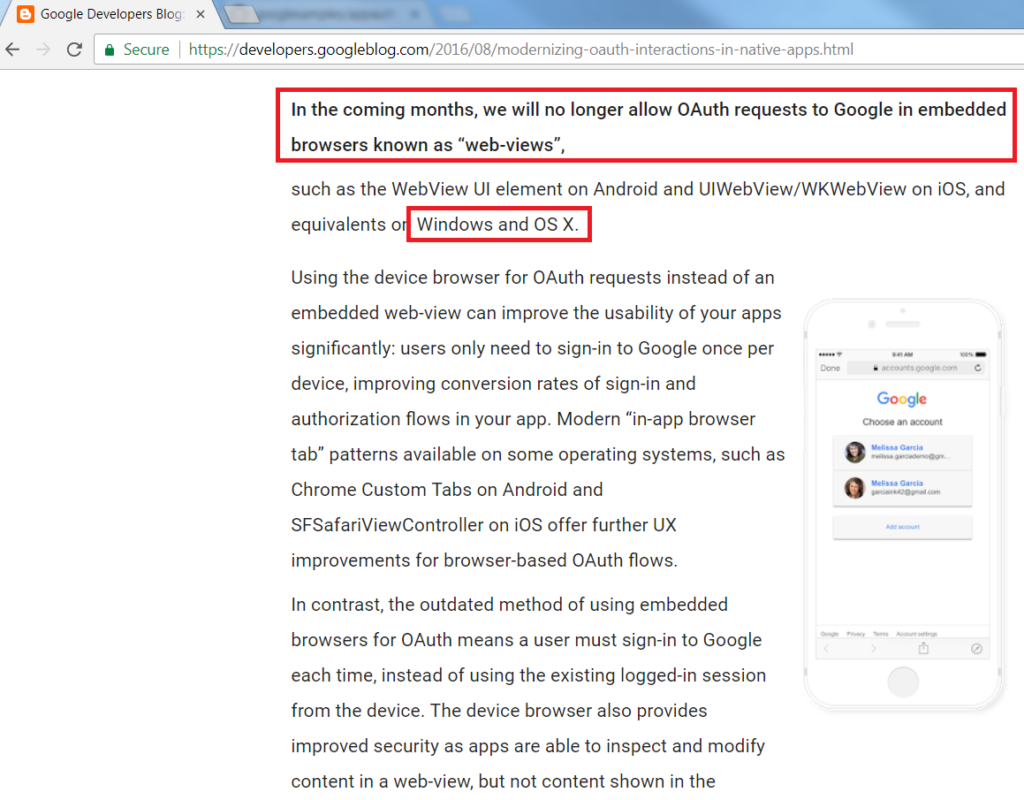
However, using web views is no longer recommended. Web views runs a private browser session, where SSO cookies may be dropped and password autofill may have issues. Authorization servers are encouraged to inspect the user agent and block login requests from web views:

Instead, in 2021 it is recommended to open an external system browser  window on which the user performs their login. Doing so avoids the use of a private browser session, yet feels less integrated into the desktop app.

Native Authorization Responses

A web client runs in a browser and has an addressable URL on which to receive login responses. Native apps need a different mechanism, and RFC8252 explains the 3 options that can be used:

Only the first two options work for a desktop app, and the loopback option will be used for this blog’s initial desktop app. The final desktop app will instead use a private URI scheme. Later, this blog’s mobile apps will use claimed HTTPS schemes.

Option Example Redirect URI Usable By
Loopback Interface http://127.0.0.1:8000 Desktop apps
Private URI Scheme x-mycompany-myapp:/callback Mobile or desktop apps
Claimed HTTPS Scheme https://web.mycompany.com/myapp Mobile apps

The AppAuth Code Sample

To quickly see a login via the System Browser, you can run the AppAuth Electron Sample via these commands:

  • git clone https://github.com/googlesamples/appauth-js-electron-sample
  • cd appauth-js-electron-sample
  • npm install
  • npm start

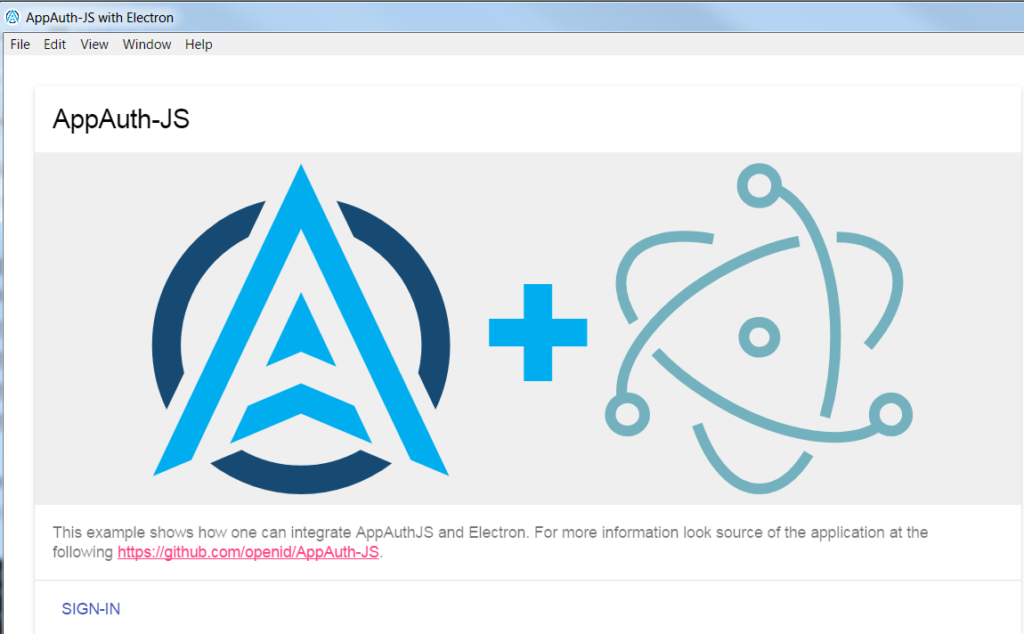
A simple desktop apps then presented, and we can click Sign In to invoke an OAuth login on the system browser:

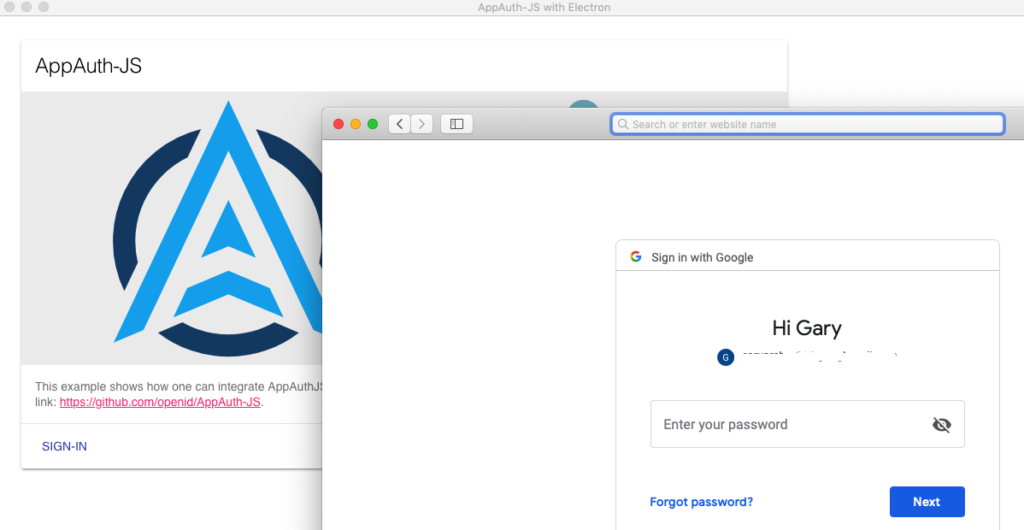
When the Sign In link is clicked, the system browser is opened. If the user is not already logged in, there will be a prompt to sign in via Google:

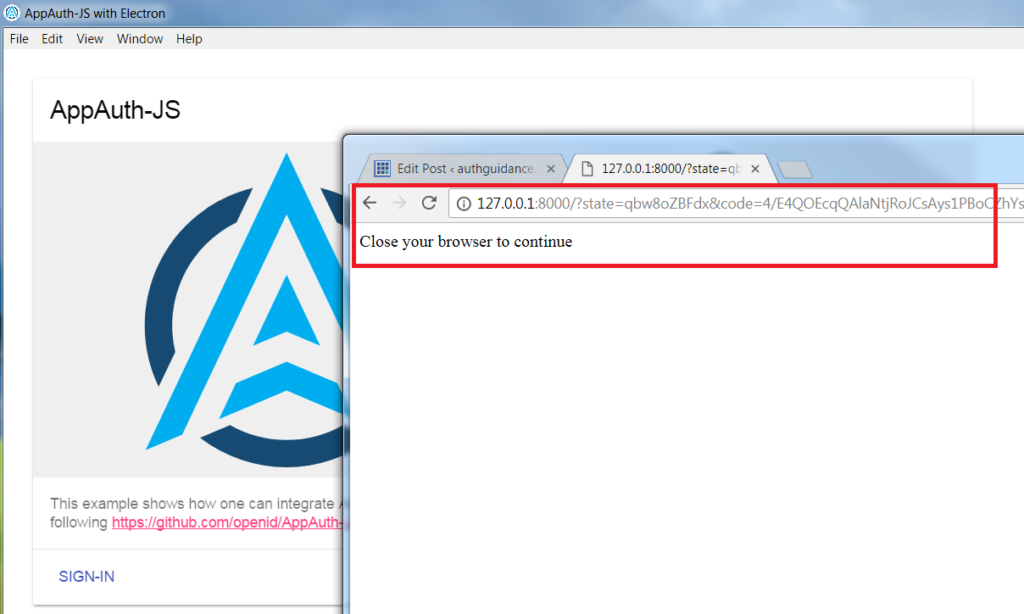
The Desktop App supplies a ‘loopback’ value of http://127.0.0.1:8000 as the OAuth redirect URI, and creates an HTTP endpoint on this port, to listen for the response.

After login, a request is sent to this HTTP endpoint, with the authorization response URL. The desktop app then extracts the returned authorization code and swaps it for tokens, after which it can call APIs.

Login User Experience

The login UX for the desktop view is not ideal. There is a disconnected browser window, and a blank page by default. We will show how to render a custom page, and also how to handle retries, to ensure reliability.

Where Are We?

This post explained the behaviours of the initial desktop code sample, to get logins and API calls working with basic reliability. Next we will show how to build and run it locally.

Next Steps

Native Architecture Goals

Background

Previously we completed our API theme by covering some people focused API Technical Support Analysis. Next we will build OAuth Secured Native Apps that connect to this blog’s cloud endpoints.

At the start of this blog, the Web Architecture Goals post articulated some high level qualities to aim for in a modern web application. This post  provides a similar summary for mobile and desktop apps. I recommend  monitoring important outcomes, to ensure that they are being achieved.

Goal: Consistent Frontend Architecture

This blog’s desktop and mobile apps will have identical ‘business’ functionality to the SPA delivered in the first theme. All frontends do the same thing, to authenticate the user, call APIs and work with business data.

Therefore all of this blog’s frontend apps use identical classes, with the same responsibilities. The code should feel the same for React SPAs, React Electron Apps, Jetpack Compose Android Apps, or SwiftUI iOS Apps.

Goal: Portable Frontend Technology

The Final SPA was developed using React, and ideally a company should be able to use the same technology stack for native apps. At a real company, this would enable teams to easily switch from SPA to mobile development.

However, web stacks are focused on rendering views and updating the DOM, whereas native apps need to do more than this. The best tool for the job must be chosen, with the least scope for blocking technical issues.

Goal: Best Native Security Capabilities

Native apps must be able to interact with APIs, so need an API message credential. APIs must return only correct and allowed data for each user, so the user must be authenticated first.

OAuth and OpenID Connect provide powerful options for issuing access tokens as API message credentials, and authenticating the user in many possible ways. OAuth for Native Apps provides some best practice recommendations.

Native apps must have full access to the underlying operating system, so that they can implement security flows. This includes the ability to use hardware backed keys on mobile devices, interact with the system browser, receive deep links, and store OAuth tokens securely.

By following native security best practices, vetted by experts, companies will avoid most vulnerabilities and perform better in PEN tests. Using respected patterns and libraries, such as AppAuth, also makes it easier to explain security to reviewers.

Goal: Best Login Usability

A poor login user experience can be a barrier to adoption for mobile apps. Aim to avoid asking users to login or type passwords on small keyboards too often. For native apps, this blog will use options such as password autofill, and tokens will be stored in secure OS storage that is private to the app.

Goal: Mobile Web Interoperability

For mobile apps, it used to be common to reuse views from a web app, to provide part of the user experience. This ran in web views and also ensured that any bug fixes were rolled out to users immediately.

Yet this type of design is now problematic because of security. Both apps should receive separate access tokens with different privileges. Web apps should also use the latest secure cookies as API credentials.

These days it is therefore recommended to share data using APIs, and to implement views multiple times. This requires additional development, but ultimately results in the best user experience, since each frontend is developed using the optimal view technology.

Goal: Scalable Security

OAuth enables native apps to externalize their security to the authorization server, and to libraries written by experts. This results in simplified application code, due to the outsourced security, and scales well to many frontend apps.

Goal: Easy to Deploy

Mobile apps have standardized deployment mechanisms to app stores. Desktop apps should run on Windows, macOS and Linux. They should not require technical prerequisites such as a Java runtime. It must also be possible to install them with only normal user privileges.

Goal: Developer Productivity

When choosing native technology stacks, ensure solid error handling control during native operations. Developers must be able to handle error and expiry conditions in their preferred way. Head scratching and delays caused by technical layers must be minimized.

I have found JavaScript stacks for desktop apps to work pretty well. Yet for mobile apps my experience has been that using Kotlin and Swift results in the best productivity. This is despite the fact that the same app needs to be written twice.

Where Are We?

This post clarified some key behavior that will be delivered in this blog’s native apps. We will see that OAuth flows for native apps are tricky to implement, both technically, and to provide a good login user experience.

Next Steps

API Technical Support Analysis

Background

Previously we provided an Elasticsearch Log Aggregation Setup, and enabled logs to be queried. This post shows how different technical stakeholders could then query the log aggregation system, in a people friendly manner, to manage common technical support use cases.

Deployed Components

If you have followed the logging setup you will first be running the secured SPA, which calls secured APIs via a cookie layer:

You can then run the Kibana system to issue queries. The main focus of this post is control over log data, so we will only use the dev tools console:

The following sections represent log queries by user type. The first section is for DevOps users, the second for testers and the third for developers.

1. DevOps Technical Support Queries

DevOps teams need effective filtering to understand systems under load, where there may be 100,000 or more API requests per day.

1.1. Production Incident Drill Down

Consider an incident that occurred yesterday at 9:00pm in your time zone, reported via the following screenshot in an email. The SPA enables you to simulate a user experiencing a problem due to a backend error, by long pressing the Reload Data button for a couple of seconds:

The exception details can then be quickly looked up via the following type of query. This matches the Fairly Unique Identifier displayed, which is designed to be easy for end users to read, write or say.

GET apilogs*/_search
{ 
  "query":
  {
    "match":
    {
      "errorId": 54308
    }
  }
}

This is a Lucene query and brings back a document. The DevOps user can then quickly access the underlying server error details and find the cause. The important behaviour is to get to the code area that is failing, which is just an error simulation in this case.

{
    "_index": "apilogs-2022.09.26",
    "_id": "17580a1c-1631-f80f-e32e-9e237d47cbab",
    "_score": 1,
    "_source": {
    "hostName": "finalapi-544cf4b557-ntvrg",
    "resourceId": "2",
    "apiName": "SampleApi",
    "method": "GET",
    "errorCode": "exception_simulation",
    "millisecondsTaken": 4,
    "operationName": "getCompanyTransactions",
    "sessionId": "720078f3-bd50-e9f1-26d4-2b7c9e606402",
    "userId": "a6b404b1-98af-41a2-8e7f-e4061dc0bf86",
    "errorData": {
        "serviceError": {
            "stack": [
            "Error: An unexpected exception occurred in the API",
            "at Function.createServerError (/usr/api/dist/plumbing/errors/errorFactory.js:15:16)",
            "at CustomHeaderMiddleware.processHeaders (/usr/api/dist/plumbing/middleware/customHeaderMiddleware.js:22:51)",
            "at Layer.handle [as handle_request] (/usr/api/node_modules/express/lib/router/layer.js:95:5)",
            "at trim_prefix (/usr/api/node_modules/express/lib/router/index.js:328:13)",
            "at /usr/api/node_modules/express/lib/router/index.js:286:9",
            "at param (/usr/api/node_modules/express/lib/router/index.js:365:14)",
            "at param (/usr/api/node_modules/express/lib/router/index.js:376:14)",
            "at Function.process_params (/usr/api/node_modules/express/lib/router/index.js:421:3)",
            "at next (/usr/api/node_modules/express/lib/router/index.js:280:10)",
            "at ClaimsCachingAuthorizer.authorizeRequestAndGetClaims (/usr/api/dist/plumbing/security/baseAuthorizer.js:51:13)"
            ],
            "details": ""
        },
        "clientError": {
            "area": "SampleApi",
            "code": "exception_simulation",
            "utcTime": "2023-03-26T10:57:28.482Z",
            "id": 54308,
            "message": "An unexpected exception occurred in the API"
        },
        "statusCode": 500
    },
    "path": "/investments/companies/2/transactions",
    "@timestamp": "2023-03-26T10:57:28.482Z",
    "name": "total",
    "utcTime": "2023-03-26T10:57:28.482Z",
    "millisecondsThreshold": 500,
    "correlationId": "fa20ca8e-8506-c4f0-9217-1cac1a83a2c8",
    "errorId": 48649,
    "id": "17580a1c-1631-f80f-e32e-9e237d47cbab",
    "clientApplicationName": "FinalSPA",
    "statusCode": 500
}

Certain error fields are denormalized to the top level, to also enable instances or types of errors to be found by SQL queries:

POST _sql?format=txt
{"query": """
SELECT
  utcTime,
  operationName,
  clientApplicationName,
  sessionId,
  statusCode,
  userId 
FROM
  "apilogs*"
WHERE
  errorCode='exception_simulation' 
AND
  utcTime between '2019-08-16T09:30:00' and '2019-08-16T10:30:00'
ORDER BY
  utcTime ASC
"""}

For this type of query, the output format is represented differently in the Kibana UI, as a tabular list of columns:

   apiName    |    operationName     |clientApplicationName|  statusCode   |     errorCode      |               userId               
---------------+----------------------+---------------------+---------------+--------------------+------------------------------------
SampleApi      |getCompanyTransactions|FinalSPA             |500            |exception_simulation|a6b404b1-98af-41a2-8e7f-e4061dc0bf86

Support staff can then query how often this type of error has been occurring and for which users:

POST _sql?format=txt
{"query": """
SELECT
  utcTime,
  operationName,
  clientApplicationName,
  sessionId,
  statusCode,
  userId
FROM
  "apilogs*"
WHERE 
  errorCode='exception_simulation' 
AND
  utcTime between '2019-08-16T09:30:00' and '2019-08-16T10:30:00'
ORDER BY 
  utcTime ASC
"""}

Support staff can also query what else the user was doing around this time, to identify usage patterns that led to the incident:

POST _sql?format=txt 
{"query": """
SELECT
  apiName,
  method,
  path,
  clientApplicationName,
  statusCode,
  errorCode
FROM
  "apilogs*"
WHERE
  sessionId='720078f3-bd50-e9f1-26d4-2b7c9e606402'
ORDER BY
  utcTime ASC
LIMIT 100
"""}

This will return results similar to the following, and for the example SPA this provides a clear picture of the user’s backend activity against both the Final API and the OAuth Agent:

    apiName    |    method     |            path             |clientApplicationName|  statusCode   |     errorCode      
---------------+---------------+-----------------------------+---------------------+---------------+--------------------
OAuthAgent     |POST           |/oauth-agent/login/end                |FinalSPA             |200            |null                
OAuthAgent     |POST           |/oauth-agent/login/start              |FinalSPA             |200            |null                
OAuthAgent     |POST           |/oauth-agent/login/end                |FinalSPA             |200            |null                
SampleApi      |GET            |/investments/companies                |FinalSPA             |200            |null                
SampleApi      |GET            |/investments/userinfo                 |FinalSPA             |200            |null                
SampleApi      |GET            |/investments/companies/2/transactions |FinalSPA             |200            |null                
OAuthAgent     |POST           |/oauth-agent/expire                   |FinalSPA             |204            |null                
SampleApi      |GET            |/investments/userinfo                 |FinalSPA             |401            |invalid_token        
SampleApi      |GET            |/investments/companies/2/transactions |FinalSPA             |401            |invalid_token        
OAuthAgent     |POST           |/oauth-agent/refresh                  |FinalSPA             |204            |null                
SampleApi      |GET            |/investments/companies/2/transactions |FinalSPA             |200            |null                
SampleApi      |GET            |/investments/userinfo                 |FinalSPA             |200            |null                
SampleApi      |GET            |/investments/companies/2/transactions |FinalSPA             |500            |exception_simulation

This provides powerful options for enabling DevOps staff to resolve code level problems. This can help enable qualities such as resolving 80% of production incidents without the need to involve a specialist developer.

1.2. Querying by Transaction IDs

Some UI systems may only display errors in terms of a business identifier, such as a transaction ID. If you receive such a screenshot, then entries will be findable in logs if that ID is used in REST URL path segments:

  • POST /customers/123/orders/456-789

When this is the case, the API logging saves the dynamic REST path segments into a resourceId column, and for the above URL its value would be 123/456-789. We can therefore use a partial match to locate the full data:

POST _sql?format=txt
{
  "query": """SELECT * from "apilogs*" where resourceId like '%456-789%'"""
}

When designing APIs, avoid secure values in URL path segments, such as the above customer ID. You then avoid the potential for a man in the middle to change them. Instead, deliver secure values to APIs by issuing them to  JWT access tokens.

1.3. Reporting Failure Occurrences

It can be common in software for there to be intermittent problems which are initially ignored, but then occur again at highly inconvenient times. Good logging forces failures or slowness to instead be visible, so that you can see where you might need to improve:

POST _sql?format=txt
{"query": """
SELECT
  clientApplicationName,
  apiName,
  operationName,
  statusCode,
  errorCode,
  COUNT(1) as frequency
FROM
  "apilogs*"
WHERE
  errorCode IS NOT NULL 
AND
  statusCode <> 401
AND
  utcTime > '2019-08-01' 
GROUP BY
  clientApplicationName,
  apiName,
  operationName,
  statusCode,
  errorCode
"""}

Reports can then be provided to engineering teams once per sprint. Each type of issue should be understood, and actions such as adding more log detail can be planned, if needed.

clientApplicationName|    apiName    |    operationName     |  statusCode   |     errorCode      |   frequency   
---------------------+---------------+----------------------+---------------+--------------------+---------------
FinalSPA             |SampleApi      |getCompanyTransactions|404            |company_not_found   |6              
FinalSPA             |SampleApi      |getCompanyList        |500            |exception_simulation|2              
FinalSPA             |SampleApi      |getCompanyList        |500            |server_error        |7              
BasicIosApp          |SampleApi      |getCompanyTransactions|500            |file_read_error     |1              
BasicAndroidApp      |SampleApi      |getCompanyTransactions|400            |invalid_company_id  |1              
BasicDesktopApp      |SampleApi      |getUserInfo           |500            |server_error        |2              

Some 400 errors are part of normal application flows, whereas others are unexpected, and might point to a bug. An example might be incorrect handling of Unicode characters.

2. Productive Quality Assurance

Technical support logs can be very useful for testing, both for general productivity, and also because it forces all errors and slowness to be visible.

2.1. Analysing your own UI Session

Our sample UIs all send a Session ID to the API via a custom header. This field is nothing to do with OAuth or authenticated user sessions, and is only used for log filtering:

This enables testers to only view logs for the entries they are interested in, for their own UI session:

POST _sql?format=txt
{
"query": """SELECT * from "apilogs*" where sessionId='196f31be-8a28-e0d6-3247-a29a4a3d86ca'"""
}

2.2. Measuring Problems in Test Systems

A useful mechanism is to use logs to monitor all errors that occur in test systems. Those that are part of normal application flows, such as expiry, can use error codes representing expected failures, so that they can be filtered out of the report.

POST _sql?format=txt
{"query": """
SELECT
  clientApplicationName,
  apiName,
  operationName,
  statusCode,
  errorCode,
  COUNT(1) as frequency
FROM
  "apilogs*"
WHERE
  errorCode IS NOT NULL 
AND
  statusCode <> 401
AND
  utcTime > '2019-08-01' 
GROUP BY
  clientApplicationName,
  apiName,
  operationName,
  statusCode,
  errorCode
"""}

Other errors may need to be discussed. Some temporary errors are expected when working with infrastructure, yet if they happen frequently it is a sign that something is wrong and needs further engineering work.

2.3. Performance Testing

Companies sometimes use performance tests on real world data sets before releasing a feature. The Session ID sent to APIs would be used in the same way by both load tests and UI clients. To get the server side logs for the 5 slowest requests in a load test, the following type of advanced Lucene query could be used:

POST apilogs*/_search
{
  "query": {
    "bool": {
      "must": [
        {
        "term": {"sessionId": "cc24c3dd-9bda-7ebe-c941-062a93691e83"}
        }
      ],
      "filter": [
        {
          "range": {"utcTime": {"gte": "2019-08-01"}}
        },
        {
          "script": {"script": "doc['millisecondsTaken'].value > doc['millisecondsThreshold'].value"}
        },
        {
          "term": {"operationName": "getCompanyTransactions"}
        }
      ]
    }
  },
  "sort": [
    {"millisecondsTaken": "desc"}
   ],
  "from" : 0, "size" : 5
}

When this identifies slow requests you will want to be able to drill into details to understand why. Our API logging design writes a performance breakdown when a threshold is exceeded.

The performance breakdown could include sanitized SQL with parameters. In the following example, unexpected SQL is being run, with a missing ‘where‘ clause. This would explain the cause of the slowness.

"performance": {
  "children": [
    {
      "name": "databaseLookup",
	  "detail": "select * from transactions",
	  "millisecondsTaken": 9024
    }
  ],
  "name": "total",
  "millisecondsTaken": 9776
}

3. Productive Development

The preferred place to find problems is at the earliest stage of the pipeline, while the code is being written. This helps to ensure good quality and saves the business money.

3.1. Cross Team Error Lookup

A good logging system empowers developers when there is an error with someone else’s component, as in the below case, where a UI developer is experiencing an API problem:

Any developer in any team should be able to quickly look up the cause of the upstream error via a simple query:

GET apilogs*/_search
{
  "query" : {
    "match" : { "errorId" : 97264 }
  }
}

The UI developer can then sometimes find a workaround, or the API team can be notified. This ensures a scientific approach and avoids guesswork and delays.

3.2. New Team Members

When a new person joins a development team, they can run a UI session to quickly learn which API endpoints are used. This enables them to quickly get up to speed on how APIs are used.

3.3. Concurrency Testing

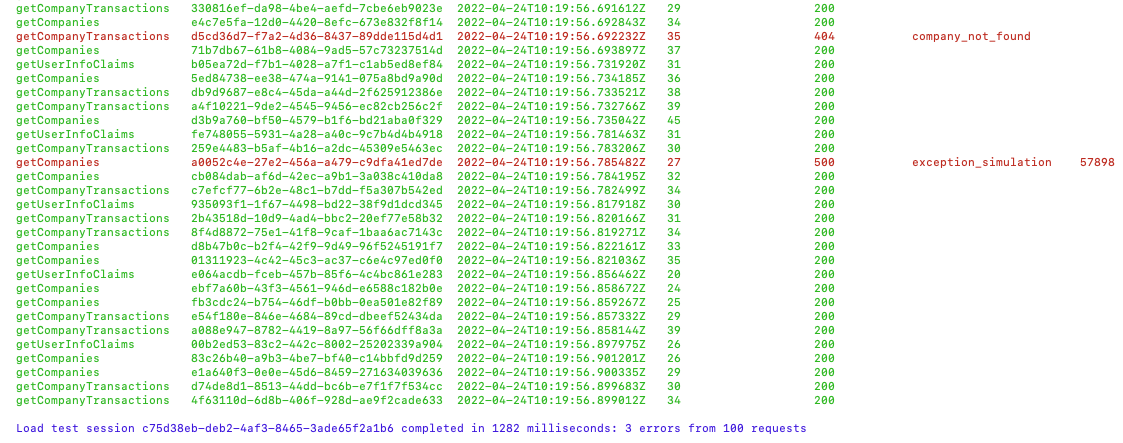
API development has risks of concurrency bugs, so it is recommended to verify no concurrency problems early, using some kind of basic load test. This blog’s final APIs fire 100 API requests and intentionally send some requests with invalid input, to rehearse API errors:

If any multi-threaded bugs are discovered, the same query techniques for a UI client session can be used to look up error details. Multi-threaded bugs in production are very serious and may be impossible to diagnose, even with good logging. The only option may be a system rollback.

3.4. Error Rehearsal

Developers are often involved in production support, which can be stressful for them if they are not prepared. They must therefore ensure that useful queryable logs are written, by testing failure scenarios when coding. The Error Handling and Supportability post explains some techniques.

Rehearsal often involves throwing exceptions temporarily, at various places in the API code, after which you check API logs and ensure that the logged details explain the cause in a clear way. Such tests should be done as a part of normal coding, and can optionally use a Local Log Aggregation Setup.

Where Are We?

The Final APIs implemented this blog’s Effective API Logging design, which was tricky at a code level. Log aggregation was then configured and deployed. This post demonstrated the end result for technical staff, to provide significant benefits in people productivity.

Next Steps

Elasticsearch Log Aggregation Setup

Background

Previously we ran some API Automated Tests, and next we will deploy a local Docker based Elasticsearch Log Aggregation system. This will enable logs to flow from APIs during development.

API Logging Output

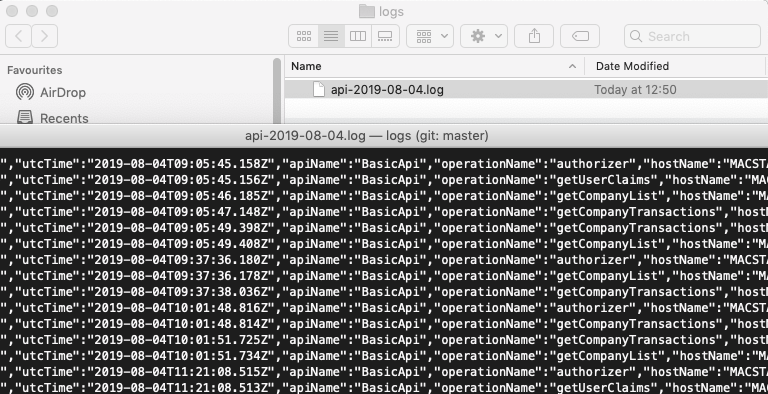
At this point we have completed our API coding and the log data contains useful fields that are written to text files, one line per entry:

{"id":"f1c38406-6d1e-212f-ee8b-e100a4219b28","utcTime":"2022-07-15T17:34:28.631Z","apiName":"SampleApi","operationName":"getCompanyList","hostName":"MACSTATION.local","method":"GET","path":"/investments/companies","statusCode":401,"errorCode":"unauthorized","millisecondsTaken":10,"millisecondsThreshold":500,"correlationId":"b868385c-e8fa-9496-9d5b-492158e3d555","errorData":{"statusCode":401,"clientError":{"code":"unauthorized","message":"Missing, invalid or expired access token"},"context":"No access token was supplied in the bearer header"}}
{"id":"c997e4f0-e7a3-ed9c-253f-fd25110a4a33","utcTime":"2022-07-15T17:34:37.065Z","apiName":"SampleApi","operationName":"getCompanyTransactions","hostName":"MACSTATION.local","method":"GET","path":"/investments/companies/2/transactions","resourceId":"2","clientApplicationName":"LoadTest","userId":"a6b404b1-98af-41a2-8e7f-e4061dc0bf86","statusCode":200,"millisecondsTaken":124,"millisecondsThreshold":500,"correlationId":"bd845c50-8995-92eb-fb2f-bc81a4405fef","sessionId":"50f7bbae-04a2-8ba1-1cde-6a44916ab4aa"}
{"id":"8e41a54c-1d40-8269-c8f4-12b1bf54ad74","utcTime":"2022-07-15T17:34:37.046Z","apiName":"SampleApi","operationName":"getUserInfo","hostName":"MACSTATION.local","method":"GET","path":"/investments/userinfo","clientApplicationName":"LoadTest","userId":"a6b404b1-98af-41a2-8e7f-e4061dc0bf86","statusCode":200,"millisecondsTaken":162,"millisecondsThreshold":500,"correlationId":"5ec0eedf-0dcf-aa8d-f64c-1522e8a65a32","sessionId":"50f7bbae-04a2-8ba1-1cde-6a44916ab4aa"}

Of course these raw logs are not easy to read, and the next step is to import them into a Queryable Data Store. This will not require any coding, but we will need to understand how to configure open source logging tools.

Logging Technology Stack

We will provide an installation of Elastic Stack components, which provide a mature platform with some great features.

We will set up the following components to a basic level on a developer PC, then demonstrate rich and highly useful queries against our API log data.

Component Role
Elasticsearch A big data store which provides rich query capabilities
Kibana A UI which we can use for query related operations
Filebeat A lightweight tool to ship JSON log files to Elastic Search

Our API logging solution is not locked-in to Elasticsearch, and if we ever found a better option we could migrate to it without any API code changes.

Step 1: Download Elastic Resources

This blog provides some helper resources which can be downloaded with the following command:

git clone https://github.com/gary-archer/logaggregation.elasticsearch

We will run scripts from the docker-local folder to deploy a development setup for Elasticsearch with working API log aggregation:

Step 2: Configure DNS and SSL

First add the following logging domain name to your computer’s hosts file:

127.0.0.1  localhost logs.authsamples-dev.com

Next run the following script to download a development SSL certificate for this domain name:

./deployment/docker-local/downloadcerts.sh

Then follow instructions to configure Browser SSL trust for the following root certificate, so that we can run the Kibana UI later:

./deployment/docker-local/certs/authsamples-dev.ca.pem

Step 3: Understand Elasticsearch Deployment

Next we will run a Docker Compose deployment, that includes the main Elasticsearch system. The installation uses xpack security at a basic level, with SSL connections between components:

elasticsearch:
  image: docker.elastic.co/elasticsearch/elasticsearch:latest
  hostname: elasticsearch-internal.authsamples-dev.com
  ports:
    - 9200:9200
  volumes:
    - ./certs/authsamples-dev.ca.pem:/usr/share/elasticsearch/config/certs/authsamples-dev.ca.crt
    - ./certs/authsamples-dev.ssl.p12:/usr/share/elasticsearch/config/certs/authsamples-dev.ssl.p12
  environment:
    discovery.type: 'single-node'
    xpack.security.enabled: 'true'
    xpack.security.autoconfiguration.enabled: 'false'
    xpack.security.http.ssl.enabled: 'true'
    xpack.security.http.ssl.keystore.path: '/usr/share/elasticsearch/config/certs/authsamples-dev.ssl.p12'
    xpack.security.http.ssl.keystore.password: 'Password1'
    xpack.security.http.ssl.certificate_authorities: '/usr/share/elasticsearch/config/certs/authsamples-dev.ca.crt'
    ES_JAVA_OPTS: -Xmx4g
    ELASTIC_PASSWORD: '${ELASTIC_PASSWORD}'

Elasticsearch’s REST API will be contactable via both of these URLs, and in a hardened setup you would typically avoid exposing the external endpoint:

URL Description
https://logs.authsamples-dev.com:9200 The external URL for connecting  from the host computer
https://elasticsearch-internal.authsamples-dev.com:9200 The internal URL used by Kibana and Filebeat inside the Docker network

Step 4: Understand Kibana Deployment

The Kibana system will connect to Elasticsearch as the kibana_system user, and the deployment sets an initial password.  Meanwhile we will login to the Kibana web UI using default admin credentials of elastic / Password1:

kibana:
  image: docker.elastic.co/kibana/kibana:latest
  hostname: kibana-internal.authsamples-dev.com
  ports:
    - 5601:5601
  volumes:
    - ./certs/authsamples-dev.ca.pem:/usr/share/kibana/config/certs/authsamples-dev.ca.crt
    - ./certs/authsamples-dev.ssl.p12:/usr/share/kibana/config/certs/authsamples-dev.ssl.p12
  environment:
    ELASTICSEARCH_HOSTS: 'https://elasticsearch-internal.authsamples-dev.com:9200'
    ELASTICSEARCH_USERNAME: '${KIBANA_SYSTEM_USER}'
    ELASTICSEARCH_PASSWORD: '${KIBANA_PASSWORD}'
    SERVER_PUBLICBASEURL: 'https://logs.authsamples-dev.com:5601'
    SERVER_SSL_ENABLED: 'true'
    SERVER_SSL_KEYSTORE_PATH: '/usr/share/kibana/config/certs/authsamples-dev.ssl.p12'
    SERVER_SSL_KEYSTORE_PASSWORD: 'Password1'
    ELASTICSEARCH_SSL_CERTIFICATEAUTHORITIES: '/usr/share/kibana/config/certs/authsamples-dev.ca.crt'

Once the installation has completed, Kibana will later be accessible using the following URL:

Step 5: Understand Filebeat Deployment

Filebeat is deployed with the following Docker settings, and the log folder for the final API is shared from the host computer to the Docker container:

filebeat:
  image: docker.elastic.co/beats/filebeat:latest
  hostname: filebeat-internal.authsamples-dev.com
  volumes:
    - ./filebeat.yml:/usr/share/filebeat/filebeat.yml
    - ./certs/authsamples-dev.ca.pem:/usr/share/filebeat/certs/authsamples-dev.ca.crt
    - ../../../oauth.apisample.nodejs/logs:/var/log/api
  environment:
    ELASTICSEARCH_USERNAME: '${ELASTIC_USER}'
    ELASTICSEARCH_PASSWORD: '${ELASTIC_PASSWORD}'

The main configuration is included in the filebeat.yml file, whose json settings tell Filebeat to read each bare line of the log file and ship it as an object, while maintaining the data type of each field:

filebeat.inputs:
- type: log
  paths:
  - /var/log/api/*.log
  json:
    keys_under_root: true
    add_error_key: false

output.elasticsearch:
  hosts: ['https://elasticsearch-internal.authsamples-dev.com:9200']
  username: elastic
  password: Password1
  index: "apilogs-%{+yyyy.MM.dd}"
  pipelines:
  - pipeline: apilogs
  ssl:
    certificate_authorities: ['/usr/share/filebeat/certs/authsamples-dev.ca.crt']

setup:
  ilm:
    enabled: false
  template:
    name: apilogs
    pattern: apilogs-*

processors:
- drop_fields:
    fields: ['agent', 'ecs', 'host', 'input', 'version']

Step 6: Generate Logs via an API and Client

To generate local API logs you need to run an API, and a client that calls the API to cause logs to be written. Components should be run in this type of folder layout, at the same level as the log aggregation repository:

~/dev/logaggregation.elasticsearch
~/dev/oauth.websample.final
~/dev/oauth.apisample.nodejs

I sometimes use log aggregation when developing this blog’s secured components, when I want to look more closely at API logs. In this case I run the Final Node.js API locally, with the Final SPA client.

Client Behaviour
API The Final API post explains how to run a Local API Setup
SPA The Final SPA post explains how to point to a Local API

To run these components, ensure that you have added the following entries to the hosts file on your local computer. In this configuration, the SPA routes API requests via its local backend for frontend:

127.0.0.1 logs.authsamples-dev.com web.authsamples-dev.com api.authsamples-dev.com login.authsamples-dev.com 

You can then run a setup, where you run the SPA client and then interactively query the API logs the UI’s session has generated:

Step 7: Deploy the Elastic Stack

Next run the following command to start the Docker deployment. It may take a few minutes for large Elastic Stack Docker containers to download, the first time the deployment is run:

./deployment/docker-local/deploy.sh

A number of actions are then triggered, as indicated by the console output:

Deploying the Elastic Stack ...
[+] Running 4/4
 ⠿ Network elasticstack_default            Created                                                                                                            0.1s
 ⠿ Container elasticstack-elasticsearch-1  Started                                                                                                            1.3s
 ⠿ Container elasticstack-filebeat-1       Started                                                                                                            1.2s
 ⠿ Container elasticstack-kibana-1         Started                                                                                                            1.3s
Waiting for Elasticsearch endpoints to become available ...
Registering the default Kibana user ...
Creating the Elasticsearch schema ...
Creating the Elasticsearch ingestion pipeline ...

Once the installation is complete, you can verify connectivity to the Elasticsearch REST API with the following HTTP request:

curl -k https://logs.authsamples-dev.com:9200 -u 'elastic:Password1'

This results in Elasticsearch system information being returned:

{
  "name" : "elasticsearch-internal.authsamples-dev.com",
  "cluster_name" : "docker-cluster",
  "cluster_uuid" : "V58E_JA1TSizDU1jaFBJbA",
  "version" : {
    "number" : "8.7.0",
    "build_flavor" : "default",
    "build_type" : "docker",
    "build_hash" : "8b0b1f23fbebecc3c88e4464319dea8989f374fd",
    "build_date" : "2022-07-06T15:15:15.901688194Z",
    "build_snapshot" : false,
    "lucene_version" : "9.5.0",
    "minimum_wire_compatibility_version" : "7.17.0",
    "minimum_index_compatibility_version" : "7.0.0"
  },
  "tagline" : "You Know, for Search"
}

Later, when you are finished with testing, free up all Docker resources with the following command:

./deployment/docker-local/teardown.sh

Step 8. Access Log Query Tools

Next sign in to Kibana with credentials elastic / Password1. There are various tools for working with logs, though I consider the following URL to be the most important:

The Dev Tools allow you to access API log documents and fields without restriction, unlike many other logging solutions. Each API log entry will be available in a record of the following form:

Step 9: Understand the API Logs Index

Each log entry will be received as a JSON document within an apilogs index. Queries are typically made against top level fields. Meanwhile, JSON objects in logs, such as those used to represent errors, maintain their structure:

{
  "hostName": "MACSTATION.local",
  "apiName": "SampleApi",
  "utcTime": "2022-07-24T14:13:20.647Z",
  "millisecondsTaken": 7,
  "errorCode": "exception_simulation",
  "errorData": {
    "serviceError": {
      "stack": [
        "com.mycompany.sample.plumbing.errors.ErrorFactory.createServerError(ErrorFactory.java:20)",
        "com.mycompany.sample.plumbing.interceptors.CustomHeaderInterceptor.preHandle(CustomHeaderInterceptor.java:35)",
        "org.springframework.web.servlet.HandlerExecutionChain.applyPreHandle(HandlerExecutionChain.java:148)",
        "org.springframework.web.servlet.DispatcherServlet.doDispatch(DispatcherServlet.java:1062)"],
      "errorCode": "exception_simulation"
    },
    "clientError": {
      "area": "SampleApi",
      "code": "exception_simulation",
      "utcTime": "2022-07-16T08:06:00.268106Z",
      "id": 32802,
      "message": "An exception was simulated in the API"
    },
    "statusCode": 500
  },
  "path": "/investments/companies",
  "correlationId": "fc081b42-2be0-454e-bdf6-f5df444b7b50",
  "id": "14ca7188-a4cb-4df5-9bb7-5f829d97b338",
  "errorId": 32802,
  "clientApplicationName": "LoadTest",
  "method": "GET",
  "operationName": "getCompanyList",
  "sessionId": "9553ffcb-f295-41e5-8b6e-5f9e068c7e2f",
  "userId": "a6b404b1-98af-41a2-8e7f-e4061dc0bf86",
  "@timestamp": "2022-07-16T08:06:00.262Z",
  "millisecondsThreshold": 500,
  "statusCode": 500
}

The deployment script defines types for fields received within the apilogs index, to ensure that we can dictate data types, rather than Elasticsearch guessing them based on data received:

"index_patterns": ["apilogs*"],
"mappings": 
{
  "properties": 
  {
    "id": 
    {
      "type": "keyword"
    },
    "utcTime": 
    {
      "type": "date"
    },
    "apiName": 
    {
      "type": "keyword"
    },
    "operationName": 
    {
      "type": "keyword"
    },
    "hostName": 
    {
      "type": "keyword"
    },
    "method": 
    {
      "type": "keyword"
    },
    "path": 
    {
      "type": "keyword"
    },
    "resourceId": 
    {
      "type": "keyword"
    }
}

The Filebeat configuration ensures that there is a separate index per day. This makes it easy to remove old indexes containing log data after a desired time to live.

Step 10: Understand Log Ingestion

By default, Filebeat adds some fields to each log entry on the outbound side of processing, and these are removed in the drop_fields processor, since they are not useful for this blog. On the inbound side of processing, an ingestion pipeline is created to customise behaviour:

{
    "description": "Ingest Pipeline for API Logs",
    "processors": [
      {
        "drop": {
          "if" : "ctx.apiName == null"
        },
        "script": {
          "lang": "painless",
          "description": "Use a client side unique id to prevent duplicates",
          "source": "ctx._id = ctx.id"
        },
        "date" : {
          "field" : "utcTime",
          "formats" : ["ISO8601"]
        },
        "remove": {
          "field": ["log", "stream"],
          "ignore_missing": true
        }
      }
    ]
  }

These processors are summarised below:

Processor Behaviour
drop Ignores any log events from foreign log files encountered, since our logs all have an apiName field.
script Prevents Elasticsearch from generating a unique _id field and instead set it to the id field from API logs. This ensures that if Filebeat gets redeployed and logs reprocessed, there will be no duplicated log entries in the aggregated data.
data Assigns the utcTime from logs to the mandatory @timestamp field, rather than using the time logs were received.
remove This removes any other extra fields that Elasticsearch generates during inbound processing.

Step 11. Query API Logs

The next post will show a number of  people focused API technical support queries that you can issue, when you have API logs containing useful data. At a software company this would improve productivity.

Step 12: Troubleshoot Filebeat

It can also be useful to understand how to diagnose logs that do not ship correctly. To do so, first make a remote connection to the Filebeat container with the following commands:

export FILEBEAT_CONTAINER_ID=$(docker ps | grep filebeat | awk '{print $1}')
docker exec -it $FILEBEAT_CONTAINER_ID bash

Then view the /var/log folder, which points to the api folder on the host computer, which is mounted as a volume to the Docker container:

-rw-r--r-- 1 root     root       5609 Aug 25 19:43 alternatives.log
drwxr-xr-x 7 filebeat filebeat    224 Oct  7 18:07 api
drwxr-xr-x 1 root     root       4096 Aug 25 19:43 apt
-rw-r--r-- 1 root     root      58592 May 31 15:43 bootstrap.log
-rw-rw---- 1 root     utmp          0 May 31 15:43 btmp
-rw-r--r-- 1 root     root     184555 Aug 25 19:43 dpkg.log
-rw-r--r-- 1 root     root      32032 Aug 25 19:57 faillog
-rw-rw-r-- 1 root     utmp     292292 Aug 25 19:57 lastlog
-rw-rw-r-- 1 root     utmp          0 May 31 15:43 wtmp

You should see files whose sizes match those on the host. On macOS you may need to disable the ‘Use gRPC FUSE for file sharing‘ option for this to work as expected:

-rw-r--r-- 1 filebeat filebeat 26311 Oct  2 19:59 api-2022-10-02.log
-rw-r--r-- 1 filebeat filebeat  4657 Oct  3 20:23 api-2022-10-03.log
-rw-r--r-- 1 filebeat filebeat  2103 Oct  7 18:08 api-2022-10-07.log
-rw-r--r-- 1 filebeat filebeat   511 Oct  2 19:46 api.2022-10-02.0.log

Alternatively, view filebeat’s own logs to see details of any log shipping errors:

export FILEBEAT_CONTAINER_ID=$(docker ps | grep filebeat | awk '{print $1}')
docker logs -f $FILEBEAT_CONTAINER_ID

The Filebeat documentation explains the component’s folder layout, and note that the data folder is used to track offsets in files being shipped:

Where Are We?

We have deployed the Elastic Stack on a local development computer, and the setup enables local API logs to be aggregated and then queried. In the next post we will drill into queries that work well for people.

Next Steps

API Automated Tests

Background

In the previous post we drilled into the Coding Model for the Java Spring Boot API. Next we will describe one way to test OAuth secured APIs, with a focus on Developer Productivity.

Getting an API Message Credential

APIs often require user level access tokens, and it can be tricky to get one of these for automated tests. By default this requires browser redirects and for a user to interactively log in. Authentication sometimes requires multiple factors and can be difficult to automate during API development:

Mocking OAuth Infrastructure

When your objective is to focus on API tests, it can be useful to have a test setup that instead mocks all of the above infrastructure, so that it does not get in the way of testing. In the following diagram, the API test client can quickly get an access token for any test user:

The mock token issuer is a JWT library, and the JWKS Endpoint can be a utility API or an HTTP tool such as Wiremock. The API’s security code runs identically to a real setup, and performs all of the same authentication and authorization checks, followed by the same business logic.

Developer Testing of OAuth Secured APIs

The above is only one possible setup, and is perhaps most useful for API developers who want to write integration tests against their own code.  Each of this blog’s final APIs include both integration tests and a basic load test that use this technique:

API Technology Test Technology
Node.js Mocha
.NET XUnit
Java Spring Boot JUnit

This post will describe the Node.js API’s test code, though the behaviour and source code for .NET and Java is almost identical.

API Test Settings

This test setup then becomes one of the API’s deployment scenarios, and is represented by the below environment file. Only the configuration is different for the API, and it runs the same code as in real environments:

The primary configuration difference is that the API has been updated to use a JWKS URI that points to an instance of Wiremock, rather than a real authorization server.

{
    "oauth": {
        "issuer":                        "testissuer.com",
        "audience":                      "api.mycompany.com",
        "scope":                         "investments",
        "jwksEndpoint":                  "https://login.authsamples-dev.com:447/.well-known/jwks.json",
        "userInfoEndpoint":              "https://login.authsamples-dev.com:447/oauth2/userInfo",
        "jwksCooldownDuration":          0,
        "claimsCacheTimeToLiveMinutes":  15
    }
}

Integration Tests

The final API integration tests consist of a number of code and script resources, to manage setup and execution. Each test will act as an API client and make HTTPS requests with a JWT access token:

When using the Node.js API, tests are run via the ‘npm run testsetup‘ and ‘npm test‘ commands, to execute a number of Mocha tests. In .NET and Java, slightly different commands are used, but the behaviour is the same:

Mock Authorization Server

A mock authorization server is created at the start of a test run, then torn down once all tests have run:

before( async () => {
    ExtraCaCerts.initialize();
    await authorizationServer.start();
});

after( async () => {
    await authorizationServer.stop();
});

This blog’s final APIs use the JOSE libraries from the below table for the JWT handling in their integration tests. The library issues JWT access tokens in the same standards based way as a real authorization server does:

API Technology JWT Library
Node.js jose
Java jose4j
.NET jose-jwt

First the authorization server must create a keypair, containing the private key it will use to sign tokens for the duration of the test session, as well as the public key that is formed into a JSON Web Keyset that is published over HTTP using Wiremock:

export class MockAuthorizationServer {

    private readonly _baseUrl: string;
    private readonly _httpProxy: HttpProxy;
    private readonly _algorithm: string;
    private _jwk: GenerateKeyPairResult | null;
    private _keyId: string;

    public constructor(useProxy = false) {

        this._baseUrl = 'https://login.authsamples-dev.com:447/__admin/mappings';
        this._httpProxy = new HttpProxy(useProxy, 'http://127.0.0.1:8888');
        this._algorithm = 'ES256';
        this._jwk = null;
        this._keyId = Guid.create().toString();
    }

    public async start(): Promise {

        this._jwk = await generateKeyPair(this._algorithm);

        const jwk = await exportJWK(this._jwk.publicKey!);
        jwk.kid = this._keyId;
        jwk.alg = this._algorithm;
        const keys = {
            keys: [
                jwk,
            ],
        };
        const keysJson = JSON.stringify(keys);

        const stubbedResponse = {
            id: this._keyId,
            priority: 1,
            request: {
                method: 'GET',
                url: '/.well-known/jwks.json'
            },
            response: {
                status: 200,
                body: keysJson,
            },
        };

        await this._register(stubbedResponse);
    }

    public async stop(): Promise {
        await this._unregister(this._keyId);
    }

Using Mock Access Tokens in Tests

This blog’s API tests cover token validation and authorization behaviour. All of these can be tested productively with simple code and the following type of syntax. Tokens for real users from the API’s data can be requested, and there is no need to deal with any OAuth client concerns:

it ('Get transactions returns 404 for companies that do not match the regions claim', async () => {

    const jwtOptions = new MockTokenOptions();
    jwtOptions.useStandardUser();
    const accessToken = await authorizationServer.issueAccessToken(jwtOptions);

    const options = new ApiRequestOptions(accessToken);
    const response = await apiClient.getCompanyTransactions(options, 3);

    assert.strictEqual(response.statusCode, 404, 'Unexpected HTTP status code');
    assert.strictEqual(response.body.code, 'company_not_found', 'Unexpected error code');
});

The issuing of mock tokens is easily done using the JOSE library. Various invalid properties can be configured, to ensure that the API implements its JWT validation correctly.

public async issueAccessToken(options: MockTokenOptions): Promise<string> {

    const now = Date.now();

    return await new SignJWT( {
            iss: options.issuer,
            aud: options.audience,
            scope: options.scope,
            sub: options.subject,
            manager_id: options.managerId,
            role: options.role,
        })
            .setProtectedHeader( { kid: this._keyId, alg: this._algorithm } )
            .setExpirationTime(options.expiryTime)
            .sign(this._jwk.privateKey);
}

The access token is easily viewed in an online JWT viewer. A mock access token issued by the JOSE library is shown below, where I have ensured that the scopes and claims are identical to those the API logic expects to receive:

Basic Load Test

It is also useful to ensure early that there are no concurrency problems in APIs, when multiple requests are in flight at once for the same operations. This ensures that behaviours such as dependency injection of request scoped objects are reliable when there are multiple parallel API calls.

Therefore a basic API load test is also provided, which can be run with ‘npm run loadtest‘. It fires 100 requests to the API by default, though this number can be increased as required. This intentionally rehearses different types of failure condition, and certain error responses are expected:

The load test is just a console application, which uses async await code to fire batches of 5 concurrent HTTP requests at a time to the API. This stays within operating system limits for in-flight requests to the same host, while ensuring that the API is continually processing multiple requests:

private async _executeApiRequests(requests: (() => Promise<ApiResponse>)[]): Promise<void> {

    const total = requests.length;
    const batchSize = 5;
    let current = 0;

    while (current < total) {

        const requestBatch = requests.slice(current, Math.min(current + batchSize, total));
        const batchPromises = requestBatch.map((r) => this._executeApiRequest(r));

        await Promise.all(batchPromises);
        current += batchSize;
    }
}

The load test also sends input fields that might give a load tester best options for diagnosing issues in a more complete load test:

Field Description
Session ID An identifier to group all requests in the load test, used to ignore other entries
Correlation ID An identifier for a single request, to enable slow or failed requests to be quickly looked up
ClientApplicationName The name of the load test, as a mechanism to find all load test sessions

Analysing Load Test Results

If performance was below requirements, the load tester could capture logs, as described in the next post. Any slow or failed API queries could then be diagnosed using technical support analysis queries.

Where Are We?

We have enabled this blog’s final APIs to be productively tested as a standalone component, using mock OAuth infrastructure. The testing also verifies that the API’s error handling and logging behaviours are working as expected when the system is handling concurrent requests.

Next Steps

Spring Boot API – Coding Model

Background

In our previous post we described our Spring Boot API OAuth Integration. We will now drill into some final implementation details.

Code Structure

Our advanced Java API consists of three main areas:

  • REST Host
  • API Business Logic
  • Common Code (plumbing)

In a real API platform, much of the plumbing folder could be extracted into one or more shared library references and there would be far less code.

Application Startup Logic

Our API entry point is the below SampleApiApplication class:

We use standard Spring Boot extensibility points via the following classes, which run when our API starts:

Class Description
ApplicationInitializer Logic before Spring’s component system is initialised
HttpServerConfiguration Logic after Spring’s component system is initialised

Dependency Composition

The main responsibility of these classes is to read the API’s JSON configuration and to set up Cross Cutting Concerns which includes registering dependencies:

@Override
public void initialize(final ConfigurableApplicationContext context) {

    var reader = new JsonFileReader();
    var configuration = reader.readFile("api.config.json", Configuration.class).join();

    loggerFactory.configure(configuration.getLogging());

    this.configurePort(configuration.getApi());
    this.configureHttpDebugging(configuration.getApi());
    this.configureSsl(configuration);

    var container = context.getBeanFactory();
    container.registerScope(CustomRequestScope.NAME, new CustomRequestScope());

    new BaseCompositionRoot(container)
            .useOAuth(configuration.getOauth())
            .withClaimsProvider(new SampleCustomClaimsProvider())
            .withLogging(configuration.getLogging(), loggerFactory)
            .register();

    container.registerSingleton("ApiConfiguration", configuration.getApi());
}

Middleware

Startup code creates various middleware classes and Spring calls most of them ‘interceptors‘. These are natural singletons, and some of them need to be registered with the container:

@Override
    public void addInterceptors(final InterceptorRegistry registry) {

        var loggingInterceptor = new LoggingInterceptor(this.context.getBeanFactory());
        registry.addInterceptor(loggingInterceptor)
                .addPathPatterns(ResourcePaths.ALL);

        var headerInterceptor = new CustomHeaderInterceptor(this.loggingConfiguration.getApiName());
        registry.addInterceptor(headerInterceptor)
                .addPathPatterns(ResourcePaths.ALL);
}

The role of each of these middleware classes is summarised below:

Middleware Class Responsibility
LoggingInterceptor Manage the log entry for each API request, then log request and response details
CustomHeaderInterceptor Allow advanced client side testing of APIs via custom headers
UnhandledExceptionHandler A central place for handling exceptions, adding error details to logs, and producing the client error response

Single Threaded Coding Model

For APIs with simple dependency graphs, I like to reduce the likelihood of parallel requests  impacting each other. I do this by giving each request its own independent object instances. The API uses a request scope for REST specific objects, or a prototype scope for domain logic classes:

@RestController()
@Scope(value = CustomRequestScope.NAME)
@RequestMapping(value = "api/companies")
public class CompanyController {
    ...    
}
@Service
@Scope(value = ConfigurableBeanFactory.SCOPE_PROTOTYPE)
public class CompanyService {
    ...
}

High Throughput Requirement

Our earlier Node.js and .NET APIs were Non Blocking via an async await syntax, to prevent threads being tied up during I/O completion, and the same requirement exists for our Java API:

Our Node.js API used Promises to achieve this, with only a small impact on the overall coding model. In Java we will use CompleteableFutures in an equivalent manner.

Java Non Blocking API Solutions

There are a few approaches to using async await code in Java, summarized below. Each of these has very different behavior:

Solution Characteristics
Reactor A streaming interface to return large collections of resources to clients in chunks.
Completable Futures Non blocking I/O in line with Node.js and .NET, with a traditional coding model.
Virtual Threads Virtual threads in Java 21+ are used to return the request’s operating system to the thread pool

The code sample uses virtual threads, with the following setting in the application.properties file, to meet my requirements in the simplest way.

spring.threads.virtual.enabled=true

Async Await

Most languages, including Kotlin, have an await keyword, which creates a state machine object that captures variables in closures, but Java does not support this. In Kotlin you can write non-blocking code like this and code remains readable when there are multiple async calls.

import kotlinx.coroutines.future.await

class JsonFileReader {

    private suspend fun readJsonFromFile(filePath: String): String {

        val path = Paths.get(filePath)
        val bytes = AsyncFiles.readAllBytes(path).await()
        return String(bytes)
    }
}

Before upgrading to Java 21 and Spring Boot 3.2, the API ran asynchronously using completable futures, which led to complex code with nested callbacks. Over time, this type of unreadable syntax would lead to bugs in a real API:

public CompletableFuture<CompanyTransactions> getCompanyTransactions(final int companyId) {

    var breakdown = this.logEntry.createPerformanceBreakdown("getCompanyTransactions");

    return this.jsonReader.readFile("data/companyList.json", Company[].class)
            .handle((companies, companiesException) ->
                    this.getAndFilterCompanies(
                            companyId,
                            companies,
                            breakdown,
                            companiesException))
            .thenCompose(foundCompany ->
                    this.jsonReader.readFile("data/companyTransactions.json", CompanyTransactions[].class)
                    .handle((transactions, transactionsException) ->
                            this.getAndFilterTransactions(
                                    companyId,
                                    foundCompany,
                                    transactions,
                                    breakdown,
                                    transactionsException)));
}

With virtual threads the code is written synchronously and is much more readable, yet continues to manage I/O efficiently:

public CompanyTransactions getCompanyTransactions(final int companyId) {

    try (var breakdown = this.logEntry.createPerformanceBreakdown("getCompanyTransactions")) {

        var companies = this.jsonReader.readFile("data/companyList.json", Company[].class);
        var foundCompany = this.getAndFilterCompanies(companyId, companies);

        var transactions = this.jsonReader.readFile("data/companyTransactions.json", CompanyTransactions[].class);
        return this.getAndFilterTransactions(companyId, foundCompany, transactions);
    }
}

Custom Request Scope

When using completable futures, the code switched threads during the lifecycle of a request, whereas with virtual threads the thread ID remains the same for the entire request.

When using completable futures, the default request scope does not work after async completion, when a thread with a different ID will resume processing. This is because the RequestContextHolder class uses thread local storage for request scoped objects:

This means you can never resolve request scoped objects when an await call resumes on another thread. If you try to do so you will receive the following cryptic error:

To solve this problem I created a Spring Boot Custom Scope that stores request scoped objects in the HttpServletRequest object. The custom scope is no longer strictly needed, but I left it in place, so that the API manages  request scoped objects in the same way as Node.js and .NET APIs.

Logging Implementation

API logging is also implemented via plumbing code, and the end goal is to enable platform wide technical support queries by people.

The log entry is a natural request scoped object so we use the following factory method to create it when another class first accesses it during the lifetime of an API request, then make it injectable:

@Component
@Scope(value = ConfigurableBeanFactory.SCOPE_SINGLETON)
public class LogEntryInjector {

    private final LoggerFactoryImpl loggerFactory;

    public LogEntryInjector(final LoggerFactoryImpl loggerFactory) {
        this.loggerFactory = loggerFactory;
    }

    @Bean
    @Scope(value = CustomRequestScope.NAME)
    public LogEntryImpl createLogEntry() {
        return this.loggerFactory.createLogEntry();
    }
}

The log entry is then accessed by interceptor classes, which contribute data to logs at various points during the request life-cycle:

public final class LoggingInterceptor implements HandlerInterceptor {

    private final BeanFactory container;

    public LoggingInterceptor(final BeanFactory container) {
        this.container = container;
    }

    @Override
    public boolean preHandle(
            final @NonNull HttpServletRequest request,
            final @NonNull HttpServletResponse response,
            final @NonNull Object handler) {

        var logEntry = this.container.getBean(LogEntryImpl.class);
        logEntry.start(request);
    }
}

It is also possible to inject the log entry into business logic, so that extra data can be included in logs, as for the  below repository class, which contributes performance instrumentation:

@Repository
@Scope(value = ConfigurableBeanFactory.SCOPE_PROTOTYPE)
public class CompanyRepository {

    private final JsonFileReader jsonReader;
    private final LogEntry logEntry;

    public CompanyRepository(final JsonFileReader jsonReader, final LogEntry logEntry) {
        this.jsonReader = jsonReader;
        this.logEntry = logEntry;
    }

    public CompletableFuture<List<Company>> getCompanyList() {

        try (var breakdown = this.logEntry.createPerformanceBreakdown("getCompanyList")) {

            var companies = await(this.jsonReader.readFile("data/companyList.json", Company[].class));
            return completedFuture(Arrays.stream(companies).collect(Collectors.toList()));
        }
    }
}

The logging classes write to a log file and, if this blog’s Log Aggregation Setup is followed, logs will automatically flow to Elasticsearch:

The sample API uses fixed appenders and fixed JSON output formats. In a real API you may instead prefer to use logback XML configuration, to enable logging behaviour to be dynamically altered without code changes.

Error Handling Implementation

The API implements this blog’s Error Handling and Supportability design. By default all errors escape to the global exception handler class, whose role is to log errors and return an error response to the caller:

@RestControllerAdvice
public final class UnhandledExceptionHandler {

    private final BeanFactory container;
    private final String apiName;

    public UnhandledExceptionHandler(
            final BeanFactory container,
            final LoggingConfiguration configuration) {

        this.container = container;
        this.apiName = configuration.getApiName();
    }

    @ExceptionHandler(value = Throwable.class)
    public ResponseEntity<String> handleException(final HttpServletRequest request, final Throwable ex) {

        var logEntry = this.container.getBean(LogEntryImpl.class);
        var clientError = this.handleError(ex, logEntry);
        return new ResponseEntity<>(clientError.toResponseFormat().toString(), clientError.getStatusCode());
    }
}

This is very standard, but the art of good error handling is to design good error objects that contain useful fields to both callers of the API and your technical support staff.

Error output has a productive and readable format, and production logs will also be rendered like this, including context such as which user, session, API and operation was involved:

{
  "id" : "2bcf50e1-8a11-4c3e-ae59-c3265693de00",
  "utcTime" : "2022-12-10T18:38:14.233698634Z",
  "apiName" : "SampleApi",
  "operationName" : "getCompanyTransactions",
  "hostName" : "WORK",
  "method" : "GET",
  "path" : "/investments/companies/4/transactions",
  "resourceId" : "4",
  "clientApplicationName" : "FinalSPA",
  "userId" : "a6b404b1-98af-41a2-8e7f-e4061dc0bf86",
  "statusCode" : 500,
  "errorCode" : "exception_simulation",
  "errorId" : 15203,
  "millisecondsTaken" : 4,
  "millisecondsThreshold" : 500,
  "correlationId" : "37a79d57-2085-e024-37d8-d7adbd577175",
  "sessionId" : "22139781-e2c1-9672-0712-ff46a72a8283",
  "performance" : {
    "name" : "total",
    "millisecondsTaken" : 4,
    "children" : [
      {
        "name" : "validateToken",
        "millisecondsTaken" : 0
      }
    ]
  },
  "errorData" : {
    "statusCode" : 500,
    "clientError" : {
      "code" : "exception_simulation",
      "message" : "An exception was simulated in the API",
      "area" : "SampleApi",
      "id" : 15203,
      "utcTime" : "2022-12-10T18:38:14.236384348Z"
    },
    "serviceError" : {
      "errorCode" : "exception_simulation",
      "stack" : [
        "com.mycompany.sample.plumbing.errors.ErrorFactory.createServerError(ErrorFactory.java:20)",
        "com.mycompany.sample.plumbing.interceptors.CustomHeaderInterceptor.preHandle(CustomHeaderInterceptor.java:35)",
        "org.springframework.web.servlet.HandlerExecutionChain.applyPreHandle(HandlerExecutionChain.java:148)",
        "org.springframework.web.servlet.DispatcherServlet.doDispatch(DispatcherServlet.java:1066)",
        "org.springframework.web.servlet.DispatcherServlet.doService(DispatcherServlet.java:964)",
        "org.springframework.web.servlet.FrameworkServlet.processRequest(FrameworkServlet.java:1006)",
        "org.springframework.web.servlet.FrameworkServlet.doGet(FrameworkServlet.java:898)",
        "javax.servlet.http.HttpServlet.service(HttpServlet.java:670)",
        "org.springframework.web.servlet.FrameworkServlet.service(FrameworkServlet.java:883)",
        "javax.servlet.http.HttpServlet.service(HttpServlet.java:779)",
        "org.apache.catalina.core.ApplicationFilterChain.internalDoFilter(ApplicationFilterChain.java:227)",
        ...
      ]
    }
  }
}

By default our exception handler treats unknown errors as general exceptions and returns a 500 response. For closer control of the response, the API’s code can throw a ServerError or ClientError derived instance:

private ClientError unauthorizedError(final int companyId) {

    var message = String.format("Transactions for company %d were not found for this user", companyId);
    return ErrorFactory.createClientError(
            HttpStatus.NOT_FOUND,
            SampleErrorCodes.COMPANY_NOT_FOUND,
            message);
}

Portability

The Java code has met some common and mainstream requirements, with code that should be easy to port to other technologies. This blog’s Node.js and .NET APIs were coded almost identically.

Where Are We?

We have implemented some foundational code in Java. The plumbing is separated from other code, and in a real API we would next focus on growing the business logic.

Next Steps

Spring Boot API – OAuth Integration

Background

In our previous post we explained how to run this blog’s final Java code sample and explained its main behaviours. Next we will explain the main  details of the OAuth integration.

Spring API Defaults

By default Spring Security uses a framework based approach to OAuth security. Add the spring-boot-starter-oauth2-resource-server and spring-security-starter-web dependencies to your project and configure the API in a fluent manner:

@Configuration
public class SecurityConfiguration {
    
	@Bean
	public SecurityFilterChain filterChain(final HttpSecurity http) throws Exception {

        http
            .securityMatcher(new AntPathRequestMatcher("/**"))
            .authorizeHttpRequests(authz -> authz
                .anyRequest().authenticated()
            )
            .oauth2ResourceServer(rs -> rs
                .jwt(jwt -> jwt
                    .jwkSetUri(myJwksUri)
                )
            )
        return http.build();
    }
}

You can also add an entry such as this to the application.properties file when you need to troubleshoot failures.

logging.level.org.springframework.security=DEBUG

When getting started with OAuth secured APIs you should use these defaults. Yet this blog’s Java API focuses on some deeper requirements.

Deeper Requirements

This blog’s Java API will focus on customizing Spring’s default behaviour in order to meet the following requirements:

Requirement Description
Standards Based We will use the same standards based design patterns for OAuth security across Node.js, .NET and Java APIs.
Best Security The jose4j library will enable the most up to date and specialised security algorithms when dealing with JWTs.
Extensible Claims APIs are in full control of the claims principal, to work around authorization server limitations or add values that should not be issued to access tokens.
Supportable Identity and error details will be captured and included in logs, and JSON error responses will be customizable.

In Java our API’s OAuth code will follow the same two phases that we used in Node.js and .NET APIs:

Task Description
JWT Access Token Validation Downloading a JSON Web Key Set and verifying received JWTs
API Authorization Creating a ClaimsPrincipal that includes useful claims, then applying them during authorization

Your Java Secured API?

This API’s security implementation is meant to be thought provoking, to provide techniques for taking finer control over claims and error handling during secured requests. Some of these may be of interest to readers.

The API contains quite a bit of plumbing code though, to make the API code feel the same across technology stacks. For your own solution you may be able to meet similar requirements with simpler code.

OAuth API Configuration

The API uses a JSON configuration file with the following OAuth settings, which are the same as those used by the final Node.js API:

{
  "oauth": {
    "issuer":                       "https://cognito-idp.eu-west-2.amazonaws.com/eu-west-2_CuhLeqiE9",
    "audience":                     "",
    "scope":                        "https://api.authsamples.com/investments",
    "jwksEndpoint":                 "https://cognito-idp.eu-west-2.amazonaws.com/eu-west-2_CuhLeqiE9/.well-known/jwks.json",
    "claimsCacheTimeToLiveMinutes": 15
  }
}

The meaning of each field is summarised in the following table:

Field Description
issuer The expected authorization server to be received in access tokens
audience The audience in JWT access tokens represents a set of related APIs
scope The business area for the API
jwksEndpoint The location from which jose4j will use token signing public keys
claimsCacheTimeToLiveMinutes The time for which extra claims, not present in access tokens, are cached

API Authorization

The API receives an access token with a payload of the following form. The scope of access is limited to investments data. The user’s business identity is a custom claim of manager_id, for a party who manages investments. Another custom claim for role is also issued to the access token:

The API receives the main claims by processing the access token JWT, then does some more advanced work to deal with additional claims in an extensible way. The goal is to set up the API’s business logic with the most useful claims principal.

Custom Authorization Filter

The HttpServerConfiguration class wires up our API’s custom OAuth behaviour. This returns a SecurityFilterChain class, which configures a custom resource server implementation:

@Bean
public SecurityFilterChain filterChain(final HttpSecurity http) throws Exception {

    var container = this.context.getBeanFactory();
    var authorizationFilter = new CustomAuthorizationFilter(container);

    http
            .securityMatcher(new AntPathRequestMatcher(ResourcePaths.ALL))
            .authorizeHttpRequests(authorize ->
                    authorize.dispatcherTypeMatchers(DispatcherType.ASYNC).permitAll()
                    .anyRequest().authenticated()
            )
            .addFilterBefore(authorizationFilter, AbstractPreAuthenticatedProcessingFilter.class)

            .cors(AbstractHttpConfigurer::disable)
            .csrf(AbstractHttpConfigurer::disable)
            .headers(AbstractHttpConfigurer::disable)
            .requestCache(AbstractHttpConfigurer::disable)
            .securityContext(AbstractHttpConfigurer::disable)
            .logout(AbstractHttpConfigurer::disable)
            .exceptionHandling(AbstractHttpConfigurer::disable)
            .sessionManagement(AbstractHttpConfigurer::disable);

    return http.build();
}

In this blog’s architecture, web specific concerns are not dealt with in APIs. Instead, APIs are designed to be callable equally from web and mobile clients. Therefore this blog’s SPA’s web security is managed by the following components, and Spring’s web security is disabled:

Component Description
Web Host Manages returning static content and recommended web headers to the browser
Backend for Frontend Manages OpenID Connect concerns such as logins and logouts, and issuing of application level cookies
API Gateway Deals with web security concerns during API requests, including CSRF, cookie and CORS handling

OAuth and Claims Code

A number of small classes are used to implement the desired behaviour from this blog’s API Authorization Design. The main work is to validate the JWT received in the HTTP request, then return a ClaimsPrincipal that is useful to the rest of the API’s code.

JWT Access Token Validation

The AccessTokenValidator class deals with direct calls to the authorization server and its main code is to validate access tokens using jose4j. This includes checking for the API’s required scope:

public JwtClaims execute(final String accessToken) {

    try {
        var builder = new JwtConsumerBuilder()
            .setVerificationKeyResolver(this.jwksResolver)
            .setJwsAlgorithmConstraints(
                AlgorithmConstraints.ConstraintType.PERMIT,
                this.configuration.getAlgorithm()
            )
            .setExpectedIssuer(this.configuration.getIssuer());

        if (StringUtils.hasLength(this.configuration.getAudience())) {
            builder.setExpectedAudience(this.configuration.getAudience());
        }

        var jwtConsumer = builder.build();
        var claims = jwtConsumer.processToClaims(accessToken);

        var scopes = ClaimsReader.getStringClaim(claims, "scope").split(" ");
        var foundScope = Arrays.stream(scopes).filter(s -> s.contains(this.configuration.getScope())).findFirst();
        if (!foundScope.isPresent()) {
            throw ErrorFactory.createClientError(
                    HttpStatus.FORBIDDEN,
                    ErrorCodes.INSUFFICIENT_SCOPE,
                    "The token does not contain sufficient scope for this API");
        }

        return claims;

    } catch (InvalidJwtException ex) {
        throw ErrorUtils.fromAccessTokenValidationError(ex, this.configuration.getJwksEndpoint());
    }
}

There are a number of responsibilities that the library implements for us:

Responsibility Description
JWKS Key Lookup Downloading token signing public keys from the Authorization Server’s JWKS endpoint
JWKS Key Caching Caching the above keys and automatically dealing with new lookups when the signing keys are recycled
Signature Checks Cryptographically verifying the JSON Web Signature of received JWTs
Field Checks Checking that the token has the correct issuer and audience, and that it is not expired

Claims Principal

The claims principal for the sample API deals with some custom fields shown here, which are explained further in the API Authorization Design:

Claim Represents
Scope The scope for the API, which in this blog will be a  high level business area of investments
Subject The user’s technical OAuth identity, generated by the authorization server
Manager ID The business identity for a user, and in my example a manager is a party who administers investment data
Role A role from which business permissions would be derived, about the level of access
Title A business title for the end user, which is displayed by frontend applications
Regions An array claim meant to represent a more detailed business rule that does not belong in access tokens

In code the ClaimsPrincipal class is represented like this:

public class ClaimsPrincipal implements AuthenticatedPrincipal {

    @Getter
    private final JwtClaims jwtClaims;

    @Getter
    private final ExtraClaims extraClaims;

    public ClaimsPrincipal(final JwtClaims jwtClaims, final ExtraClaims extraClaims) {
        this.jwtClaims = jwtClaims;
        this.extraClaims = extraClaims;
    }
}

It can then be injected into business focused classes and used for authorization. This is a little tricky, since Spring may resolve and create all request scoped dependencies at the start of an HTTP request, before the OAuth filter is executed. Therefore a holder object is injected:

public CompanyService(final CompanyRepository repository, final ClaimsPrincipalHolder claimsHolder) {
    this.repository = repository;
    this.claimsHolder = claimsHolder;
}

When the OAuth filter runs successfully, it update the holder object with the claims principal. When the controller logic runs, the claims principal can be resolved, and this works even if the request uses child threads. The API can then easily implement its authorization logic, using simple code:

private boolean isUserAuthorizedForCompany(final Company company) {

    var claims = (SampleClaimsPrincipal) this.claimsHolder.getClaims();

    var isAdmin = claims.getRole().equalsIgnoreCase("admin");
    if (isAdmin) {
        return true;
    }

    var isUser = claims.getRole().equalsIgnoreCase("user");
    if (!isUser) {
        return false;
    }

    var extraClaims = (SampleExtraClaims) claims.getExtraClaims();
    return Arrays.stream(extraClaims.getRegions()).anyMatch(ur -> ur.equals(company.getRegion()));
}

OAuth Middleware Customization

The OAuthAuthorizer class encapsulates the overall OAuth work and deals with injecting claims into the ClaimsPrincipal when needed. In Spring it is also possible to add extra claims in a custom JwtAuthenticationConverter.

public ClaimsPrincipal execute(final HttpServletRequest request) {

    String accessToken = BearerToken.read(request);
    if (accessToken == null) {
        throw ErrorFactory.createClient401Error("No access token was supplied in the bearer header");
    }

    var jwtClaims = this.tokenValidator.execute(accessToken);

    String accessTokenHash = DigestUtils.sha256Hex(accessToken);
    var extraClaims = this.cache.getExtraUserClaims(accessTokenHash);
    if (extraClaims != null) {
        return this.extraClaimsProvider.createClaimsPrincipal(jwtClaims, extraClaims);
    }

    extraClaims = this.extraClaimsProvider.lookupExtraClaims(jwtClaims);
    this.cache.setExtraUserClaims(accessTokenHash, extraClaims, ClaimsReader.getExpiryClaim(jwtClaims));
 
    return this.extraClaimsProvider.createClaimsPrincipal(jwtClaims, extraClaims);
}

This technique adds complexity and is best avoided in most APIs. Yet this type of design can prove useful if you  run into productivity problems, where many fine-grained authorization values are managed in the authorization server.

If so, this is one possible way to ensure a stable access token and avoid needing to frequently deploy APIs and the authorization server together. It keeps the claims principal useful to the API’s logic, and reduces the need for access token versioning.

OAuth Error Responses

The API implements this blog’s Error Handling Design, starting by handling invalid tokens in the standard way. We can simulate a 401 error by clicking our UI’s Expire Access Token button followed by the Reload Data button:

This results in an invalid access token being sent to the API, which returns an error response in its standard format:

Data Description
HTTP Status The appropriate HTTP status is returned
Payload A JSON error object containing code and message fields

In total the following security related HTTP status codes may be returned:

Status Description
401 Access token is missing, invalid or expired
403 The access token does not contain a required scope
404 A ‘not found for user‘ error is returned if a resource is requested that domain specific claims do not allow
500 A technical problem during OAuth processing, such as a network error downloading JWKS keys

A 500 error is shown below in an HTTP Proxy Tool, and this type of error includes additional fields to help enable fast problem resolution:

The client can then take various types of action based on HTTP status and error code returned. For server errors the UI displays details that may be useful for technical support staff:

Identity and API Logs

API logs include details about OAuth errors, which helps when there is a configuration problem:

{
  "id": "b3629a0d-fc73-46b7-a3ca-6115963e8e43",
  "utcTime": "2022-12-10T13:17:28",
  "apiName": "SampleApi",
  "operationName": "GetCompanyTransactions",
  "hostName": "WORK",
  "method": "GET",
  "path": "/investments/companies/2/transactions",
  "resourceId": "2",
  "clientApplicationName": "FinalSPA",
  "statusCode": 200,
  "errorCode": "invalid_token",
  "millisecondsTaken": 43,
  "millisecondsThreshold": 500,
  "correlationId": "b091ec8e-a1d0-dbf9-f764-012cc730c925",
  "sessionId": "004d32bc-9755-b50e-6315-5be09f277ebe",
  "errorData": {
    "statusCode": 401,
    "body": {
      "code": "invalid_token",
      "message": "Missing, invalid or expired access token"
    },
    "context": "JWT verification failed: Invalid signature."
  }
}

Once a JWT is validated, its generated subject claim, most commonly a UUID, is also written to logs. This can potentially help to track users in benign ways, for technical support purposes. This requires care, and is discussed further in the Effective API Logging post.

Where Are We?

We have implemented Java API Security in a requirements first manner, to implement behavior that is likely to be important for any OAuth secured API, regardless of technology.

Next Steps

Final Java API – Overview

Background

Previously we described a .NET Coding Model that included some behaviours from this blog’s API Journey – Server Side blog post. Next we will provide an equivalent API in Java and Spring.

Final API Code Sample Overview

As for other code examples on this blog, the API has a simple money based theme of investments. It provides only a couple of simple endpoints that return fictional hard coded data.

The API aims to be visual and can serve this blog’s apps, such as the Final SPA below. Running both together is a good way to ensure that the API is client focused. API logs are then generated via requests from the client:

API URLs

During development the API is run as a standalone component. Either JUnit tests or a load test can be used as API clients. These tests can get user level access token to call the API and verify its OAuth security. This is done by pointing the API to a mock authorization server:

Component Base URL
API https://apilocal.authsamples-dev.com:446
Mock Authorization Server https://login.authsamples-dev.com:447

Prerequisite 1: Domain Setup

First update the hosts file to create domains for local development. Include the web domain if running the SPA and API together:

127.0.0.1 localhost apilocal.authsamples-dev.com login.authsamples-dev.com web.authsamples-dev.com 
::1 localhost

Prerequisite 2: Install Java

We will use the latest long term support version of Java that Spring Boot and the libraries we depend upon support, which is Java 21 at the time of writing.. This blog uses the open source Azul Java SDK.

Prerequisite 3: Optionally Install a Java IDE

I use the free community edition of Intellj Idea for Java based development. The project structure must be uploaded to use the downloaded JDK. Also install the Lombok plugin and optionally the Checkstyle plugin.

Then wait for the gradle sync to complete, which will take a couple of minutes. Then you can run the SampleApiApplication.java file, to run the API and listen for requests at an HTTPS URL.

Prerequisite 4: Optionally Install Node.js

If you want to run the SPA as well as the API, install Node.js for your operating system, which is used to build the SPA’s JavaScript bundles.

Prerequisite 5: Install Docker Desktop

To run API tests, or to run the full SPA and API solution, utility components are run in Docker. Therefore ensure that a local Docker Engine, such as Docker Desktop is installed.

Step 1: Build and Run the API

The API sample is available here and can be be downloaded / cloned to your local PC:

  • git clone https://github.com/gary-archer/oauth.apisample.javaspringboot
  • cd oauth.apisample.javaspringboot

Next run the following script, which downloads some OpenSSL generated development certificates, then uses gradle to run the API on port 446:

./start.sh

Step 2: Configure SSL Trust

The API runs over SSL using a development certificate, and to prevent trust problems from tests or the browser you will need to trust the highlighted root certificate below, by Configuring Browser Trust:

Tests will make HTTPS requests to the Java API, and scripts require a JAVA_HOME environment variable to be configured, which will be a value similar to the following, depending on your operating system:

/usr/lib/jvm/zulu-21-amd64

The root certificate used in HTTPS requests must be trusted by the Java runtime. This is done via the following command:

sudo "$JAVA_HOME/bin/keytool" -import -alias authsamples.ca -cacerts -file ./certs/authsamples-dev.ca.pem -storepass changeit -noprompt

You can revoke trust for the root CA later if required, using this command:

sudo "$JAVA_HOME/bin/keytool" -delete -alias authsamples.ca -cacerts -storepass changeit -noprompt

Step 3: Run Integration Tests

To run JUnit tests, the API must be pointed to a mock authorization server, so must run with a test configuration. Stop the API if it is running, then re-run it via this command:

./testsetup.sh

Next run JUnit tests with the following command:

./gradlew test

This will spin up a mock JWKS URI hosted at HTTPS endpoints provided by the Wiremock utility. A number of tests are then run, which make HTTP requests to the API. These tests focus on the API’s key security behaviour:

Step 4: Run a Basic Load Test

While the API is running with a test configuration, you can also run a basic load test. This test ensures that the API code has no multi-threading bugs, by firing concurrent API requests:

./gradlew loadtest

The test fires 100 HTTP requests to the API, in batches of 5 concurrent requests at a time. This intentionally rehearses certain types of error, and the expected result is 3 errors from a total of 100 requests:

For further details on testing the API with user level tokens but without running a full user login flow, see the  API Automated Tests blog post.

Step 5: Run the SPA Client

If required, run the Final SPA using the following commands, where SPA resources are downloaded to a parallel folder:

cd ..
git clone https://github.com/gary-archer/oauth.websample.final
cd oauth.websample.final
./build.sh LOCALAPI
./run.sh LOCALAPI

The run.sh executes a number of commands in child terminals, to run the default browser at https://web.authsamples-dev.com/. You can then sign into the SPA using this blog’s test credential:

  • User: guestuser@mycompany.com
  • Password: GuestPassword1

The SPA will then make OAuth secured requests to the API, which will result in the API’s code writing JSON logs.

Main Feature 1: Extensible Authorization

The API implements its security according to these two blog posts, using a JOSE library and some custom claims handling:

The overall behaviour should be to deal with OAuth security in the correct ways, while setting up the API’s business logic with the authorization values it needs. These values may originate from multiple data sources and may not always be issued to access tokens:

@Service
@Scope(value = ConfigurableBeanFactory.SCOPE_PROTOTYPE)
public class CompanyService {

    private final CompanyRepository repository;
    private final ClaimsPrincipalHolder claimsHolder;

    public CompanyService(final CompanyRepository repository, final ClaimsPrincipalHolder claimsHolder) {
        this.repository = repository;
        this.claimsHolder = claimsHolder;
    }
}

Main Feature 2: Production Supportability

The other main objective of the API code sample will be JSON logging of API requests, to include useful technical support fields. Logging console output looks like this on a development computer:

{
  "id" : "b8ae0e13-0752-4ce1-ac3c-692c26528855",
  "utcTime" : "2022-12-10T13:30:42.032527148Z",
  "apiName" : "SampleApi",
  "operationName" : "getCompanyTransactions",
  "hostName" : "WORK",
  "method" : "GET",
  "path" : "/investments/companies/4/transactions",
  "resourceId" : "4",
  "clientApplicationName" : "FinalSPA",
  "userId" : "a6b404b1-98af-41a2-8e7f-e4061dc0bf86",
  "statusCode" : 200,
  "millisecondsTaken" : 288,
  "millisecondsThreshold" : 500,
  "correlationId" : "f17ac322-661f-1b26-aba1-8ccc3f55b62c",
  "sessionId" : "004d32bc-9755-b50e-6315-5be09f277ebe"
}

Meanwhile, logs are also written to files in a bare JSON format, ready for log shipping:

The Elasticsearch Log Aggregation Setup can also be followed, to enable  Technical Support Queries against the API. This would be useful in a production system, where there would be many API requests per day.

Cloud Native Deployment

The API would typically be deployed as a container in a cloud native environment. The API includes some Docker and Kubernetes deployment resources. A basic Docker deployment can be run with these commands:

./deployment/docker-local/build.sh
./deployment/docker-local/deploy.sh
./deployment/docker-local/teardown.sh

Where Are We?

We have described the key behaviour of our final Java API. In the next post we will take a closer look at how this has been coded.

Next Steps

.NET API – Coding Model

Background

In our previous post we described our .NET API OAuth Integration. We will now drill into some final implementation details.

Code Structure

Our advanced C# API consists of three main areas:

  • REST Host
  • API Business Logic
  • Common Code (plumbing)

In a real API platform, much of the plumbing folder could be extracted into one or more shared library references and there would be far less code.

Application Startup Logic

As is standard for a .NET API, the startup logic is coded primarily in the following two classes:

Class Description
Program The application entry point
Startup Manages REST and security specific behaviour

The program class logic focuses on reading the configuration file and configuring logging:

private static IWebHost BuildWebHost(ILoggerFactory loggerFactory)
{
    var configuration = Configuration.Load("./api.config.json");

    return new WebHostBuilder()

        .ConfigureServices(services =>
        {
            services.AddSingleton(loggerFactory);
            services.AddSingleton(configuration);
        })

        .ConfigureLogging(loggingBuilder =>
        {
            loggerFactory.Configure(loggingBuilder, configuration.Logging);
        })

Dependency Composition

The main responsibility of these classes is to set up Cross Cutting Concerns which includes registering dependencies in the Microsoft IOC container:

private void ConfigureBaseDependencies(IServiceCollection services)
{
    new BaseCompositionRoot()
        .UseOAuth(this.configuration.OAuth)
        .WithCustomClaimsProvider(new SampleCustomClaimsProvider())
        .WithLogging(this.configuration.Logging, this.loggerFactory)
        .WithProxyConfiguration(this.configuration.Api.UseProxy, this.configuration.Api.ProxyUrl)
        .WithServices(services)
        .Register();
}

Middleware

Startup code creates various middleware classes, which are natural singletons, and some of them need to be registered with the container:

private void ConfigureApiMiddleware(IApplicationBuilder api)
{
    api.UseMiddleware<LoggerMiddleware>();
    api.UseMiddleware<UnhandledExceptionMiddleware>();
    api.UseMiddleware<CustomHeaderMiddleware>();
}

The role of each of these middleware classes is summarised below:

Middleware Class Responsibility
LoggerMiddleware Manage the log entry for each API request, then log request and response details
CustomHeaderMiddleware Allow advanced client side testing of APIs via custom headers
UnhandledExceptionMiddleware A central place for handling exceptions, adding error details to logs, and producing the client error response

Single Threaded Coding Model

For APIs with simple dependency graphs, I like to reduce the likelihood of parallel requests  impacting each other. I do this by giving each request its own independent object instances. The API uses a request scope for REST specific objects, or a transient scope for domain logic classes:

private void ConfigureApiDependencies(IServiceCollection services)
{
    services.AddTransient<SampleCustomClaimsProvider>();
    services.AddTransient<JsonReader>();
    services.AddTransient<CompanyRepository>();
    services.AddTransient<CompanyService>();
}

High Throughput Requirement

All of this blog’s APIs will be non blocking, to prevent threads being tied up during I/O completion:

It is standard in .NET these days to be ‘async all the way’, starting at the controller entry point:

[HttpGet("")]
public async Task<IEnumerable> GetCompanyListAsync()
{
    return await this.service.GetCompanyListAsync();
}

We then chain async calls together, all the way down to the actual I/O request, such as our JSON file reading (below), or network calls to the Authorization Server:

public async Task<T> ReadDataAsync<T>(string filePath)
{
    string jsonText = await File.ReadAllTextAsync(filePath);
    return JsonConvert.DeserializeObject<T>(jsonText);
}

Logging Implementation

API logging is also implemented via plumbing code, and the end goal is to enable platform wide technical support queries by people.

The log entry is a natural request scoped object so we use the following factory method to create it when another class first accesses it during the lifetime of an API request, then make it injectable:

private void RegisterBaseDependencies()
{
    this.services.AddSingleton(this.loggingConfiguration);
    this.services.AddScoped<ILogEntry>(
        ctx =>
        {
            return this.loggerFactory.CreateLogEntry();
        });

    this.services.AddSingleton(this.httpProxy);
    this.services.AddSingleton<IHttpContextAccessor, HttpContextAccessor>();
}

The log entry is then injected into singleton middleware classes, which contribute data to logs at various points during the request life-cycle:

public async Task Invoke(HttpContext context, ILogEntry logEntryParam)
{
    var logEntry = (LogEntry)logEntryParam;
    logEntry.Start(context.Request);

    await this.next(context);

    logEntry.End(context.Request, context.Response);
    logEntry.Write();
}

It is also possible to inject the log entry into business logic, so that extra data can be included in logs, as for the  below repository class, which contributes performance instrumentation:

public class CompanyRepository
{
    public CompanyRepository(JsonReader jsonReader, ILogEntry logEntry)
    {
        this.jsonReader = jsonReader;
        this.logEntry = logEntry;
    }

    public async Task<IEnumerable<Company>> GetCompanyListAsync()
    {
        using (this.logEntry.CreatePerformanceBreakdown("getCompanyList"))
        {
            return await this.jsonReader.ReadDataAsync<IEnumerable<Company>>(@"./data/companyList.json");
        }
    }
}

Logging classes writes to a JSON log file and, if the Log Aggregation Setup is followed, logs will automatically flow to Elasticsearch:

The sample API uses fixed appenders and fixed JSON output formats. In a real API you may instead prefer to use log4net XML configuration, to enable logging behaviour to be dynamically altered without code changes.

Error Handling Implementation

The API implements our Error Handling and Supportability design. By default all errors escape to the global exception handler, whose role is to log errors and return an error response to the caller:

public ClientError HandleException(Exception exception, HttpContext context)
{
    var logEntry = (LogEntry)context.RequestServices.GetService(typeof(ILogEntry));
    var configuration = (LoggingConfiguration)context.RequestServices.GetService(typeof(LoggingConfiguration));

    var error = ErrorUtils.FromException(exception);
    if (error is ServerError)
    {
        var serverError = (ServerError)error;
        logEntry.SetServerError(serverError);
        return serverError.ToClientError(configuration.ApiName);
    }
    else
    {
        ClientError clientError = (ClientError)error;
        logEntry.SetClientError(clientError);
        return clientError;
    }
}

This is very standard, but the art of good error handling is to design good error objects that are useful to both callers of the API and your technical support staff.

Error output has a productive and readable format, and production logs will also be rendered like this, including context such as which user, session, API and operation was involved:

{
  "id": "0ff96924-1c02-469a-a5de-a1a6b7911ab2",
  "utcTime": "2022-12-10T13:25:40",
  "apiName": "SampleApi",
  "operationName": "GetCompanyTransactions",
  "hostName": "WORK",
  "method": "GET",
  "path": "/investments/companies/4/transactions",
  "resourceId": "4",
  "clientApplicationName": "FinalSPA",
  "statusCode": 200,
  "errorCode": "unauthorized",
  "millisecondsTaken": 12,
  "millisecondsThreshold": 500,
  "correlationId": "d892c50e-c4fb-2e13-57c5-83389fc69c95",
  "sessionId": "004d32bc-9755-b50e-6315-5be09f277ebe",
  "errorData": {
    "statusCode": 401,
    "body": {
      "code": "unauthorized",
      "message": "Missing, invalid or expired access token"
    },
    "context": "JWT verification failed: Invalid signature."
  }
}

By default our exception handler treats unknown errors as general exceptions and returns a 500 response. For closer control of the response, the API’s code can throw a ServerError or ClientError derived instance:

[HttpGet("{id}/transactions")]
public async Task<CompanyTransactions> GetCompanyTransactionsAsync(string id)
{
    int idValue;
    if (!int.TryParse(id, NumberStyles.Any, CultureInfo.InvariantCulture, out idValue) || idValue <= 0)
    {
        throw ErrorFactory.CreateClientError(
            HttpStatusCode.BadRequest,
            SampleErrorCodes.InvalidCompanyId,
            "The company id must be a positive numeric integer");
    }

    return await this.service.GetCompanyTransactionsAsync(idValue);
}

Portability

The above coding model is very mainstream and the concepts can be easily followed in any technology stack. Our earlier Node.js API was almost identical.

Where Are We?

We have implemented some foundational code in .NET without any blocking issues, and separated plumbing from other code. In a real API we could then focus on growing the business logic.

Next Steps

.NET API – OAuth Integration

Background

In our previous post we explained how to run this blog’s final .NET code sample and its main behaviours. Next we will explain the custom OAuth integration.

.NET API Defaults

By default .NET uses a framework based approach to OAuth security, where you add the JwtBearer middleware, then other details are looked up from the OpenID Connect metadata endpoint. For AWS Cognito, which does not include an audience claim in access tokens, this can be done as follows:

private void ConfigureOAuth(IServiceCollection services)
{
    services
        .AddAuthentication(JwtBearerDefaults.AuthenticationScheme)
        .AddJwtBearer(options =>
        {
            options.Authority = this.configuration.IssuerBaseUrl;
            options.TokenValidationParameters = new TokenValidationParameters
            {
                ValidateAudience = false
            };
        });

    services.AddAuthorization(options =>
    {
        options.FallbackPolicy = new AuthorizationPolicyBuilder().RequireAuthenticatedUser().Build();
    });
}

You can then use an AllowAnonymous annotation for any unsecured endpoints, and use Authorization Policies to check for required claims. To troubleshoot, you can configure a log level for the Microsoft.AspNetCore.Authentication.JwtBearer namespace.

[HttpGet("{id}/transactions")]
[Authorize(Policy = "mypolicy")]
public async Task<CompanyTransactions> GetCompanyTransactionsAsync(string id)
{
    ...
}

When getting started with OAuth secured APIs you should use these defaults. Yet this blog’s .NET API focuses on some deeper requirements.

Deeper Requirements

This blog’s .NET API will focus on customizing default behaviour in order to meet the following requirements:

Requirement Description
Standards Based We will use the same standards based design patterns for OAuth security across Node.js, .NET and Java APIs.
Best Security The jose-jwt library will enable the most up to date and specialised security algorithms when dealing with JWTs.
Extensible Claims APIs are in full control of the claims principal, to work around authorization server limitations or add values that should not be issued to access tokens.
Supportable Identity and error details will be captured and included in logs, and JSON error responses will be customizable.

In .NET our OAuth code will follow the same phases that are used by all of this blog’s APIs:

Task Description
JWT Access Token Validation Downloading a JSON Web Key Set and verifying received JWTs
API Authorization Creating a ClaimsPrincipal that includes useful claims, then applying them during authorization

Your .NET Secured API?

This API’s security implementation is meant to be thought provoking, to provide techniques for taking finer control over claims and error handling during secured requests. Some of these may be of interest to readers.

The API contains quite a bit of plumbing code though, to make the API code feel the same across technology stacks. For your own solution you may be able to meet similar requirements with simpler code.

OAuth API Configuration

The API uses a JSON configuration file with the following OAuth settings, which are the same as those used by the final Node.js API:

{
  "oauth": {
    "issuer":                       "https://cognito-idp.eu-west-2.amazonaws.com/eu-west-2_CuhLeqiE9",
    "audience":                     "",
    "scope":                        "https://api.authsamples.com/investments",
    "jwksEndpoint":                 "https://cognito-idp.eu-west-2.amazonaws.com/eu-west-2_CuhLeqiE9/.well-known/jwks.json",
    "claimsCacheTimeToLiveMinutes": 15
  }
}

The meaning of each field is summarised in the following table:

Field Description
issuer The expected authorization server to be received in access tokens
audience The audience in JWT access tokens represents a set of related APIs
scope The business area for the API
jwksEndpoint The location from which jose-jwt will use token signing public keys
claimsCacheTimeToLiveMinutes The time for which extra claims, not present in access tokens, are cached

API Authorization

The API receives an access token with a payload of the following form. The scope of access is limited to investments data. The user’s business identity is a custom claim of manager_id, for a party who manages investments. Another custom claim for role is also issued to the access token:

The API receives the main claims by processing the access token JWT, then does some more advanced work to deal with additional claims in an extensible way. The goal is to set up the API’s business logic with the most useful claims principal.

Custom Authentication Handler

The Startup class wires up our API’s custom OAuth behaviour by creating a custom handler where, unless the authorization policy is overridden for a particular endpoint, the security will be applied:

private void ConfigureOAuth(IServiceCollection services)
{
    string scheme = "Bearer";
    services.AddAuthentication(scheme)
            .AddScheme<AuthenticationSchemeOptions, CustomAuthenticationHandler>(scheme, null);

    services.AddAuthorization(options =>
    {
        options.FallbackPolicy = new AuthorizationPolicyBuilder().RequireAuthenticatedUser().Build();
    });
}

The implementation ensures that claims used for authorization can be controlled. We will also be able to customize API logs and error responses based on the results of the handler.

protected override async Task<AuthenticateResult> HandleAuthenticateAsync()
{
    var logEntry = (LogEntry)this.Context.RequestServices.GetService(typeof(ILogEntry));
    logEntry.Start(this.Request);

    try
    {
        var authorizer = (OAuthAuthorizer)this.Context.RequestServices.GetService(typeof(OAuthAuthorizer));
        var claimsPrincipal = await authorizer.ExecuteAsync(this.Request);

        logEntry.SetIdentity(claimsPrincipal.JwtClaims.Sub);

        var ticket = new AuthenticationTicket(claimsPrincipal, new AuthenticationProperties(), this.Scheme.Name);
        return AuthenticateResult.Success(ticket);
    }
    catch (Exception exception)
    {
        var handler = new UnhandledExceptionMiddleware();
        var clientError = handler.HandleException(exception, this.Context);

        logEntry.End(this.Context.Request, this.Context.Response);
        logEntry.Write();

        this.Request.HttpContext.Items.TryAdd(ClientErrorKey, clientError);
        return AuthenticateResult.NoResult();
    }
}

OAuth and Claims Code

A number of small classes are used to implement the desired behaviour from this blog’s API Authorization Design. The main work is to validate the JWT received in the HTTP request, then return a ClaimsPrincipal that is useful to the rest of the API’s code.

JWT Access Token Validation

The AccessTokenValidator class deals with direct calls to the authorization server and its main code is to validate access tokens using jose-jwt. This includes checking for the API’s required scope:

public async Task ValidateTokenAsync(string accessToken)
{
    var claimsJson = string.Empty;
    try
    {
        var kid = this.GetKeyIdentifier(accessToken);
        if (kid == null)
        {
            throw ErrorFactory.CreateClient401Error("Unable to read the kid field from the access token");
        }

        var jwk = await this.jsonWebKeyResolver.GetKeyForId(kid);
        if (jwk == null)
        {
            throw ErrorFactory.CreateClient401Error($"The token kid {kid} was not found in the JWKS");
        }

        if (jwk.Alg != this.configuration.Algorithm)
        {
            throw ErrorFactory.CreateClient401Error($"The access token kid was not found in the JWKS");
        }

        claimsJson = JWT.Decode(accessToken, jwk);
    }
    catch (Exception ex)
    {
        throw ErrorUtils.FromTokenValidationError(ex);
    }

    var claims = new JwtClaims(claimsJson);
    this.ValidateProtocolClaims(claims);
    return claims;
}

There are a number of responsibilities that I would expect a JWT library to implement for an API:

Responsibility Description
JWKS Key Lookup Downloading token signing public keys from the authorization server’s JWKS endpoint
JWKS Key Caching Caching the above keys and automatically dealing with new lookups when the signing keys are recycled
Signature Checks Cryptographically verifying the JSON Web Signature of received JWTs
Protocol Claim Checks Checking that the token has the correct issuer and audience, and that it is not expired

Yet the jose.jwt library does not manage JWKS downloads, caching of JWKS keys, or checking issuer / audience claims. Therefore I had to write my own plumbing classes for a JsonWebKeyResolver and a JwksCache.

Claims Principal

The claims principal for the sample API deals with some custom fields shown here, which are explained further in the API Authorization Design:

Claim Represents
Scope The scope for the API, which in this blog will be a  high level business area of investments
Subject The user’s technical OAuth identity, generated by the authorization server
Manager ID The business identity for a user, and in my example a manager is a party who administers investment data
Role A role from which business permissions would be derived, about the level of access
Title A business title for the end user, which is displayed by frontend applications
Regions An array claim meant to represent a more detailed business rule that does not belong in access tokens

In code the ClaimsPrincipal class is represented like this, consisting of easy to use objects:

public class CustomClaimsPrincipal : ClaimsPrincipal
{
    public CustomClaimsPrincipal(JwtClaims jwtClaims, ExtraClaims extraClaims)
        : base(GetClaimsIdentity(jwtClaims, extraClaims))
    {
        this.JwtClaims = jwtClaims;
        this.ExtraClaims = extraClaims;
    }

    public JwtClaims JwtClaims { get; private set; }

    public ExtraClaims ExtraClaims { get; private set; }
}

The claims can then be injected into business focused classes and used for authorization, so that there is full control over both data and logic:

private bool IsUserAuthorizedForCompany(Company company)
{
    var isAdmin = this.claims.GetRole() == "admin";
    if (isAdmin)
    {
        return true;
    }

    var isUser = this.claims.GetRole() == "user";
    if (!isUser)
    {
        return false;
    }

    var extraClaims = this.claims.ExtraClaims as SampleExtraClaims;
    return extraClaims.Regions.Any(ur => ur == company.Region);
}

OAuth Middleware Customization

The OAuthAuthorizer class encapsulates the overall OAuth work and deals with injecting claims into the ClaimsPrincipal when needed. In .NET it is also possible to add extra claims in an OnTokenValidated event handler.

public async Task<CustomClaimsPrincipal> ExecuteAsync(HttpRequest request)
{
    var accessToken = BearerToken.Read(request);
    if (string.IsNullOrWhiteSpace(accessToken))
    {
        throw ErrorFactory.CreateClient401Error("No access token was received in the bearer header");
    }

    var jwtClaims = await this.accessTokenValidator.ValidateTokenAsync(accessToken);

    var accessTokenHash = this.Sha256(accessToken);
    var extraClaims = await this.cache.GetExtraUserClaimsAsync(accessTokenHash);
    if (extraClaims != null)
    {
        return this.extraClaimsProvider.CreateClaimsPrincipal(jwtClaims, extraClaims);
    }

    extraClaims = await this.extraClaimsProvider.LookupExtraClaimsAsync(jwtClaims, request.HttpContext.RequestServices);
    await this.cache.SetExtraUserClaimsAsync(accessTokenHash, extraClaims, jwtClaims.Exp);
    return this.extraClaimsProvider.CreateClaimsPrincipal(jwtClaims, extraClaims);
}

This technique adds complexity and is best avoided in most APIs. Yet this type of design can prove useful if you  run into productivity problems, where many fine-grained authorization values are managed in the authorization server.

If so, this is one possible way to ensure a stable access token and avoid needing to frequently deploy APIs and the authorization server together. It keeps the claims principal useful to the API’s logic, and reduces the need for access token versioning.

OAuth Error Responses

The API implements this blog’s Error Handling Design, starting by handling invalid or expired tokens. In a test client we can simulate a 401 error by clicking Expire Access Token followed by Reload Data:

This results in an invalid access token being sent to the API, which returns an error response in its standard format:

Data Description
HTTP Status The appropriate HTTP status is returned
Payload A JSON error object containing code and message fields

In total the following security related HTTP status codes may be returned:

Status Description
401 Access token is missing, invalid or expired
403 The access token does not contain a required scope
404 A ‘not found for user‘ error is returned if a resource is requested that claims do not allow
500 A technical problem during OAuth processing, such as a network error downloading JWKS keys

A 500 error is shown below, and developers can view this type of request by  following the HTTP Proxy tutorial:

The client can then take various types of action based on HTTP status and error code returned. For server errors, user facing apps display details that may be useful for technical support staff:

Identity and API Logs

API logs include details about OAuth errors, which helps when there is a configuration problem:

{
  "id": "b3629a0d-fc73-46b7-a3ca-6115963e8e43",
  "utcTime": "2022-12-10T13:17:28",
  "apiName": "SampleApi",
  "operationName": "GetCompanyTransactions",
  "hostName": "WORK",
  "method": "GET",
  "path": "/investments/companies/2/transactions",
  "resourceId": "2",
  "clientApplicationName": "FinalSPA",
  "statusCode": 200,
  "errorCode": "unauthorized",
  "millisecondsTaken": 43,
  "millisecondsThreshold": 500,
  "correlationId": "b091ec8e-a1d0-dbf9-f764-012cc730c925",
  "sessionId": "004d32bc-9755-b50e-6315-5be09f277ebe",
  "errorData": {
    "statusCode": 401,
    "body": {
      "code": "invalid_token",
      "message": "Missing, invalid or expired access token"
    },
    "context": "JWT verification failed: Invalid signature."
  }
}

Once a JWT is validated, its generated subject claim, most commonly a UUID, is also written to logs. This can potentially help to track users in benign ways, for technical support purposes. This requires care, and is discussed further in the Effective API Logging post.

Where Are We?

We have implemented .NET API Security in a requirements first manner, to enable behaviour that is likely to be important for any OAuth secured API, regardless of technology.

Next Steps

Final .NET API – Overview

Background

Previously we described a Node.js Coding Model that included some behaviours from this blog’s API Journey – Server Side blog post. Next we will provide an equivalent API in C# and .NET.

Final API Code Sample Overview

As for other code examples on this blog, the API has a simple money based theme of investments. It provides only a couple of simple endpoints that return fictional hard coded data.

The API aims to be visual and can serve this blog’s apps, such as the Final SPA below. Running both together is a good way to ensure that the API is client focused. API logs are then generated via requests from the client:

API URLs

During development the API is run as a standalone component. Either XUnit tests or a load test can be used as API clients. These tests can get user level access token to call the API and verify its OAuth security. This is done by pointing the API to a mock authorization server:

Component Base URL
API https://apilocal.authsamples-dev.com:446
Mock Authorization Server https://login.authsamples-dev.com:447

Prerequisite 1: Domain Setup

First update the hosts file to create web and API domains for local development. Include the web domain if running the SPA and API together:

127.0.0.1     localhost apilocal.authsamples-dev.com login.authsamples-dev.com web.authsamples-dev.com
::1           localhost

Prerequisite 2: Install .NET

Download and install the latest .NET SDK, which can be installed on Windows, macOS or Linux:

Prerequisite 3: Optionally Install a .NET IDE

I use Visual Studio Code for C# development:

Prerequisite 4: Optionally Install Node.js

If you want to run the SPA as well as the API, install Node.js for your operating system, which is used to build the SPA’s JavaScript bundles.

Prerequisite 5: Install Docker Desktop

To run API tests, or to run the full SPA and API solution, utility components are run in Docker. Therefore ensure that a local Docker Engine, such as Docker Desktop is installed.

Step 1: Build and Run the API

The API sample is available here and can be be downloaded / cloned to your local PC:

  • git clone https://github.com/gary-archer/oauth.apisample.netcore
  • cd oauth.apisample.netcore

Next run the following script, which downloads some OpenSSL generated development certificates, then runs the API on port 446:

./start.sh

Step 2: Configure SSL Trust

The API runs over SSL using a development certificate, and to prevent trust problems from tests or the browser you will need to trust the highlighted root certificate below, by Configuring Browser Trust:

You will then be able to navigate to the API URL in a browser without any SSL warnings:

Step 3: Run Integration Tests

To run XUnit tests, the API must be pointed to a mock authorization server, so must run with a test configuration. Stop the API if it is running, then re-run it via this command:

./testsetup.sh

Next run the tests with the following command:

./integration_tests.sh

This will spin up a mock JWKS URI hosted at HTTPS endpoints provided by the Wiremock utility. A number of tests are then run, which make HTTP requests to the API. These tests focus on the API’s key security behaviour:

Step 4: Run a Basic Load Test

While the API is running with a test configuration, you can also run a basic load test. This test ensures that the API code has no concurrency bugs, by firing parallel API requests:

./load_test.sh

The test fires 100 HTTP requests to the API, in batches of 5 concurrent requests at a time. This intentionally rehearses certain types of error, and the expected result is 3 errors from a total of 100 requests:

For further details on testing the API with user level tokens but without running a full user login flow, see the  API Automated Tests blog post.

Step 5: Run the SPA Client

The API can be the source of data for any of this blog’s Final UIs. Run the Final SPA using the following commands, where SPA resources are downloaded to a parallel folder:

cd ..
git clone https://github.com/gary-archer/oauth.websample.final
cd oauth.websample.final
./build.sh LOCALAPI
./run.sh LOCALAPI

This will run a number of commands in child terminals, the last of which runs the default browser at https://web.authsamples-dev.com/. You can then sign into the SPA using this blog’s test credential:

  • User: guestuser@mycompany.com
  • Password: GuestPassword1

The SPA will then make OAuth secured requests to the API, which will result in the API’s code writing JSON logs.

Main Feature 1: Extensible Authorization

The API implements its security according to these two blog posts, using a JOSE library and some custom claims handling:

The overall behaviour should be to deal with OAuth security in the correct ways, while setting up the API’s business logic with the authorization values it needs. These values may originate from multiple data sources and may not always be issued to tokens:

public class CompanyService
{
    private readonly CompanyRepository repository;
    private readonly CustomClaimsPrincipal claims;

    public CompanyService(CompanyRepository repository, CustomClaimsPrincipal claims)
    {
        this.repository = repository;
        this.claims = claims;
    }
}

Main Feature 2: Production Supportability

The other main objective of the API code sample will be JSON logging of API requests, to include useful technical support fields. Logging console output looks like this on a development computer:

{
  "id": "65904f11-5fd4-429b-bf6d-3e27285e4fd7",
  "utcTime": "2022-12-10T13:09:29",
  "apiName": "SampleApi",
  "operationName": "GetCompanyTransactions",
  "hostName": "WORK",
  "method": "GET",
  "path": "/investments/companies/2/transactions",
  "resourceId": "2",
  "clientApplicationName": "FinalSPA",
  "userId": "a6b404b1-98af-41a2-8e7f-e4061dc0bf86",
  "statusCode": 200,
  "millisecondsTaken": 12,
  "millisecondsThreshold": 500,
  "correlationId": "5d9ced72-02be-7069-45e8-fd4bcfdb1881",
  "sessionId": "004d32bc-9755-b50e-6315-5be09f277ebe"
}

Meanwhile, logs are also written to files in a bare JSON format, ready for log shipping:

The Elasticsearch Log Aggregation Setup can also be followed, to enable  Technical Support Queries against the API. This would be useful in a production system, where there would be many API requests per day.

Cloud Native Deployment

The API would typically be deployed as a container in a cloud native environment. The API includes some Docker and Kubernetes deployment resources. A basic Docker deployment can be run with these commands:

./deployment/docker-local/build.sh
./deployment/docker-local/deploy.sh
./deployment/docker-local/teardown.sh

Where Are We?

We have described the key behaviour of our final .NET API. In the next post we will take a closer look at how the OAuth integration has been coded.

Next Steps

Final Node.js API – Coding Model

Background

In our last post we started describing an advanced code sample that implemented our API Architecture in Node.js. We will now drill into some final implementation details.

Code Structure

Our advanced Node.js API consists of three main areas:

  • REST Host
  • API Business Logic
  • Common Code (plumbing)

In a real API platform, much of the plumbing folder could be extracted into one or more shared library references and there would be far less code.

Use of Dependency Injection

Our coding model has changed a fair amount since the previous API sample, and this includes use of InversifyJS as an IOC Container:

One reason to improve the dependency management is to enable the request scoped claims principal and log entry instances to be injected into business logic.

Application Startup Logic

Our API starts by running the app.ts file, which creates the container and then runs the HttpServerConfiguration class to set up the Express web server and the application’s dependencies:

(async () => {

    const loggerFactory = LoggerFactoryBuilder.create();
    const container = new Container();

    try {

        const configurationBuffer = await fs.readFile('api.config.json');
        const configuration = JSON.parse(configurationBuffer.toString()) as Configuration;
        loggerFactory.configure(configuration.logging);

        const httpServer = new HttpServerConfiguration(configuration, container, loggerFactory);
        await httpServer.configure();
        httpServer.start();

    } catch (e) {

        // Report startup errors
        loggerFactory.logStartupError(e);
    }
})();

The HttpServerConfiguration class configures an Inversify Express Server, which is just a wrapper around the Express HTTP Server:

attributes and set up controller autowiring
new InversifyExpressServer(this._container, null, {rootPath: '/investments/'}, this._expressApp)
    .setConfig(() => {

        this._expressApp.set('etag', false);
        base.configureMiddleware(this._expressApp);
    })
    .setErrorConfig(() => {

        base.configureExceptionHandler(this._expressApp);
    })
    .build();

Dependency Composition

Our startup logic also performs DI Composition, which consists of 2 types of dependency:

  • Plumbing Classes
  • Application Classes
public async configure(): Promise<void> {

    const base = new BaseCompositionRoot(this._container)
        .useApiBasePath('/investments/')
        .useOAuth(this._configuration.oauth)
        .withExtraClaimsProvider(new SampleExtraClaimsProvider())
        .withLogging(this._configuration.logging, this._loggerFactory)
        .withProxyConfiguration(this._configuration.api.useProxy, this._configuration.api.proxyUrl)
        .register();

    CompositionRoot.registerDependencies(this._container);
}

The BaseCompositionRoot class represents initialisation of common code, which sets up these cross cutting concerns:

  • API Request Logging
  • API Exception Handling
  • An OAuth Authorizer
  • A Custom Claims Provider

Inversify uses the following type of syntax to register dependencies:

private _registerBaseDependencies(): void {

    this._container.bind(BASETYPES.UnhandledExceptionHandler)
        .toConstantValue(this._exceptionHandler!);
    this._container.bind(BASETYPES.LoggerFactory)
        .toConstantValue(this._loggerFactory!);
    this._container.bind(BASETYPES.LoggingConfiguration)
        .toConstantValue(this._loggingConfiguration!);
    this._container.bind(BASETYPES.HttpProxy)
        .toConstantValue(this._httpProxy!);

    this._container.bind(BASETYPES.LogEntry)
        .toConstantValue({} as any);
}

Middleware

As part of composing base dependencies, middleware classes for cross cutting concerns are also created, and these are natural singletons:

public configureMiddleware(expressApp: Application): void {

    this._loggerMiddleware = new LoggerMiddleware(this._loggerFactory!);
    expressApp.use(`${this._apiBasePath}*`, this._loggerMiddleware.logRequest);

    this._authorizerMiddleware = new AuthorizerMiddleware();    
    expressApp.use(`${this._apiBasePath}*`, this._authorizerMiddleware!.authorize);

    const handler = new CustomHeaderMiddleware(this._loggingConfiguration!.apiName);
    expressApp.use(`${this._apiBasePath}*`, handler.processHeaders);
}

The role of each of the API’s middleware classes is summarised below:

Middleware Class Responsibility
LoggerMiddleware Manage the log entry for each API request, then log request and response details
AuthorizerMiddleware OAuth processing, getting data needed for request authorization, and adding identity details to logs
CustomHeaderMiddleware Allow advanced client side testing of APIs via custom headers
UnhandledExceptionHandler A central place for handling exceptions, adding error details to logs, and producing the client error response

Controller Annotations

As is common in other technology stacks, our final Node.js sample uses method and path annotations to manage receiving API requests, and these are provided by Inversify Express Utils.

@controller('/companies')
export class CompanyController extends BaseHttpController {

    private readonly _service: CompanyService;

    public constructor(
        @inject(SAMPLETYPES.CompanyService) service: CompanyService) {

        super();
        this._service = service;
    }

    @httpGet('')
    public async getCompanyList(): Promise<Company[]> {
        ...
    }

    @httpGet('/:id/transactions')
    public async getCompanyTransactions(@requestParam('id') id: string): Promise<CompanyTransactions> {

        ...
    }
}

Note that dependency injection works differently to languages such as C# and Java, since code is compiled to JavaScript and type information is lost. Inversify deals with this by requiring injected objects to be accompanied by an identifying string key, which can be reliably coded as a constant.

Autowiring of REST Controllers

Inversify Express Utils uses a Container Per Request pattern, to create a child container at the start of every HTTP request:

The controller and method for the incoming request are then identified based on which controller annotations the incoming request maps to. The controller class and its dependencies are then created:

Single Threaded Coding Model

For APIs with simple dependency graphs, I like to reduce the likelihood of parallel requests  impacting each other. I do this by giving each request its own independent object instances. The API uses a request scope for REST specific objects, or a transient scope for domain logic classes:

public static registerDependencies(container: Container): void {

    container.bind<ClaimsController>(SAMPLETYPES.ClaimsController)
        .to(ClaimsController).inRequestScope();
    container.bind<UserInfoController>(SAMPLETYPES.UserInfoController)
        .to(UserInfoController).inRequestScope();
    container.bind<CompanyController>(SAMPLETYPES.CompanyController)
        .to(CompanyController).inRequestScope();

    container.bind<CompanyService>(SAMPLETYPES.CompanyService)
        .to(CompanyService).inTransientScope();
    container.bind<CompanyRepository>(SAMPLETYPES.CompanyRepository)
        .to(CompanyRepository).inTransientScope();
    container.bind<JsonFileReader>(SAMPLETYPES.JsonFileReader)
        .to(JsonFileReader).inTransientScope();
}

Logging Implementation

API logging is also implemented via plumbing code, and the end goal is to enable platform wide technical support queries by people.

The log entry is a natural request scoped object and is created in the LoggerMiddleware, which does most of the logging work:

public logRequest(request: Request, response: Response, next: NextFunction): void {

    const logEntry = this._loggerFactory.createLogEntry();
    const container = ChildContainerHelper.resolve(request);
    container.bind(BASETYPES.LogEntry).toConstantValue(logEntry);

    logEntry.start(request);
    logEntry.processRoutes(request, this._routeMetadataHandler);

    response.on('finish', () => {
        logEntry.end(response);
        logEntry.write();
    });

    next();
}

The log entry class can also be injected into business logic, which can contribute to logs, as for the  CompanyRepository, which provides performance instrumentation:

@injectable()
export class CompanyRepository {

    private readonly _jsonReader: JsonFileReader;
    private readonly _logEntry: LogEntry;

    public constructor(
        @inject(SAMPLETYPES.JsonFileReader) jsonReader: JsonFileReader,
        @inject(BASETYPES.LogEntry) logEntry: LogEntry) {

        this._jsonReader = jsonReader;
        this._logEntry = logEntry;
        this._setupCallbacks();
    }

    public async getCompanyList(): Promise<Company[]> {

        return using(this._logEntry.createPerformanceBreakdown('selectCompanyListData'), async () => {

            return this._jsonReader.readData<Company[]>('data/companyList.json');
        });
    }
}

Logging classes write to a log file and, if the Log Aggregation Setup is followed, logs will automatically flow to a local Elastic Search instance. Developers can then query API activity on their local PC:

Error Handling Implementation

The API implements this blog’s Error Handling and Supportability design. By default all errors escape to a global exception handler, whose role is to log errors and return an error response to the caller:

public handleException(exception: any, request: Request, response: Response, next: NextFunction): void {

    const perRequestContainer = ChildContainerHelper.resolve(request);
    const logEntry = perRequestContainer.get<LogEntryImpl>(BASETYPES.LogEntry);

    const error = ErrorUtils.fromException(exception);

    let clientError;
    if (error instanceof ServerError) {
        logEntry.setServerError(error);
        clientError = error.toClientError(this._configuration.apiName);
    } else {
        logEntry.setClientError(error);
        clientError = error;
    }

    const writer = new ResponseWriter();
    writer.writeObjectResponse(response, clientError.getStatusCode(), clientError.toResponseFormat());
}

This is very standard, but the art of good error handling is to design good error objects that contain useful fields to both callers of the API and your technical support staff.

Error output for developers has a productive and readable format, and production logs will also be rendered like this, including context such as which user, session, API and operation was involved.

{
  "id": "2b9de255-808b-10f9-cb01-79d76a851b27",
  "utcTime": "2022-12-10T13:02:46.234Z",
  "apiName": "SampleApi",
  "operationName": "getCompanyList",
  "hostName": "WORK",
  "method": "GET",
  "path": "/investments/companies",
  "clientApplicationName": "FinalSPA",
  "userId": "a6b404b1-98af-41a2-8e7f-e4061dc0bf86",
  "statusCode": 500,
  "errorCode": "exception_simulation",
  "errorId": 95739,
  "millisecondsTaken": 10,
  "millisecondsThreshold": 500,
  "correlationId": "cde4cfed-c6d2-bd28-0add-fc19a97c9fb9",
  "sessionId": "89ab6a9c-12ca-35be-584b-71bb84ee1042",
  "performance": {
    "name": "total",
    "millisecondsTaken": 10,
    "children": [
      {
        "name": "validateToken",
        "millisecondsTaken": 1
      }
    ]
  },
  "errorData": {
    "statusCode": 500,
    "clientError": {
      "code": "exception_simulation",
      "message": "An unexpected exception occurred in the API",
      "id": 95739,
      "area": "SampleApi",
      "utcTime": "2022-12-10T13:02:46.237Z"
    },
    "serviceError": {
      "details": "",
      "stack": [
        "Error: An unexpected exception occurred in the API",
        "at Function.createServerError (/home/gary/dev/oauth.apisample.nodejs/src/plumbing/errors/errorFactory.ts:16:16)",
        "at CustomHeaderMiddleware.processHeaders (/home/gary/dev/oauth.apisample.nodejs/src/plumbing/middleware/customHeaderMiddleware.ts:27:36)",
        "at Layer.handle [as handle_request] (/home/gary/dev/oauth.apisample.nodejs/node_modules/express/lib/router/layer.js:95:5)",
        "at trim_prefix (/home/gary/dev/oauth.apisample.nodejs/node_modules/express/lib/router/index.js:328:13)",
        "at /home/gary/dev/oauth.apisample.nodejs/node_modules/express/lib/router/index.js:286:9",
        "at param (/home/gary/dev/oauth.apisample.nodejs/node_modules/express/lib/router/index.js:365:14)",
        "at param (/home/gary/dev/oauth.apisample.nodejs/node_modules/express/lib/router/index.js:376:14)",
        "at Function.process_params (/home/gary/dev/oauth.apisample.nodejs/node_modules/express/lib/router/index.js:421:3)",
        "at next (/home/gary/dev/oauth.apisample.nodejs/node_modules/express/lib/router/index.js:280:10)",
        "at ClaimsCachingAuthorizer.authorizeRequestAndGetClaims (/home/gary/dev/oauth.apisample.nodejs/src/plumbing/security/baseAuthorizer.ts:62:13)"
      ]
    }
  }
}

By default our exception handler treats unknown errors as general exceptions and returns a 500 response. For closer control of the response, the API’s logic can throw a ServerError or ClientError derived instance:

private _unauthorizedError(companyId: number): ClientError {

    throw ErrorFactory.createClientError(
        404,
        ErrorCodes.companyNotFound,
        `Company ${companyId} was not found for this user`);
}

Portability

The above coding model is mainstream and can be implemented in any technology stack. This blog’s .NET and Java APIs will be coded in an almost identical manner.

Where Are We?

We have implemented our non functional requirements in Node.js without any blocking issues, and separated plumbing from other code. In a real API we could then focus on growing the business logic.

Next Steps

Continue reading “Final Node.js API – Coding Model”

Final Node.js API – Overview

Background

Previously we drilled into this blog’s Error Handling and Supportability design. Next we will explain this blog’s final Node.js API. See also the API Journey – Server Side blog post for the API’s main behaviours.

Final API Code Sample Overview

As for other code examples on this blog, the API has a simple money based theme of investments. It provides only a couple of simple endpoints that return fictional hard coded data.

The API aims to be visual and can serve this blog’s apps, such as the Final SPA below. Running both together is a good way to ensure that the API is client focused. API logs are then generated via requests from the client:

API URLs

During development the API is run as a standalone component. Either mocha tests or a load test can be used as API clients. These tests can get user level access token to call the API and verify its OAuth security. This is done by pointing the API to a mock authorization aerver:

Component Base URL
API https://apilocal.authsamples-dev.com:446
Mock Authorization Server https://login.authsamples-dev.com:447

Prerequisite 1: Domain Setup

First update the hosts file to create domains for local development. Include the web domain if running the SPA and API together:

127.0.0.1     localhost apilocal.authsamples-dev.com login.authsamples-dev.com web.authsamples-dev.com
::1           localhost

Prerequisite 2: Install Node.js

Download Node.js for your operating system, which will be used to run the API and also to build and host the SPA’s JavaScript bundles.

Prerequisite 3: Install Docker Desktop

To run API tests, or to run the full SPA and API solution, utility components are run in Docker. Therefore ensure that a local Docker Engine, such as Docker Desktop is installed.

Step 1: Build and Run the API

The API sample is available here and can be be downloaded / cloned to your local PC:

  • git clone https://github.com/gary-archer/oauth.apisample.nodejs
  • cd oauth.apisample.nodejs

Next run the following command, which downloads some OpenSSL generated development certificates, then runs the API on port 446:

./start.sh

Step 2: Configure SSL Trust

The API runs over SSL using a development certificate. To prevent SSL trust problems from tests or the browser you may need to Configure Node.js and Browser Trust for the highlighted root certificate below:

You will then be able to navigate to the API URL in a browser without any SSL warnings:

Step 3: Run Integration Tests

To run mocha tests, the API must be pointed to a mock authorization server, so must run with a test configuration. Stop the API if it is running, then re-run it via this command:

npm run testsetup

Then run tests with the following command:

npm test

This will spin up a mock JWKS URI hosted at HTTPS endpoints provided by the Wiremock utility. A number of tests are then run, which make HTTP requests to the API. These tests focus on the API’s key security behaviour:

Step 4: Run a Basic Load Test

While the API is running with a test configuration, you can also run a basic load test. This test ensures that the API code has no concurrency bugs, by firing parallel API requests:

npm run loadtest

The test fires 100 HTTP requests to the API, in batches of 5 concurrent requests at a time. This intentionally rehearses certain types of error, and the expected result is 3 errors from a total of 100 requests:

For further details on testing the API with user level tokens but without running a full user login flow, see the  API Automated Tests blog post.

Step 5: Run the SPA Client

If required, run the Final SPA using the following commands, where SPA resources are downloaded to a parallel folder:

cd ..
git clone https://github.com/gary-archer/oauth.websample.final
cd oauth.websample.final
./build.sh LOCALAPI
./run.sh LOCALAPI

The run.sh script executes a number of commands in child terminals, to run the default browser at https://web.authsamples-dev.com/. You can then sign into the SPA using this blog’s test credential:

  • User: guestuser@mycompany.com
  • Password: GuestPassword1

The SPA will then make OAuth secured requests to the API, which will result in the API’s code writing JSON logs.

Main Feature 1: Extensible Authorization

The API implements its security according to these two blog posts, using a JOSE library and some custom claims handling:

The overall behaviour should be to deal with OAuth security in the correct ways, while setting up the API’s business logic with the authorization values it needs. These values may originate from multiple data sources and may not always be issued to tokens:

@injectable()
export class CompanyService {

    private readonly _repository: CompanyRepository;
    private readonly _claims: ClaimsPrincipal;

    public constructor(
        @inject(SAMPLETYPES.CompanyRepository) repository: CompanyRepository,
        @inject(BASETYPES.ClaimsPrincipal) claims: ClaimsPrincipal) {

        this._repository = repository;
        this._claims = claims;
    }
}

The OAuth integration and its claims handling uses exactly the same techniques as the second code example, summarized earlier in its API Coding Key Points. Therefore I will not repeat them, and these posts will instead only focus only on newer features.

Main Feature 2: Production Supportability

The other main objective of the API code sample will be JSON logging of API requests, to include useful technical support fields. Logging console output looks like this on a development computer:

{
  "id": "57b5b054-55bc-2515-65f9-cd7f66919788",
  "utcTime": "2022-12-10T12:57:52.451Z",
  "apiName": "SampleApi",
  "operationName": "getUserInfo",
  "hostName": "WORK",
  "method": "GET",
  "path": "/investments/userinfo",
  "clientApplicationName": "FinalSPA",
  "userId": "a6b404b1-98af-41a2-8e7f-e4061dc0bf86",
  "statusCode": 200,
  "millisecondsTaken": 372,
  "millisecondsThreshold": 500,
  "correlationId": "8debe475-41bb-6c9f-7fc6-7395d79a4b67",
  "sessionId": "f54f1734-aeba-d9a5-550c-e8c74ad3fbf9"
}

Meanwhile, logs are also written to files in a bare JSON format, ready for log shipping:

The Elasticsearch Log Aggregation Setup can also be followed, to enable  Technical Support Queries against the API. This would be useful in a production system, where there would be many API requests per day.

Cloud Native Deployment

The API would typically be deployed as a container in a cloud native environment. The API includes some Docker and Kubernetes deployment resources. A basic Docker deployment can be run with these commands:

./deployment/docker-local/build.sh
./deployment/docker-local/deploy.sh
./deployment/docker-local/teardown.sh

Where Are We?

We have described the key behaviour of our final Node.js API. In the next post we will take a closer look at how this has been coded.

Next Steps

Error Handling and Supportability

Background

In the previous post we scientifically drilled into designing useful API Logs. This post will cover error design patterns for APIs and UIs, with a focus on API Responses, Logs, Presentation and Lookup.

Goal: Fast Problem Resolution

An early focus on failures reduces stress and improves productivity. In production it can make the difference between these two outcomes, where the latter causes reputational damage for your company:

  • A problem for a high profile user takes 10 minutes to resolve
  • A problem for a high profile user takes 12 hours to resolve

Goal: Fast Time to Market

Even more important is the hidden cost when software and people do not have good processes for handling failures. Companies are rarely able to measure or quantify these costs:

  • Cryptic failures can block developers or testers
  • Production incidents can waste time for senior engineers
  • Delivery of other critical projects is frequently impacted

Design for Failure Scenarios

To meet these goals, companies must build software that expects failure. It is common these days to read about this approach when using platforms such as Kubernetes, but there is usually insufficient focus on coding.

The following sections of this post will describe some common failure scenarios and desired outcomes, along with design thinking to achieve them. The coding techniques are used in this blog’s code samples.

401 Error Responses

The first error case we will  consider is calling our OAuth secured API without an access token. Our APIs return a secure error object with a code and message. The HTTP 401 status is also included in the response:

{   
  "code": "invalid_token",
  "message": "Missing, invalid or expired access token"
}

The API logs the error, along with some context to include the cause, in case the 401 occurred for an unexpected reason, such as a misconfigured audience. Note that no call stack is logged for 4xx errors:

{
  "id": "39c9350e-b056-38e0-2bed-636a50ead25d",
  "utcTime": "2022-12-22T09:37:51.821Z",
  "apiName": "SampleApi",
  "operationName": "getCompanyTransactions",
  "hostName": "WORK",
  "method": "GET",
  "path": "/investments/companies/4/transactions",
  "resourceId": "4",
  "clientApplicationName": "FinalSPA",
  "statusCode": 401,
  "errorCode": "invalid_token",
  "millisecondsTaken": 4,
  "millisecondsThreshold": 500,
  "correlationId": "4b32057f-e204-db1f-5781-aa054c840e86",
  "sessionId": "832fd8c3-5fc2-e980-2f32-f88ae284f4e1",
  "errorData": {
    "statusCode": 401,
    "clientError": {
      "code": "invalid_token",
      "message": "Missing, invalid or expired access token"
    },
    "context": "JWT verification failed : signature verification failed"
  }
}

4xx Error Responses due to Invalid Input

In real world APIs you will want to validate all input early, to prevent deeper problems such as data corruption. This blog’s app have a couple of very simple input validation cases, just to cover the concept.

The API returns a Not Found for User response if the user tries to access data they are not entitled to, by editing the browser location. In the below screenshot, the user is not authorized to access company 3:

The error response returned from the API has a 404 status code, and the following response body:

{   
  "code": "company_not_found",
  "message": "Company 3 was not found for this user"
}

Similarly if a syntactically invalid ID such as ‘abc‘ is provided, then the API return a 400 error to indicate a malformed request:

{
  "code": "invalid_company_id",
  "message": "The company id must be a positive numeric integer"
}

Using Error Codes in Clients

The Transactions View in our UIs is able to handle these known API error codes gracefully, by redirecting the user back to the home page. More generally, useful error codes put clients in control:

private _isExpectedApiError(error: UIError): boolean {

    if (error.statusCode === 404 && error.errorCode === ErrorCodes.companyNotFound) {
        return true;
    }

    if (error.statusCode === 400 && error.errorCode === ErrorCodes.invalidCompanyId) {
        return true;
    }

    return false;
}

Error Codes per Component

For each of this blog’s UI and API code examples, an ‘Error Codes‘ module lists all of the known error codes. This provides a full list of error codes and can be published to interested parties when required.

export class ErrorCodes {

    public static readonly serverError = 'server_error';

    public static readonly invalidToken = 'invalid_token';

    public static readonly tokenSigningKeysDownloadError = 'jwks_download_failure';

    public static readonly insufficientScope = 'insufficient_scope';

    public static readonly userinfoFailure = 'userinfo_failure';

    public static readonly userInfoInvalidToken = 'invalid_token';

    public static readonly exceptionSimulation = 'exception_simulation';
}

You can start small, where for example any server exception returns a generic code such as server_error. Then enhance your error processing over time, based on specific failures encountered.

Unexpected API 4xx Responses

Most 4xx errors should only occur during initial integration and not during production usage. However, UIs need a default action if a 4xx error ever occurs unexpectedly. This can be simulated in APIs by throwing an error:

throw ErrorFactory.createClientError(
    400,
    'invalid_text_data', 
    'Unsupported characters were encountered');

Client 4xx Error Displays

At this point the client is broken and usually needs to present an error response to the end user. Think through how you will manage this from both a support and usability viewpoint. When online sites present an error such as this, the experience is poor in both areas:

  • Oops – something has gone wrong

This blog’s apps present an Error Summary Link for the view that failed. The end user can either view details or perform a Navigation Action by clicking the home button, to try to recover:

If the red link is clicked, an Error Details View is presented. In some types of app this screen can be hidden away, as a last resort option. Aim to keep the user informed though, and also provide hints for support staff on the underlying cause:

The client should model errors as a first class object. You can then decide which properties to display. Secure properties should also be collected, but may be used differently, such as sending to an error service:

export class UIError extends Error {

    private _area: string;
    private _errorCode: string;
    private _userAction: string;
    private _utcTime: string;
    private _statusCode: number;
    private _instanceId: number;
    private _details: any;
    private _url: string;
}

Custom API 4xx Error Responses

There is not always a one size fits all solution for 4xx errors. Sometimes error responses need to be domain specific and contain more complex payloads, as in this example, which returns a collection of errors, each of which indicates which item failed:

[{   
  "code": "invalid_stock_item_id",
  "message": "The stock item supplied was not found",
  "key": 2
},
{
  "code": "invalid_quantity",
  "message": "The quantity must be a positive integer",
  "key": 5
}]

You should still be able to design a loose abstraction that all client errors can fit into. Custom errors can then translate to the response and log formats in custom ways when required:

export abstract class ClientError extends Error {

    public constructor(statusCode: number, errorCode: string, message: string);
    
    public abstract getStatusCode(): number;

    public abstract getErrorCode(): string;

    public abstract toResponseFormat(): any;

    public abstract toLogFormat(): any;
}

Aim to Fail on First Error

Unless there is a good reason, I avoid returning API Composite Errors and use a Fail on First Error model. A single error item is usually much easier for clients to code against, and also simpler for the API to implement reliably.

This can often work well in cases where a form submits multiple values, since client side validation should deal with simple failures such as missing or malformed input, to ensure that multiple invalid fields submitted to the server is rare.

API Validation Frameworks

Developers are often attracted to vendor solutions that validate fields via declarative annotations. This is fine, but first ensure that the framework fits into your wider plan, and check requirements such as these:

Requirement Description
Controllable Format It must be possible to override default error responses to fit your error model
Reliable Rules must handle nuances such as leading and trailing white space
Extensible It must be possible to create custom validators in code when required
Complex Validation Complex rules must be supported, that operate on multiple input fields, yet use the same response format

API 5xx Error Response Formats

API 500 errors most commonly occur due to either bugs, misconfiguration or temporary infrastructure problems. You will then require extra fields to help with fast problem resolution. This blog’s APIs return an extended error response in this case:

{
	"code": "decryption_error",
	"message": "An unexpected exception occurred in the API",
	"area": "BasicApi",
	"id": 88146,
	"utcTime": "2019-05-06T12:42:30.357Z"
}

The three extra fields provide the Where, Which and When of the failure, to help enable fast error lookup:

Field Meaning
area Where in your API platform to look for the root cause
id Which log entry in that API’s logs contains the error details
utcTime When the error occurred

Note also that the root cause of the error may have been in an Upstream API rather than the API that returned the error to the caller.

Client 5xx Error Displays

For API 5xx errors, the key difference is that this blog’s apps render the extra fields in the API response. This includes an Error ID to represent a particular occurrence of the error:

API 5xx Error Logs

For 5xx errors, this blog’s APIs log the error details in the following format. This includes client and service error details. The service details including a call stack and any other useful information that could explain the cause. Some error fields are denormalized, to support error queries:


  "id": "efa6217b-7be1-f393-773d-6d8aa9a464b3",
  "utcTime": "2023-03-26T11:14:32.154Z",
  "apiName": "SampleApi",
  "operationName": "getCompanyList",
  "hostName": "WORK",
  "method": "GET",
  "path": "/investments/companies",
  "clientApplicationName": "FinalSPA",
  "userId": "a6b404b1-98af-41a2-8e7f-e4061dc0bf86",
  "statusCode": 500,
  "errorCode": "exception_simulation",
  "errorId": 76236,
  "millisecondsTaken": 1,
  "millisecondsThreshold": 500,
  "correlationId": "b95f6800-b236-863a-1f6f-23e7a12cf474",
  "sessionId": "832fd8c3-5fc2-e980-2f32-f88ae284f4e1",
  "errorData": {
    "statusCode": 500,
    "clientError": {
      "code": "exception_simulation",
      "message": "An unexpected exception occurred in the API",
      "id": 76236,
      "area": "SampleApi",
      "utcTime": "2023-03-26T11:14:32.154Z"
    },
    "serviceError": {
      "details": "",
      "stack": [
        "Error: An unexpected exception occurred in the API",
        "at Function.createServerError (/home/gary/dev/oauth.apisample.nodejs/src/plumbing/errors/errorFactory.ts:16:16)",
        "at CustomHeaderMiddleware.processHeaders (/home/gary/dev/oauth.apisample.nodejs/src/plumbing/middleware/customHeaderMiddleware.ts:27:36)",
        "at Layer.handle [as handle_request] (/home/gary/dev/oauth.apisample.nodejs/node_modules/express/lib/router/layer.js:95:5)",
        "at trim_prefix (/home/gary/dev/oauth.apisample.nodejs/node_modules/express/lib/router/index.js:328:13)",
        "at /home/gary/dev/oauth.apisample.nodejs/node_modules/express/lib/router/index.js:286:9",
        "at param (/home/gary/dev/oauth.apisample.nodejs/node_modules/express/lib/router/index.js:365:14)",
        "at param (/home/gary/dev/oauth.apisample.nodejs/node_modules/express/lib/router/index.js:376:14)",
        "at Function.process_params (/home/gary/dev/oauth.apisample.nodejs/node_modules/express/lib/router/index.js:421:3)",
        "at next (/home/gary/dev/oauth.apisample.nodejs/node_modules/express/lib/router/index.js:280:10)",
        "at ClaimsCachingAuthorizer.authorizeRequestAndGetClaims (/home/gary/dev/oauth.apisample.nodejs/src/plumbing/security/baseAuthorizer.ts:62:13)"
      ]
    }
  }
}

Error Communication

In some types of app, end users will communicate problems back to the software producing company, via one of these methods:

  • User sends a screenshot to a help desk email address
  • User phones a help desk person and reads out the red error number

This ‘fairly unique error ID‘ of 88641 is easy for a user to communicate by phone, even if they are not a strong English speaker. The error ID is then used by support staff to quickly look up the error in the log aggregation system, via the following type of query.

GET apilogs*/_search
{ 
  "query":
  {
    "match":
    {
      "errorId": 88641
    }
  }
}

Occasionally, multiple log entries will exist with the same error ID. In this case, other details, such as the time, will enable the most relevant entry to be quickly identified.

Error Chaining

In the below screenshot the root cause of the error is in an upstream API. The Online Sales API must return the most relevant error details to the UI:

  • area = Customers API
  • id = 97264

If the Online Sales API generated a new Error ID, the UI would not point to the root cause. Instead, the error handling in the Online Sales API must log and return error details from the Customers API. There will be two API log entries, both with the same values for these fields:

  • Error ID
  • Correlation ID
  • Session ID

The log aggregation query will return both errors, and the Customers API log entry will contain the root cause.

Error Rehearsal

Typically 500 errors are the most difficult to reproduce or test, but the ability to do so has considerable business value, and ensures that:

  • The API 500 error handling code is behaving as designed
  • The right people have access to production logs
  • People are trained on the incident resolution process

All of this blog’s Final UIs support rehearsing a back end 500 error by long pressing the Reload Data button for a few seconds:

To support error rehearsal, this blog’s APIs use a very small middleware class, which checks for a Custom Header and throws an exception when the header value matches the name of the API:

export class CustomHeaderMiddleware {

    public processHeaders(request: Request, response: Response, next: NextFunction): void {

        const apiToBreak = request.header('x-mycompany-test-exception');
        if (apiToBreak) {
            if (apiToBreak.toLowerCase() === this._apiName.toLowerCase()) {

                throw ErrorFactory.createServerError(
                    BaseErrorCodes.exceptionSimulation,
                    'An unexpected exception occurred in the API');
            }
        }

        next();
    }
}

For demo purposes, this blog’s apps send the custom header to the API after a long press of the Reload Data button. This enables a basic form of chaos testing, to choose an API to break.

Reliability Over Time

Not all errors are so deterministic. Occasionally your software will have deeper bugs, that occur intermittently. The best way to deal with these is to assign them an error code, then measure them.

The Technical Support Analysis post explains how you should be able to produce a report with a breakdown of API errors by type with frequencies. Once you have visibility you can plan actions for any error occurrences that are not expected, such as adding extra details to logs.

clientApplicationName|    apiName    |    operationName     |  statusCode   |     errorCode      |   frequency   
---------------------+---------------+----------------------+---------------+--------------------+---------------
FinalSPA             |SampleApi      |getCompanyTransactions|404            |company_not_found   |6              
FinalSPA             |SampleApi      |getCompanyList        |500            |exception_simulation|2              
FinalSPA             |SampleApi      |getCompanyList        |500            |server_error        |7              
BasicIosApp          |SampleApi      |getCompanyTransactions|500            |file_read_error     |1              
BasicAndroidApp      |SampleApi      |getCompanyTransactions|400            |invalid_company_id  |1              
BasicDesktopApp      |SampleApi      |getUserInfo           |500            |server_error        |2              

Error Coding Design

Error coding can usually be classified into steps, similar to the following. These steps are used by all of this blog’s code samples:

Step Description
Error Translation Catching an error at the earliest point, to include exception specific context in error models
Error Throwing Throwing a different exception after error translation, while keeping the stack trace of the original error
Error Logging Logging the error information in a structured format, that is easy to query later
Error Responses Returning the error details to an API client or displaying them to an end user

Error Translation and Throwing

When there is an exception, both our UI and API collect exception related data into their error models. APIs use both ClientError and ServerError objects, both of which contain fields focused on supportability:

export class ServerErrorImpl extends ServerError {

    private readonly _statusCode: number;
    private readonly _errorCode: string;
    private readonly _instanceId: number;
    private readonly _utcTime: string;
    private _details: any;

    public constructor(errorCode: string, userMessage: string, stack?: string | undefined) {

        super(userMessage);

        this._statusCode = 500;
        this._errorCode = errorCode;
        this._instanceId = Math.floor(Math.random() * (MAX_ERROR_ID - MIN_ERROR_ID + 1) + MIN_ERROR_ID);
        this._utcTime = new Date().toISOString();
        this._details = '';

        if (stack) {
            this.stack = stack;
        }
   }
}

Catching is done both when we want to assign a specific error code, or when we want to capture third party details. These concerns are best managed close to the source exception. Catching is only needed when dealing with infrastructure, and the code base should not contain many catch blocks:

public async validateToken(accessToken: string): Promise<JWTPayload> {

    try {

        const options = {
            algorithms: ['RS256'],
            issuer: this._configuration.issuer,
            audience: this._configuration.audience,
        };
        const result = await jwtVerify(accessToken, this._jwksRetriever.remoteJWKSet, options);

        return result.payload;

    } catch (e: any) {

        if (e.code === 'ERR_JOSE_GENERIC') {
            throw ErrorUtils.fromSigningKeyDownloadError(e, this._configuration.jwksEndpoint);
        }

        let details = 'JWT verification failed';
        if (e.message) {
            details += ` : ${e.message}`;
        }

        throw ErrorFactory.createClient401Error(details);
    }
}

Another example is shown here, where a file read problem includes the library’s call stack, and the rethrown error includes the file path that failed:

public async readData<T>(filePath: string): Promise<T> {

    try {

        const buffer = await fs.readFile(filePath);
        return JSON.parse(buffer.toString()) as T;

    } catch (e: any) {

        const error = ErrorFactory.createServerError(
            ErrorCodes.fileReadError,
            'Problem encountered reading data',
            e.stack);

        if (e instanceof Error) {
            error.setDetails(`File: ${filePath}, ${e.message}`);
        } else {
            error.setDetails(`File: ${filePath}, ${e}`);
        }

        throw error;
    }
}

The API code is able to indicate a 4xx condition by throwing a ClientError, or a 5xx condition by throwing a ServerError. It can assign an error code in both cases. The thrown error also contains a useful stack trace, from the third party library that does the lower level work.

Error Logging and Responses

Results are returned from APIs to clients via an exception middleware class. At this point the operations for toLogFormat and toResponseFormat are called:

export class UnhandledExceptionHandler {

    public handleException(exception: any, request: Request, response: Response, next: NextFunction): void {

        const perRequestContainer = ChildContainerHelper.resolve(request);
        const logEntry = perRequestContainer.get<LogEntryImpl>(BASETYPES.LogEntry);
        const error = ErrorUtils.fromException(exception);

        let clientError;
        if (error instanceof ServerError) {
            
            logEntry.setServerError(error);
            clientError = error.toClientError(this._configuration.apiName);

        } else {

            logEntry.setClientError(error);
            clientError = error;
        }

        const writer = new ResponseWriter();
        writer.writeObjectResponse(response, clientError.getStatusCode(), clientError.toResponseFormat());
    }
}

The app then receives the API error and renders the error to the end user. Both the API and client are therefore consumer focused:

export class ErrorFormatter {

    public getErrorLines(error: UIError): ErrorLine[] {

        const lines: ErrorLine[] = [];

        lines.push(this._createErrorLine('User Action', error.userAction, 'highlightcolor'));

        if (error.message.length > 0) {
            lines.push(this._createErrorLine('Info', error.message));
        }

        if (error.utcTime.length > 0) {
            const displayTime = moment(error.utcTime).format('DD MMM YYYY HH:mm:ss');
            lines.push(this._createErrorLine('UTC Time', displayTime));
        }

        if (error.area.length > 0) {
            lines.push(this._createErrorLine('Area', error.area));
        }

        if (error.errorCode.length > 0) {
            lines.push(this._createErrorLine('Error Code', error.errorCode));
        }

        if (error.instanceId > 0) {
            lines.push(this._createErrorLine('Instance Id', error.instanceId.toString(), 'errorcolor'));
        }

        if (error.statusCode > 0) {
            lines.push(this._createErrorLine('Status Code', error.statusCode.toString()));
        }

        return lines;
    }
}

Portable Design

Technology stacks often provide only basic error handling. You usually need to design error handling based on your company’s requirements. The above examples showed some commonly desired behaviour, which can be coded in any language.

Where Are We?

We have discussed some techniques to enable software companies to deal with errors in both backend and frontend code, in a scalable manner. This behaviour is implemented in all of this blog’s code samples.

Next Steps

  • We will describe the behaviour of this blog’s final Node.js API
  • For a list of all blog posts see the Index Page
Effective API Logging

Background

The previous post tool a look at the API Journey – Client Side, to focus on some technical behaviors OAuth clients typically implement. This post dives deep into ensuring the most useful API logging results.

Logging Frameworks

Most online documents on API logging describe a widely used development approach, with the following generic capabilities. These behaviors are typically provided by a logging framework:

  • Enable a logger per class
  • Enable logging levels, such as DEBUG, INFO, WARN and ERROR
  • Output log data to various locations via appenders
  • Enable logging behavior to be changed via configuration

Results can be useful for local development, with a single user and a low volume of API requests. As we shall see however, this often leaves a lot to be desired for production systems.

Common Logging Problems

These are some common problems with API logs. To avoid them, start with your requirements rather than being led by the technology:

Problem Area Description
Difficult to Query Logger per class output typically uses free text and as a result it only supports text find operations
Does not Scale Under load it is difficult to understand which log entries are related, or to answer simple questions such as how many errors of a particular type there have been today
Not Configurable In some setups it can be impossible to get stakeholders to change the production log level when there is a problem, for fear they will make things worse

Technical Support Logging Requirements

Start by defining how you want a logging solution to work. This blog will use the following requirements:

Requirement Notes
Logs are Centralized Log users go to a single known location to find technical support data for all API instances.
Logs are Structured Logs contain data we want to query by, and each log entry can consist of both known and unknown fields.
Logs are Easy to Use Any semi-technical person can issue basic queries against the log data, with a small learning curve.
Logs are Lightweight Logging avoids redundant noise, so that they are readable and do not impact performance.
Logs are Secure Logs do not include confidential data, such as emails or request bodies. As a result it should be possible to grant engineers access to production logs.
Logging is Always On Incidents are always in the past and changing the log level after the event is too late.
Logging is the same Everywhere Logging works the same on a development computer as in production.

The primary goal of logging is a system that is easy for the following people to use. It must be able to deal with busy production systems, with hundreds of concurrent users, or a million API calls per day.

Role Usage
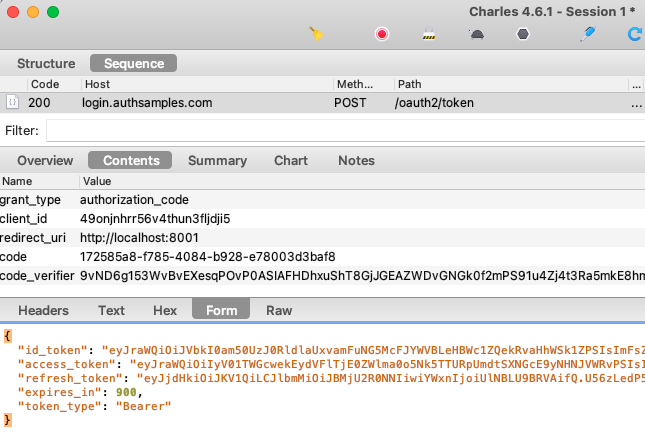
Developer Looks at logs while coding
Tester Looks at logs during various types of testing
DevOps Looks at production logs to investigate incidents

Solution Overview

This blog’s final APIs do immediate logging to a text file, which is a fast operation. In some setups, such as Kubernetes, the platform will create these files for us, by redirecting stdout. A Log Shipper then reads the text files and sends logs to a data store from where logs can be queried.

Log aggregation is very standard these days, and this blog uses the free open source Elastic Stack, deployed using containers. The essential part of the solution is for API logs to output useful data. Generic technical logging, including agents deployed to API servers, is always sub-optimal.

Multiple Logger Types

Frameworks use loggers to represent a category of output data.  In this blog I will structure API code to use the following loggers, and only aggregate the first of these:

Data Type Output
Request Log A production logger that outputs a single JSON object per API request and is easy to query
Logger per Class Development loggers that output free text that can be useful for developers, but is difficult to query

In more complex APIs, the logger per class data at an INFO level may also be useful in production. In this case an alternative approach is to aggregate both types of log data, but ensure that queries can join them using a Request ID.

Production Logs

An example log entry is shown below, with fields similar to a Web Server HTTP Request Log Entry. The fields it contains are designed for log users to query by, rather than being purely HTTP related.

{
  "id": "c4939e2c-9f71-4f4b-bbca-dda287b48385",
  "utcTime": "2022-07-24T08:41:05.069Z",
  "apiName": "SampleApi",
  "operationName": "getCompanyTransactions",
  "hostName": "MACSTATION.local",
  "method": "GET",
  "path": "/investments/companies/2/transactions",
  "resourceId": "2",
  "clientApplicationName": "LoadTest",
  "userId": "a6b404b1-98af-41a2-8e7f-e4061dc0bf86",
  "statusCode": 200,
  "millisecondsTaken": 7,
  "millisecondsThreshold": 500,
  "correlationId": "3e4ac756-11c7-e60f-c564-ad4f203d5742",
  "sessionId": "a601559a-0c90-c899-8099-8a9f63a30be8"
}

Production Log Schema

This blog will use a schema with the following top level fields. Users of the logging system will be able to issue queries based on any of these:

Field Description
ID A globally unique identifier for the log entry
UTC Time The time when the API code received the request
API Name The name of the API within the platform
Operation Name The name of the operation within the API
Host Name The name of the server that hosts this API instance
HTTP Method Whether a GET, POST etc
Path The URL path and query string
Resource ID The REST URL runtime path segments that identify the resource
Client Application Name A readable value for the application that called the API
User ID The subject claim from the OAuth access token
Status Code The response status code
Milliseconds Taken The number of milliseconds that the API code took to execute
Milliseconds Threshold The performance threshold beyond which the API operation is considered slow
Error Code When an error occurs, this contains a text code to identify the cause of the error
Error ID When an API 500 error occurs, this contains a generated number to track the exact error occurrence
Correlation ID An identifier either supplied via a caller header or generated by the API otherwise
Session ID Used to partition multiple related calls to the API together, such as those for a UI session or load test

In addition, these child objects can be optionally logged, but not queried directly. They can be retrieved by getting documents, using the top level fields as queries.

Field Description
Performance Provides instrumentation on expensive subtasks to help understand where time is being spent
Error When the API returns a 400 or 500 response, this contains the error returned to the client, along with context and exception details where applicable
Info Additional arbitrary data can be added here, though it should be used sparingly

Users and Privacy

The User ID requires a special mention, since these days you must not record personally identifiable information such as names and emails in logs. I use an anonymous identifier for the OAuth subject claim, and log that as a stable value.

You also need to avoid inadvertent user tracking. The logs are used to support a set of related apps and the User ID should only ever be available to people operating in this context. In some setups it may be safer to omit User IDs from logs.

API Logging Configuration

This blog’s final APIs are written in Node.js, .NET and Java and each of them defines its logging in the API configuration file. Production logs always use JSON output, to either the console or a file, and pretty printing is configured on a development computer.

{
    "apiName": "SampleApi",
    "production": {
        "level": "info",
        "performanceThresholdMilliseconds": 500,
        "transports": [
            {
                "type": "console",
                "prettyPrint": true
            },
            {
                "type": "file",
                "filePrefix": "api",
                "dirname": "./logs",
                "maxSize": "10m",
                "maxFiles": "7d"
            }
        ]
    },
    "development": {
        "level": "info",
        "overrideLevels": {
            "ClaimsCache": "info"
        },
        "transports": [
            {
                "type": "file",
                "filePrefix": "trace",
                "dirname": "./logs",
                "maxSize": "10m",
                "maxFiles": "7d"
            }
        ]
    }
},

In your own APIs it may make sense to instead use the built-in logging configuration, such as that provided by log4j2, for best flexibility. In this blog I avoided doing so since I wanted the logging configuration to look the same for all three API technologies.

By default , this blog’s APIs output production JSON logs at all stages of the pipeline, including development computers. When required, developers can temporarily change to a logger per class configuration.

Logging Framework Customization

Logging frameworks typically implement JSON logging by first adding their own fields, then encoding the JSON payload into a ‘message‘ field. This blog instead uses pure JSON, for best readability on development computers.
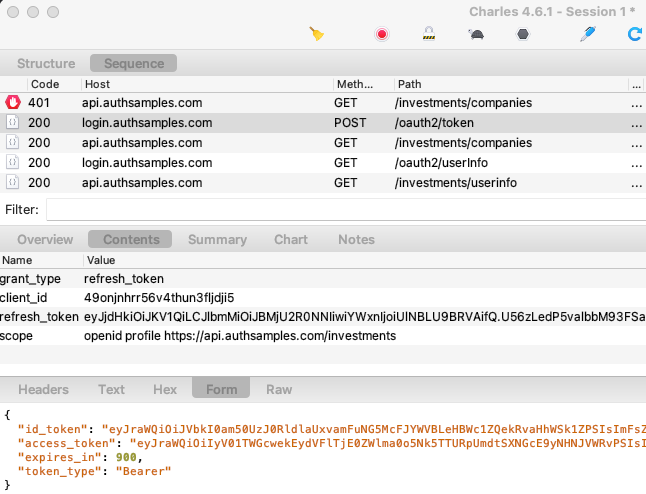
Later, in the API implementations, there is quite a bit of plumbing code in order to enable my desired inputs and output. It can be worth the effort though, to enable the best readability for users of logs.

JSON Output

In API development configurations, multi-line JSON is written to stdout by default. When log aggregation is used, log shipper components require immediate output to instead be bare JSON, on a single line.

To enable log aggregation from a development computer, log files are used. In container based setups you will also need to use log files if you aggregate more than one type of log data.

Logger per Class Output

To enable development output, the following type of configuration can be used. This disables JSON request logging and uses a debug level for the logger for the ClaimsCache class:

{
    "apiName": "SampleApi",
    "production": {
        "level": "info",
        "performanceThresholdMilliseconds": 500,
        "transports": [
            {
                "type": "file",
                "filePrefix": "api",
                "dirname": "./logs",
                "maxSize": "10m",
                "maxFiles": "7d"
            }
        ]
    },
    "development": {
        "level": "info",
        "overrideLevels": {
            "ClaimsCache": "debug"
        },
        "transports": [
            {
                "type": "console",
                "prettyPrint": true
            }
        ]
    }
}

The API code can then use the following type of  ‘logger per class‘ logging:

const traceLogger = loggerFactory.getDevelopmentLogger(ClaimsCache.name);
traceLogger.debug(`Token to be cached will expire in ${secondsToCache} seconds (hash: ${accessTokenHash})`);

The request logs are then written only to a file and the console shows the logging you are interested in.

debug: 2022-07-24T09:31:09.219Z : ClaimsCache : Token to be cached will expire in 1656996443945 seconds (hash: 4185d7218f55d0a14314ee473c64f0a01b66b567f601d32d3b070dd654532da7)
debug: 2022-07-24T09:31:09.219Z : ClaimsCache : Adding token to claims cache for 1800 seconds (hash: 4185d7218f55d0a14314ee473c64f0a01b66b567f601d32d3b070dd654532da7)
debug: 2022-07-24T09:31:09.222Z : ClaimsCache : Token to be cached will expire in 1656996443944 seconds (hash: 46a5f14270fbff05d31310cf49bb1243076dec4f3d51fab562af7640dae2cd24)
debug: 2022-07-24T09:31:09.222Z : ClaimsCache : Adding token to claims cache for 1800 seconds (hash: 46a5f14270fbff05d31310cf49bb1243076dec4f3d51fab562af7640dae2cd24)
debug: 2022-07-24T09:31:09.223Z : ClaimsCache : Token to be cached will expire in 1656996443943 seconds (hash: 9fa995f769351cbccd8cd67b41e2a74636e8fb7db9c1cbf7702db29f5c231053)
debug: 2022-07-24T09:31:09.223Z : ClaimsCache : Adding token to claims cache for 1800 seconds (hash: 9fa995f769351cbccd8cd67b41e2a74636e8fb7db9c1cbf7702db29f5c231053)
debug: 2022-07-24T09:31:09.296Z : ClaimsCache : Found existing token in claims cache (hash: db090981096137579adba5a032aa386f443d78a31b5d755ba5a482fc29dd4fd1)
debug: 2022-07-24T09:31:09.297Z : ClaimsCache : Found existing token in claims cache (hash: 9fa995f769351cbccd8cd67b41e2a74636e8fb7db9c1cbf7702db29f5c231053)
debug: 2022-07-24T09:31:09.298Z : ClaimsCache : Found existing token in claims cache (hash: 46a5f14270fbff05d31310cf49bb1243076dec4f3d51fab562af7640dae2cd24)
debug: 2022-07-24T09:31:09.298Z : ClaimsCache : Found existing token in claims cache (hash: 84bae745760578309cfeea9f2e7cdae73aceea9b0565b4bef832875fd74d6150)
debug: 2022-07-24T09:31:09.300Z : ClaimsCache : Found existing token in claims cache (hash: 4185d7218f55d0a14314ee473c64f0a01b66b567f601d32d3b070dd654532da7)

Error Logs

When API requests return an HTTP 400 related status, the error returned to the client is logged, along with additional context. The code throws an exception, but no call stack is logged, since nothing has failed on the server:

{
  "id": "7af62b06-8c04-41b0-c428-de332436d52a",
  "utcTime": "2022-07-24T10:27:33.468Z",
  "apiName": "SampleApi",
  "operationName": "getCompanyTransactions",
  "hostName": "MACSTATION.local",
  "method": "GET",
  "path": "/investments/companies/2/transactions",
  "resourceId": "2",
  "clientApplicationName": "FinalSPA",
  "statusCode": 401,
  "errorCode": "invalid_token",
  "millisecondsTaken": 2,
  "millisecondsThreshold": 500,
  "correlationId": "15b030a2-c67d-01ae-7c3f-237b9a70dbba",
  "sessionId": "77136323-ec8c-dce2-147a-bc52f34cb7cd",
  "errorData": {
    "statusCode": 401,
    "clientError": {
      "code": "invalid_token",
      "message": "Missing, invalid or expired access token"
    },
    "context": "JWT verification failed : signature verification failed"
  }
}

When API requests return an HTTP 500 related status, the error logged includes both the client and service errors, including the call stack. This information will typically be needed in order to resolve the problem:

{
  "id": "b36701c9-ddf2-d7da-df48-4dfcc918009b",
  "utcTime": "2022-07-24T10:28:00.435Z",
  "apiName": "SampleApi",
  "operationName": "getCompanyTransactions",
  "hostName": "MACSTATION.local",
  "method": "GET",
  "path": "/investments/companies/2/transactions",
  "resourceId": "2",
  "clientApplicationName": "FinalSPA",
  "userId": "a6b404b1-98af-41a2-8e7f-e4061dc0bf86",
  "statusCode": 500,
  "errorCode": "exception_simulation",
  "errorId": 79072,
  "millisecondsTaken": 9,
  "millisecondsThreshold": 500,
  "correlationId": "5f1f1bcb-79c4-00ee-a1fe-be5e4262eb75",
  "sessionId": "77136323-ec8c-dce2-147a-bc52f34cb7cd",
  "errorData": {
    "statusCode": 500,
    "clientError": {
      "code": "exception_simulation",
      "message": "An unexpected exception occurred in the API",
      "id": 79072,
      "area": "SampleApi",
      "utcTime": "2022-07-24T10:28:00.438Z"
    },
    "serviceError": {
      "details": "",
      "stack": [
        "Error: An unexpected exception occurred in the API",
        "at Function.createServerError (/Users/gary/dev/oauth.apisample.nodejs/src/plumbing/errors/errorFactory.ts:16:16)",
        "at CustomHeaderMiddleware.processHeaders (/Users/gary/dev/oauth.apisample.nodejs/src/plumbing/middleware/customHeaderMiddleware.ts:27:36)",
        "at Layer.handle [as handle_request] (/Users/gary/dev/oauth.apisample.nodejs/node_modules/express/lib/router/layer.js:95:5)",
        "at trim_prefix (/Users/gary/dev/oauth.apisample.nodejs/node_modules/express/lib/router/index.js:328:13)",
        "at /Users/gary/dev/oauth.apisample.nodejs/node_modules/express/lib/router/index.js:286:9",
        "at param (/Users/gary/dev/oauth.apisample.nodejs/node_modules/express/lib/router/index.js:365:14)",
        "at param (/Users/gary/dev/oauth.apisample.nodejs/node_modules/express/lib/router/index.js:376:14)",
        "at Function.process_params (/Users/gary/dev/oauth.apisample.nodejs/node_modules/express/lib/router/index.js:421:3)",
        "at next (/Users/gary/dev/oauth.apisample.nodejs/node_modules/express/lib/router/index.js:280:10)",
        "at ClaimsCachingAuthorizer.authorizeRequestAndGetClaims (/Users/gary/dev/oauth.apisample.nodejs/src/plumbing/security/baseAuthorizer.ts:62:13)"
      ]
    }
  }
}

Performance Instrumentation

In places the API code contains statements such as this, to measure the performance of a particular routine, which may also include time for an async await call:

public async getUserInfo(accessToken: string): Promise<UserInfoClaims> {

    return using(this._logEntry.createPerformanceBreakdown('userInfoLookup'), async () => {

        try {

            const response = await axios.request(options as AxiosRequestConfig);
            return ClaimsReader.userInfoClaims(response.data);

        } catch (e: any) {

            throw ErrorUtils.fromUserInfoError(e, this._configuration.userInfoEndpoint);
        }
    });
}

To see this output, change the logging configuration to use a zero performance threshold:

{
    "apiName": "SampleApi",
    "production": {
        "level": "info",
        "performanceThresholdMilliseconds": 0,
        ...
    }
}

The logging then contains performance instrumentation:

{
  "id": "baf31c4c-6bf3-5ba3-2863-169a088b4776",
  "utcTime": "2022-07-24T10:30:10.697Z",
  "apiName": "SampleApi",
  "operationName": "getCompanyList",
  "hostName": "MACSTATION.local",
  "method": "GET",
  "path": "/investments/companies",
  "clientApplicationName": "FinalSPA",
  "userId": "a6b404b1-98af-41a2-8e7f-e4061dc0bf86",
  "statusCode": 200,
  "millisecondsTaken": 383,
  "millisecondsThreshold": 0,
  "correlationId": "b4b1f41c-abcb-f99f-e8fd-0193ff7c2099",
  "sessionId": "77136323-ec8c-dce2-147a-bc52f34cb7cd",
  "performance": {
    "name": "total",
    "millisecondsTaken": 383,
    "children": [
      {
        "name": "validateToken",
        "millisecondsTaken": 84
      },
      {
        "name": "userInfoLookup",
        "millisecondsTaken": 292
      },
      {
        "name": "selectCompanyListData",
        "millisecondsTaken": 1
      }
    ]
  }
}

Each performance section also has a details field, which can be useful for storing additional information. For example, further code could be added to include sanitized SQL and parameters when there is a database error or SQL performance is beyond a threshold:

{ 
    "name": "selectCompanyTransactions",
    "detail": "select * from transactions where companyId=@p0; @p0=2"
    "millisecondsTaken": 2011
}

Arbitrary Data

The Info object can be used to handle other use cases. One option might be to temporarily log request input under particular error conditions. This might help to resolve a particularly tricky bug caused by input data, that can’t be reproduced in any other way.

Client Context

Whenever one of our Final UIs or an API Load Test makes API requests, the following three custom HTTP headers are also sent:

  • A Correlation ID for the exact request
  • A Session ID for all requests in the same session
  • A Client Application Name to easily identify the client

This client context helps to satisfy query use cases for log users, including the ability to quickly access only logs for your own Session ID:

If our API was to call upstream APIs it would include the above context fields, so that each API includes these identifiers in its own log entry.

Request Logging Implementation

An implementation needs to populate a LogEntry object stored in memory during the lifetime of the API request, then output its data when the request ends. This is trickier to code than when using a logger per class:

  • Identity details are best captured via an Authentication Filter
  • HTTP Request details are best captured via Logging Filter
  • Exception details are best captured via an Error Filter
  • Business logic classes may sometimes need to contribute to logs

The LogEntry is a natural request scoped object, and it needs to be injected into a number of other classes. This log’s Final APIs will implement this in Node.js, C# and Java, while ensuring that it works correctly when switching threads after async await calls:

Non REST API Operations

APIs often also implement non REST operations, such as receiving an event message from a message broker, or running a scheduled job. Each of these represents a unit of work, similar to a REST API call.
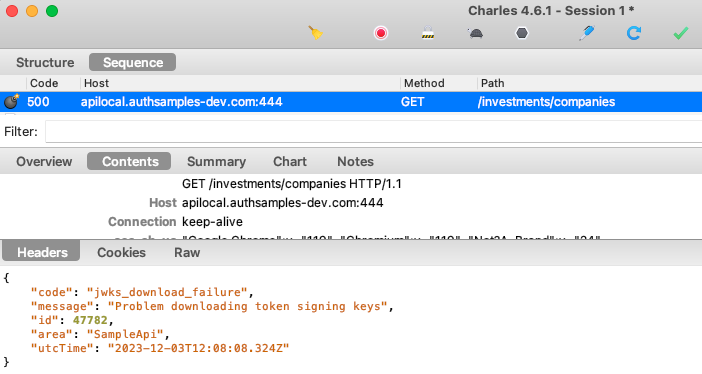
If a Billing API subscribes to an event called OrderCreated and creates an invoice, that unit of work could log to the same schema, with similar coding techniques. I would write the following type of log entry, as a logical REST operation rather that a physical one, but with an expressive result:

{
  "id": "c4939e2c-9f71-4f4b-bbca-dda287b48385",
  "utcTime": "2022-07-24T08:41:05.069Z",
  "apiName": "SampleApi",
  "operationName": "OrderCreated",
  "hostName": "MACSTATION.local",
  "method": "POST",
  "path": "/invoices/777",
  "resourceId": "777",
  "clientApplicationName": "MessageBroker",
  "userId": "a6b404b1-98af-41a2-8e7f-e4061dc0bf86",
  "statusCode": 200,
  "millisecondsTaken": 7,
  "millisecondsThreshold": 500,
  "correlationId": "3e4ac756-11c7-e60f-c564-ad4f203d5742",
  "sessionId": "a601559a-0c90-c899-8099-8a9f63a30be8"
}

Although there is no physical HTTP request, assigning failures a status code is a widely understood way to convey a high level result to people. Logging client and service parts of an error also remains a good practice, in case  an external recipient needs to be notified of failures.

Tracing Standardization

This blog’s API logging could be updated to output performance details as OpenTelemetry traces. The correlation ID in the log schema would then store the OpenTelemetry trace ID. Performance breakdowns would be recorded as spans in the standardized trace format.

Logs and traces are closely related, so should be queryable in the same observability system. The Elastic Stack provides this type of integration, though its ability to effectively slice and dice aggregated log data has by far the highest value.

Where Are We?

We have articulated how this blog’s logging would behave in a platform of APIs. Next we will describe this blog’s approach to handling errors and enabling fast problem resolution, both during and after development.

Next Steps

API Journey – Client Side

Background

Previously we took a look at some backend technical behaviours in API Journey – Server Side. Next we will take a look at the API journey for frontend applications, as implemented by this blog’s final code samples:

Configuration

OAuth clients typically start by loading their configuration, which provides details such as backend base URLs. For native apps this includes OAuth client settings:

{
    "app": {
        "apiBaseUrl": "https://api.authsamples.com/investments",
    },
    "oauth": {
        "authority":             "https://cognito-idp.eu-west-2.amazonaws.com/eu-west-2_qqJgVeuTn",
        "clientId":              "1h8pildfi6a4bmfv2alj3fs6va",
        "redirectUri":           "https://authsamples.com/apps/finaldesktopapp/postlogin.html",
        "privateSchemeName":     "x-mycompany-desktopapp",
        "scope":                 "openid profile https://api.authsamples.com/investments",
        "customLogoutEndpoint":  "https://login.authsamples.com/logout",
        "postLogoutRedirectUri": "https://authsamples.com/apps/finaldesktopapp/postlogout.html",
        "logoutCallbackPath":    "/logoutcallback"
    }
}

Views

In most modern frontend technology stacks, the UI usually starts with a main view or application shell:

const root = ReactDOM.createRoot(document.getElementById('root') as HTMLElement);
root.render (
    <StrictMode>
        <ErrorBoundary>
            <BrowserRouter basename={BasePath.get()}>
                <App {...props} />
            </BrowserRouter>
        </ErrorBoundary>
    </StrictMode>
);

The shell then lays out a tree of views, and some of them will call APIs when they load. This results in multiple API requests that execute or are in-flight concurrently:

<>
    <TitleView {...getTitleProps()} />
    <HeaderButtonsView {...getHeaderButtonProps()} />
    {model.error && <ErrorSummaryView {...getErrorProps()} />}
    {model.isLoaded &&
        <>
            <SessionView {...getSessionProps()} />
            <Routes>
                <Route path='/companies/:id' element={<TransactionsContainer {...getTransactionsProps()} />} />
                <Route path='/loggedout'     element={<LoginRequiredView {...getLoginRequiredProps()} />} />
                <Route path='/*'             element={<CompaniesContainer {...getCompaniesProps()} />} />
            </Routes>
        </>
    }
</>

This Blog’s Example Views

This blog’s final UIs are all pretend apps based on a theme of protecting money based data. The business area is one of investments, that are administered by some kind of manager. There are two users, where the first has business permissions to one region:

The second user has higher privileges, for multiple regions:

The API’s authorization filters resources using claims, so that the first user only sees American data. A transactions view also exists, where access is denied if the first user tries to change the browser URL to a non American resource:

The API uses the following user attributes and the UI aims to visualise the use of claims:

User Attribute Represents
Scope The main scope in the client’s access token is called ‘investments‘ to represent the app’s business area.
Manager ID The API receives its business user identity in access tokens sent by the client, though the UI does not use this value.
Role This is used for API authorization, and grants the admin role access to all regions shown in the UI. The role is stored in identity data and is issued to access tokens.
Regions This is used for API authorization, and only allows other users access to their region(s). It is meant to represent a finer grained business permission not issued to the access token.
Name The UI downloads data from the OAuth user info endpoint, then displays the given_name and family_name fields.
Title In the example, the user title is also stored outside the identity data. The UI displays this and the user’s regions in a tooltip. Both are downloaded from an API user info endpoint.

This use of claims is similar to that in any moderately complex real world system, where some user attributes will be stored in the identity data and others in the business data. The UI and API operate on both types of user attribute, in a way that is easy for a software company to extend.

Views, Models and Data Loading

For a React app, the code to load a view that calls APIs looks similar to this. The view asks its view model to fetch data from APIs. This is done in an async manner, to avoid blocking the UI thread. The view also binds to the model’s data, or renders an error when API requests fail unexpectedly:

export function CompaniesContainer(props: CompaniesContainerProps): JSX.Element {

    const model = props.viewModel;
    model.useState();

    useEffect(() => {
        startup();
        return () => cleanup();
    }, []);

    CurrentLocation.path = useLocation().pathname;

    async function startup(): Promise<void> {
        model.eventBus.on(EventNames.ReloadData, onReload);
        await loadData();
    }

    function cleanup(): void {
        model.eventBus.detach(EventNames.ReloadData, onReload);
    }

    async function loadData(options?: ViewLoadOptions): Promise<void> {
        await model.callApi(options);
    }

    return (
        <>
            ...
        </>
    );
}

The view model then calls a lower level fetch client to do the work of calling the API. It then updates its data, causing the view to re-render:

public async callApi(options?: ViewLoadOptions): Promise<void> {

    const fetchOptions = {
        cacheKey: FetchCacheKeys.Companies,
        forceReload: options?.forceReload || false,
        causeError: options?.causeError || false,
    };

    this._viewModelCoordinator.onMainViewModelLoading();
    this._updateError(null);
    this._updateCompanies([]);

    try {

        const result = await this._apiClient.getCompanyList(fetchOptions);
        if (result) {
            this._updateCompanies(result);
        }

    } catch (e: any) {

        this._updateError(ErrorFactory.fromException(e));
        this._updateCompanies([]);

    } finally {

        this._viewModelCoordinator.onMainViewModelLoaded(fetchOptions.cacheKey);
    }
}

View Recreation

In modern UI stacks such as React, Android Jetpack or Swift UI, views can be recreated many times, but view models and data should be created only once. To re-enforce this, React strict mode (in debug builds) immediately re-runs the view while the async code in the useEffect hook is executing.

This causes a duplicate API request, and the idea is to force developers to write efficient UIs, that avoid unnecessary APIs requests. This leads to a design of caching API responses in the front end, in a thread safe dictionary, with a URL based cache key:

export class FetchCache {
    private readonly _requests: Record<string, FetchCacheItem> = {};
}

This blog’s final UIs all follow this approach. The user is also given a reload option, which is broadcast to views using a publish subscribe mechanism, such as an in-memory event bus. The caching makes the views feel fast during forward or back navigation, and also lightens the load on APIs.

The Initial Login Redirect

During the initial API request, the views do not have an API message credential so cannot call APIs. This is managed by the fetch client throwing a ‘login required‘ error, which is stored in the fetch cache.

Multiple views could throw this error at the same time. Therefore a ViewModelCoordinator class is notified after each view has tried to load. Once all view models have executed, this object inspects the fetch cache and sends a single event when required, to trigger a login redirect.

Security Libraries

The OAuth work for the UI must then be performed, to trigger an OpenID Connect code flow. This is done by plugging in a third party library, or Backend for Frontend in the case of the SPA. By default, I aim to use a respected standards based library.

This blog’s final UIs  wrap use of libraries in an AuthenticatorImpl class. In the event of library limitations or problems it could be swapped out, without impacting the rest of the app. If required, the logic to implement a code flow and other lifecycle operations is fairly easy to code manually.

The Login Flow

The login flow looks different for web, desktop and mobile platforms. For a web client the entire browser window is redirected. This blog’s default authorization server is configured to use only basic password logins:

For mobile clients an integrated browser overlays the views, which wait on the response:

For a desktop client, the app renders a ‘login in progress‘ window, while the user signs in via a disconnected system browser:

After login, the previous frontend views retry API requests. Session cookies are written for the SPA, which are discarded when all browser windows are closed. For native apps, tokens are instead saved to operating system secure storage, to avoid a re-login on every application restart.

Applications Support any Authentication Method

Although password logins are used, use of a code flow means that all apps support any form of user authentication the authorization server supports.  Changing authentication should usually require zero code changes to applications, and the API identity in access tokens should stay the same.

Concurrent API Requests

Views send an API credential to get data, representing the access token. The final UIs send an API request to get the current main view’s data, as well as two small API requests to get user info for the upper right view:

The user can then navigate around views to trigger further API calls, if that view’s data has not been loaded yet. A forced reload of data is possible by clicking the reload button, which re-runs the 3 API requests concurrently.

Expiry Events

At some point the token used to call APIs will expire. This can be rehearsed by clicking Expire Access Token followed by Reload Data. Doing so triggers 3 API requests that fail with a 401 error. This is followed by a synchronized token refresh, after which the API requests are retried and succeed:

Any resilient client should support this behaviour, since there could be multiple reasons why an access token is rejected by APIs with a 401 error. This blog manages synchronized token refresh as follows:

public async synchronizedRefresh(): Promise<void> {
    await this._concurrencyHandler.execute(this._performTokenRefresh);
}

The concurrency handler queues up promises in a thread safe array, then only makes the actual refresh call for the first caller, then returns the same result to all callers:

public async execute(action: () => Promise<void>): Promise<void> {

    const promise = new Promise<void>((resolve, reject) => {

        const onSuccess = () => {
            resolve();
        };

        const onError = (error: any) => {
            reject(error);
        };

        this._callbacks.push([onSuccess, onError]);
    });

    const performAction = this._callbacks.length === 1;
    if (performAction) {

        try {

            await action();

            this._callbacks.forEach((c) => {
                c[0]();
            });

        } catch (e: any) {

            this._callbacks.forEach((c) => {
                c[1](e);
            });
        }

        this._callbacks = [];
    }

    return promise;
}

Eventually the UI’s refresh token will also expire. This can be simulated by clicking Expire Refresh Token followed by Reload Data. The token refresh request then returns an invalid_grant error code. The UI then triggers another login redirect, in the same way as the initial login redirect.

Deep Linking

All of this blog’s UIs support deep linking, to enable users to bookmark locations within the app. Some example deep linked URLs for each platform are shown here:

Client Type Deep Linking URL
SPA https://web.authsamples.com/spa/companies/2
Desktop x-mycompany-desktopapp:/companies/2
Android https://mobile.authsamples.com/basicmobileapp/deeplink/company/2
iOS https://mobile.authsamples.com/basicmobileapp/deeplink/company/2

These commands trigger views to run, which may then trigger API requests. These could fail if an access token needs refreshing, or the user needs to re-authenticate. In such cases this blog’s UIs return to the requested view once any OAuth work is complete.

UIs and APIs are Supportable

UIs and APIs will follow this blog’s Error Handling and Supportability Design. API requests, or OAuth operations that they trigger, could fail, in which case the view renders an error link. API 500 errors can be rehearsed by long pressing the Reload Data button for a few seconds:

Clicking a link invokes an Error Details Display that provides hints to technical support staff on the cause. For API exceptions an Error ID is shown, which references an entry in API logs, to enable details to be quickly looked up:

The API Session ID shown in the browser is nothing to do with OAuth, but could be used to enable a technical user of the SPA to query the API logs their session generates. See the Technical Support Analysis post for details.

Clients Handle Advanced Failures

OAuth clients can experience some advanced failure scenarios that are difficult to reason about, due to the three way relationship between the client, the  APIs it calls and the authorization server. The best way to deal with error events reliably is to rehearse them.

Failure Scenario Resilient Application Behaviour
Key Renewal Token signing keys, or cookie encryption keys used by SPAs, are sometimes renewed in an abrupt way. This blog’s clients manage this by receiving 401 response in API requests, after which token refresh fails with a session expired error. This causes a new login redirect and avoids user errors.
Redirect Loops This blog’s apps don’t trigger an authorization redirect when a 401 error is returned from APIs. Instead, redirects only occur when there is no access token yet or if token refresh fails with a session expired error. Doing so prevents the possibility of redirect loops.
Invalid Tokens OAuth configuration mistakes can cause clients to be issued invalid access tokens that are rejected by APIs, even though token refresh works. The client should then present an error, but clear token state. Once configuration is fixed, the user can trigger a new authorization redirect, after which the client receives corrected tokens.

Client Responsibilities are Separated

This blog’s final UIs are coded in multiple technologies. The code is largely identical regardless of  the programming language or platform, since all implementations have the same application behaviour:

In order to provide the behaviours articulated on this page, some plumbing code is needed. A folder structure is used that starts by classifying each class as either view related or plumbing related.

The goal in a real company would be to grow the views and view models. It should be possible to externalize some of the plumbing to one or more shared libraries, so that the frontend code is mostly business focused.

Developers Run a Productive Setup

All frontends can be developed in isolation, and pointed to remote API URLs. This includes deploying a remote backend for frontend to enable productive SPA development.

The development samples use SSL connections to backend components, with realistic domain names. This best enables deployment related thinking during development. I avoid URLs such as http://localhost:3000.

Where Are We?

This post has summarized a non-functional journey for API clients whose complexity is not caused by OAuth. The same intricacies would exist if any other security framework was used.

In this blog,  the difficult areas are dealt with as early as possible in the software pipeline, on a development computer. Doing so should improve quality and result in more predictable business delivery.

Next Steps